Author Archives: Kris Blevons

Holiday Inspiration – Arrangements, Flowers and Greens – Part 1

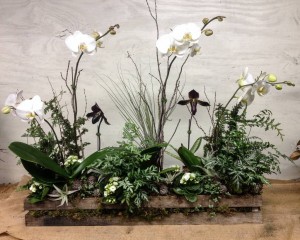
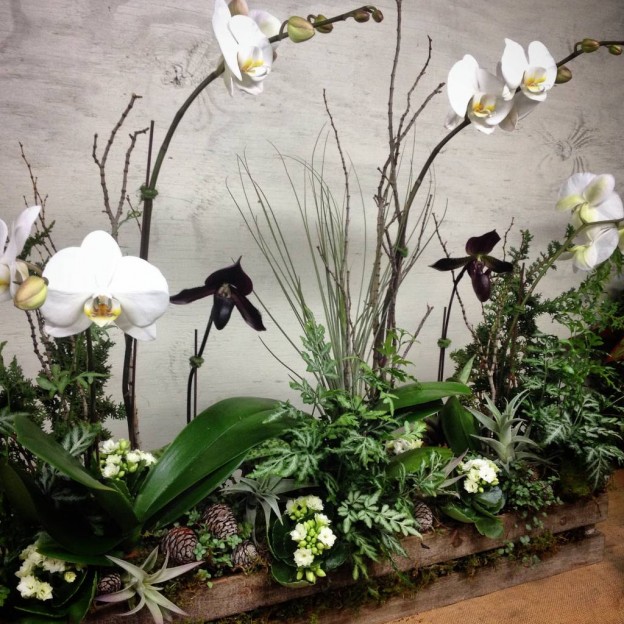
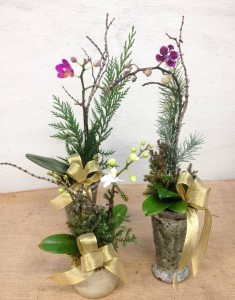
A trio of miniature orchids...

A trio of miniature orchids Jamie put together…

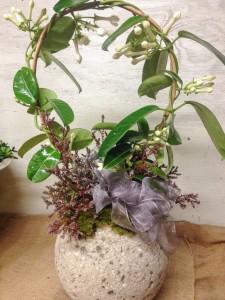
Stephanotis Wreath

Stephanotis Wreath

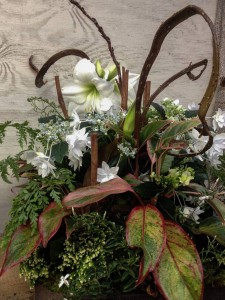
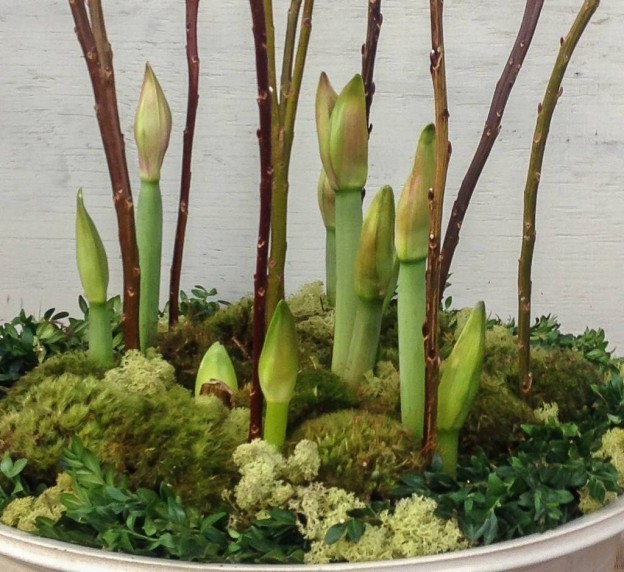
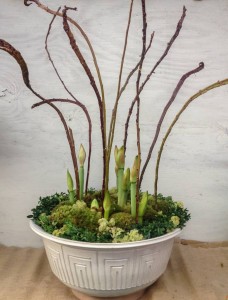
Amaryllis in a very large bowl...

Amaryllis in a very large bowl…


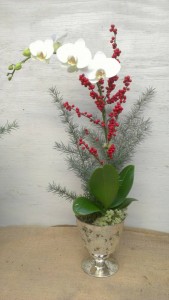
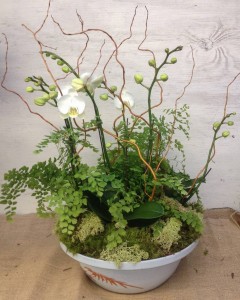
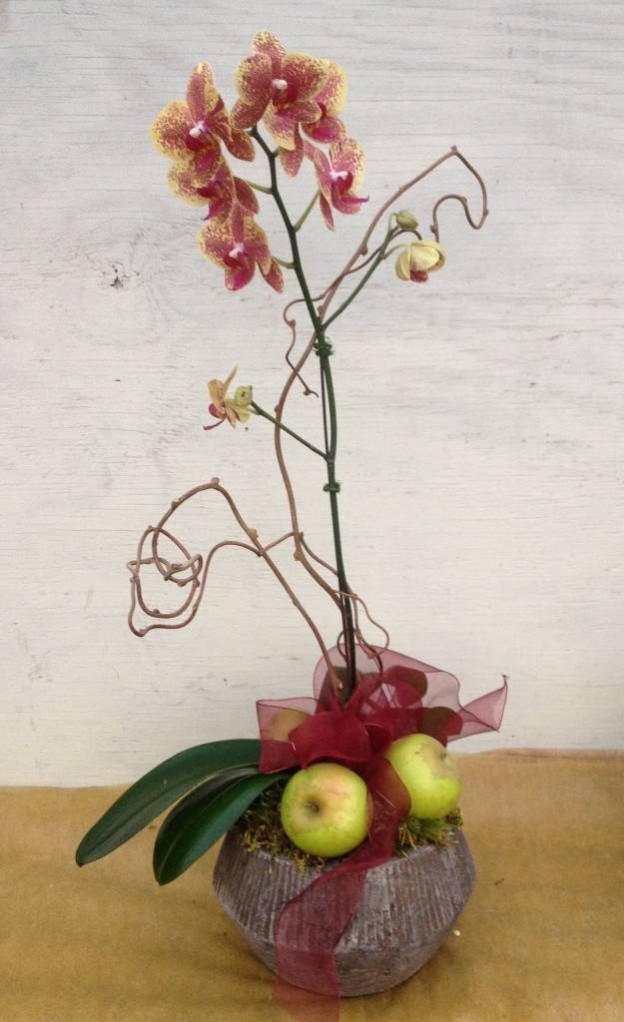
The last few weeks have flown by in a colorful blur of customers, Christmas trees, and deliveries of beautiful plants and flowers. Phalaenopsis Orchid Arrangement with Curly Willow


Holiday Arrangement

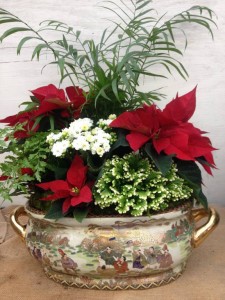
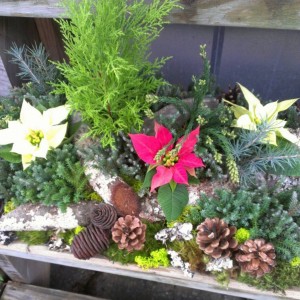
Miniature poinsettias, cut greens and a lemon cypress in a low tray Jamie designed…

Now Christmas is almost here, though soon enough a new year will be upon us, filled with possibility and fresh beginnings.


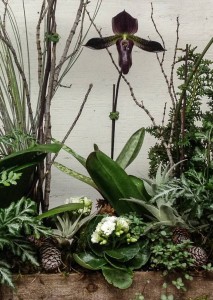
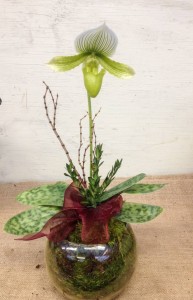
Lady Slipper Orchid


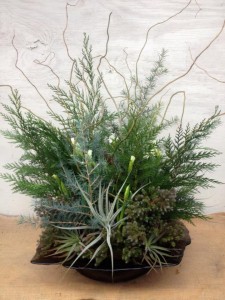
Holiday Arrangement with Paperwhites, Air Plants, Cut Greens and Curly Willow

Paperwhites, cut greens and curly willow…

To celebrate, here is the first post of a few of our arrangements of flowers and cut greens from the past few weeks, our gift to you this holiday season.

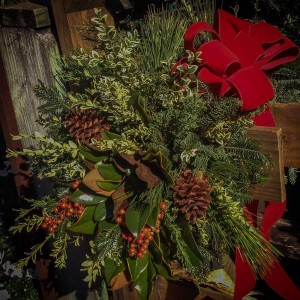
Holiday Greenery...

Pinkie’s cut greens and berries…

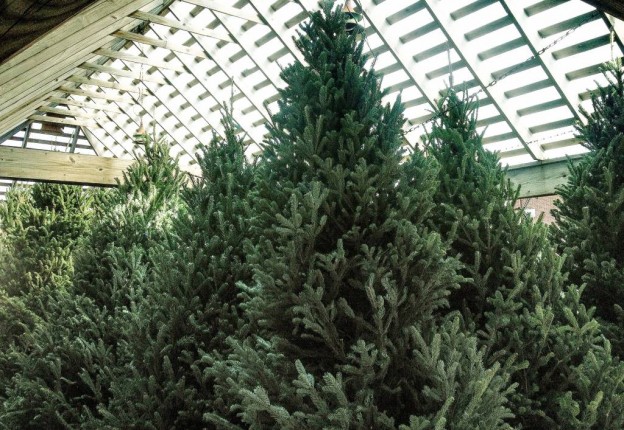
First, the Christmas Trees Arrive…

Sugar Pine Cones

Sugar Pinecones…

SignI know the holiday season is here when the greenery bunches, garlands and wreaths we’ve ordered begin to appear – not to mention fragrant Fraser fir Christmas trees. I was looking forward to two of the boxes in particular  this year – the ones the huge sugar pine cones were packed in, just 30 to a box because they’re so big.

Sugar PineCone

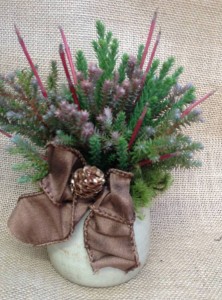
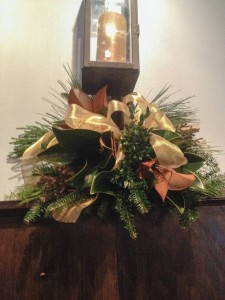
Ribbon and Greenery added to a Sugar Pinecone…

Take a look in any craft magazine or on Pinterest and you’ll find plenty of decorating being done with these Northwest beauties!  There hasn’t been much time for us to play with these big pinecones, but I was able to add a bit of ribbon and some greenery to a couple before it got too busy.  A beautiful collection of these impressive cones in a large basket,  with a bit of reindeer moss tucked between and curls of ribbon for more color, would be festive too.

There’s a definite progression of the holiday season that I’ve noticed over the many years in this business, and, for no other reason than I’ve observed this phenomenon, here it is:

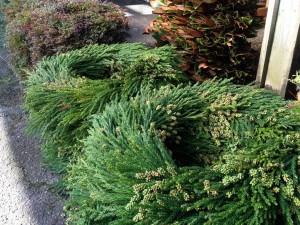
Alabama Cryptomeria Wreaths…

First the Christmas trees, outdoor garlands, and wreaths arrive, bringing the scent of the Carolina mountains to Birmingham. The trees are the stars of the show for a couple of weeks,  and the buzz of tree drills and saws fill the air.Holiday Greenery - Dyrons

Families arrive to find their perfect tree among the 700 that are  drilled for our tree stands and given a fresh cut before they’re moved out for sale. Bows for wreaths and other outdoor decorations are debated and chosen, and mailbox decorations are ordered.

Slowly but surely the outdoor decisions are made, trees are delivered, and festive decorations for inside and outdoors are complete.  Now the emphasis shifts to the  greenhouse, a magical place during Christmas, full of pretty flowering plants and more, and we begin the party season. Containers fill the back design area, waiting to be transformed into beautiful arrangements ready on just the right date. Finally, closest to Christmas, teacher’s gifts and gifts for family are arranged, to be picked up just before the end of school or prior to leaving town.

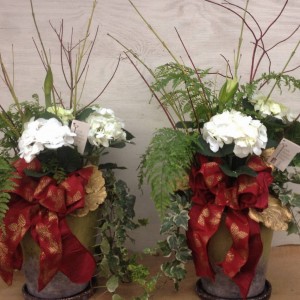
Orchids, Ferns, Ivy, Hydrangeas in Pretty Pots

Finished Arrangements…

The Grinch in the Tree

Our Grinch…

In fact, this year we had to make more room for finished pieces in front of the design area. Our new area has worked out well, since now it’s easier for everyone to see many of the finished centerpieces, pots, and special orders, and it gives people ideas for their own gifts or containers.

There’s another new addition this year too. Tacca, our garden shop cat, is experiencing her first holiday season and is she enjoying it! She’s taken to sitting in our Christmas display, right in the line of sight of all the children, who come in to pet her while they look at Santa and his elves. This year Molly created our wonderful grinch too.

Hydrangeas & Amaryllis...Gifts

More Arrangements…

While Fraser fir scents fill  the outside nursery, the greenhouse is truly a feast for the senses too,  filled with colorful flowers and lights.


Here you’ll  find orchids, amaryllis, jasmine, stephonotis, hydrangeas, rieger begonias and more, including the usual poinsettias.  There’s really nothing like a true greenhouse, devoted almost entirely to plants of the season.  Box stores with their fluorescent lights and a few holiday plants simply can’t compare. I hope you’ll come visit and see why.


The End Of The Season…Fall Arrangements

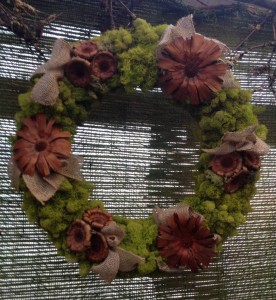
A reindeer moss wreath, with burlap and pods...

A reindeer moss wreath, with burlap and pods…

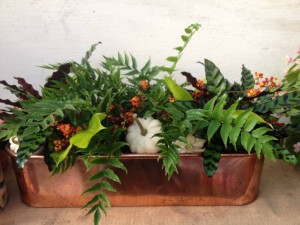
A copper planter for a table. Jamie's colorful fall design of chartreuse, orange and white...

A copper planter for a table. Jamie’s colorful fall design of chartreuse, orange and white…

Autumn  passes far too quickly. As usual, when a season is nearing the end, I find myself wishing I’d made the time to take more pictures of the many arrangements that we’ve created the past few weeks. Jamie, Molly, and I looked through those we had and here are a few of them – a simple goodbye to the autumn season for another year as we set our sights ahead to the holidays.

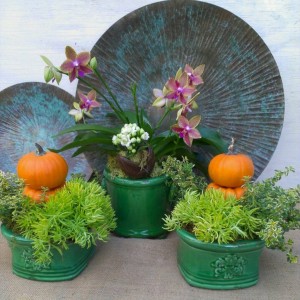
A vignette Jamie created with an orchid, sedum, tiny pumpkins and more...

A vignette Jamie created with an orchid, sedum, tiny pumpkins and more…

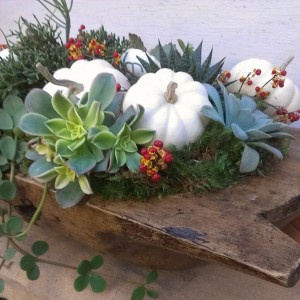
Pinkie used little white pumpkins, succulents, and bittersweet in a dough bowl...

Pinkie used little white pumpkins, succulents, and bittersweet in this dough bowl…


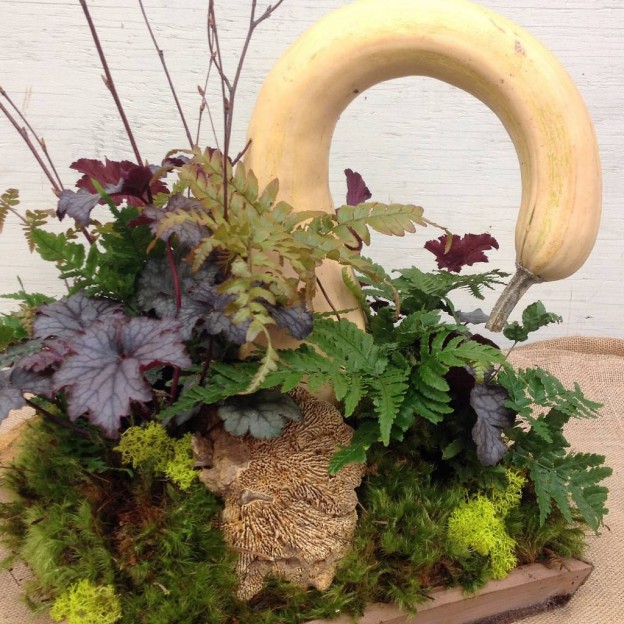
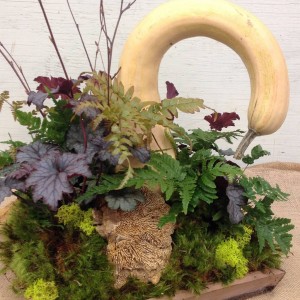
This simple tray became home to a gourd, mushrooms and moss, with Heuchera and autumn Fern adding more rich color...

My simple tray became home to a gourd, mushrooms and moss, with Heuchera and Autumn Fern adding more rich color…

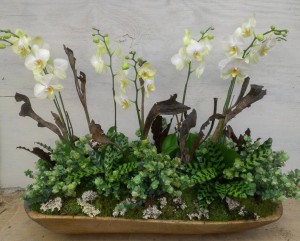
A dough bowl Jamie designed...

A dough bowl Jamie designed…


Fall is a favorite time, as the materials we work with are so interesting and organic. There’s none of the shiny, glittery, in-your-face glitz that will be here, oh, so soon enough, with the approach of Christmas. No, this time of year is quieter, as we embrace the down-to-earth beauty of mushrooms, soft green moss, natural branches, dark wiry angelvine, pods of all kinds, and interesting gourds. I enjoy the combinations that result, melded at times with the muted tones of burlap and raffia.

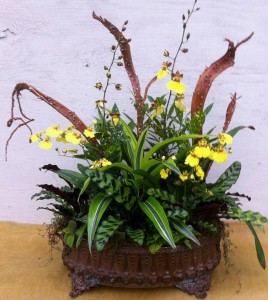
Molly's spirited fall arrangement with bright yellow Oncidium orchids...

Molly’s spirited fall arrangement with bright yellow Oncidium orchids…

I really enjoyed creating this "woodsy" piece...

I really enjoyed creating this “woodsy” piece…


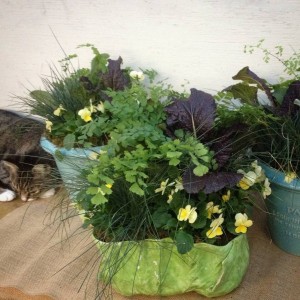
Fall flowers in pretty pots for a fall luncheon...

For a fall luncheon..

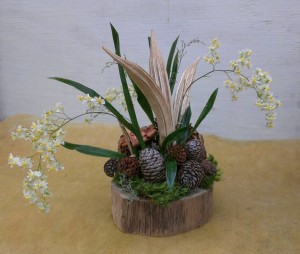
Oncidium Orchid 'Twinkle' Arrangement With Okra Pods and Pinecones

Oncidium ‘Twinkle’ in a sweet combination of Jamie’s. Okra pods and pinecones add even more texture…

My simple lady slipper orchid arrangement, watched over by pretty Tacca, our garden shop kitty…


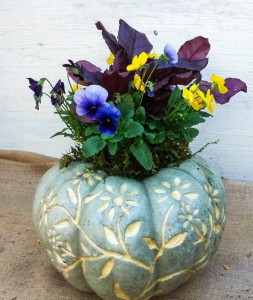
Dená carved this pretty blue pumpkin, and daughter, Molly, planted it...

Dená carved this pretty blue pumpkin and daughter, Molly, planted it…

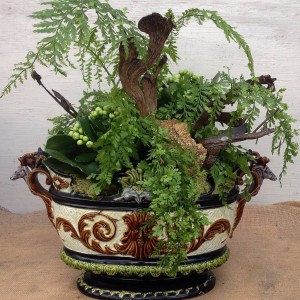
We see such interesting pieces in the fall too. Earthy dough bowls, dark metal planters and copper containers, low wooden trays just perfect for mossy vignettes, a majolica bowl the right size and shape for a woodsy arrangement. Soon enough we’ll be making quite different sorts of combinations through the holidays, with quite different materials. For now though, I’m content to enjoy these last few days of fall.

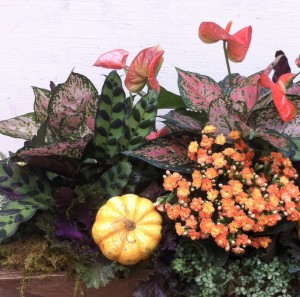
A colorful fall piece Molly created using houseplants and mini pumpkins...

A final fall piece Molly created using houseplants and mini pumpkins…


Succulent Wreaths For The Holidays

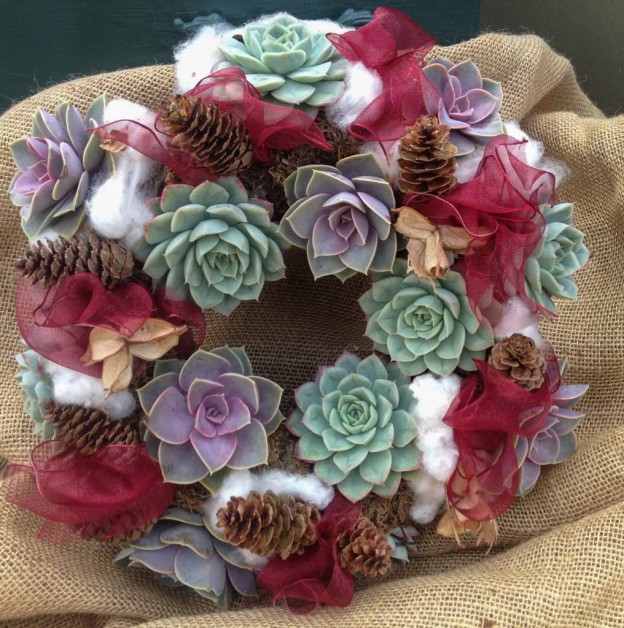
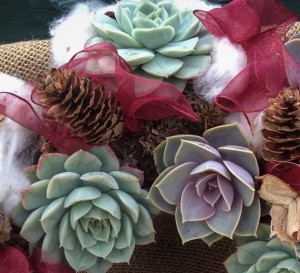
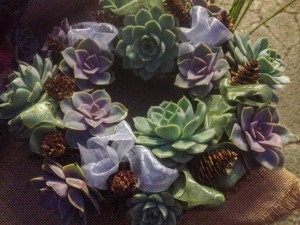
Succulent wreaths might not be what one thinks of first as a component of holiday decorating, but these pretty echeveria wreaths just might change your mind. The best thing about these wreaths is that there is room for the little echeverias to grow, and this also makes them easier to take care of through the winter months.

Echeveria WreathsThe wreaths are just about 10″ in diameter and can just as easily be laid flat on a table and made part of a holiday tablescape as hung. Though they’re beautiful just as they are, adding other elements is easy to do. The one shown here was “dressed up” with small loops of a pretty, sheer ribbon, tiny pine cones, and small tufts of real cotton.

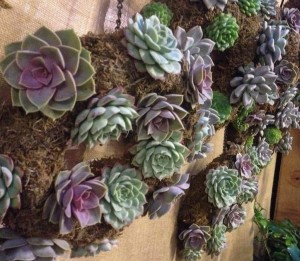
The echeverias in these wreaths have been planted in a sphagnum moss wreath form and will continue to grow with the proper care. Give them as much direct light as possible, and, when the wreaths feel very light when lifted, it’s time to water. Place them in a shallow pan filled with a few inches of water and leave them in it for at least 30 minutes or until the form feels heavy, indicating it’s saturated.  Do not water again until it feels very light once more. Remember, succulents prefer to be on the dry side.

Loops of ribbon and tiny pinecones embellish this echeveria wreath...

Loops of ribbon and tiny pinecones embellish this echeveria wreath…

These sweet wreaths are in limited supply, so, if you’re interested in trying one, now is the time to stop in and take a look. On their own or “dressed up”, what a lovely, unexpected,  and long lasting addition to your holiday decor!

Decorate Your Mailbox & Door For Christmas – Here Are A Few Tips!

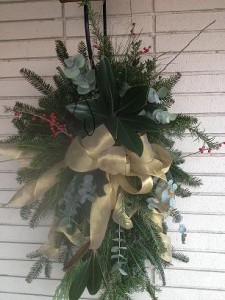
Christmas - Door SwagI have to confess, where I grew up, mailboxes were at the houses, either as a mail slot in the door or physically attached to the outside of the home, and only folks in the country had mailboxes on a post at the street. Now this was actually a very good thing since it saved having to walk outside each day to get the mail,  especially on extra cold or very snowy days.  Of course, there was always a wreath, and garland with bows,  and evergreen bunches in frozen pots.

But, since moving to Birmingham, I’ve grown to enjoy having a more southern twist to decorating, using a swag on the front door with all sorts of beautiful greens and berries,  putting up garland with bows on the porch rail, and, yes, decorating the mailbox. In fact, that’s one of the things I enjoy most.

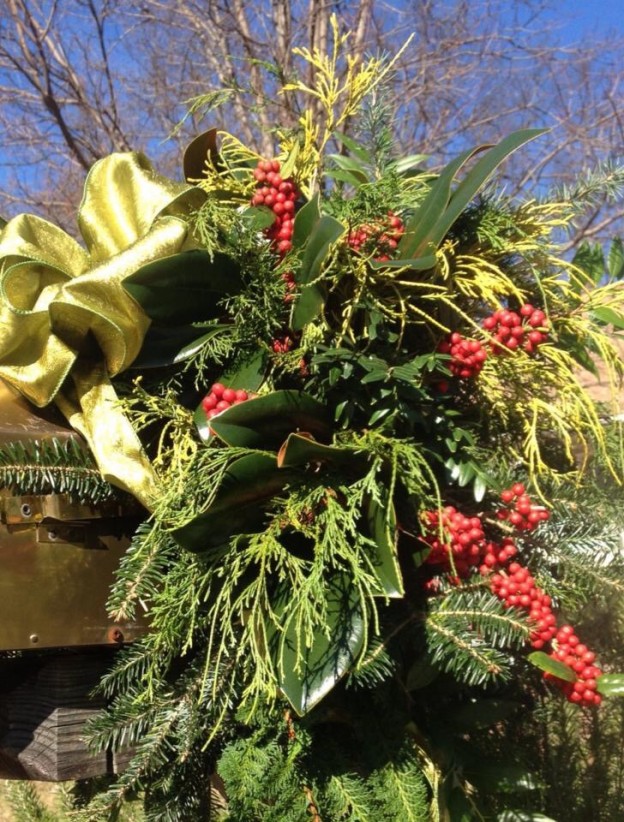
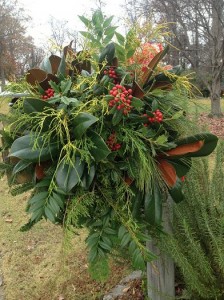
My mailbox decoration...

My mailbox decoration…

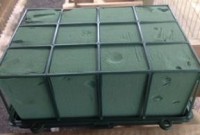
one oasis cage...

one oasis cage…

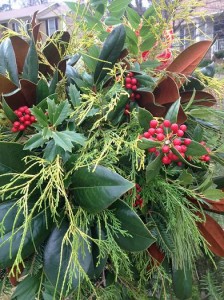
If you’d like to try your hand with your own mailbox decoration or door swag, using oasis in a cage will make the project easy, and, of course, the oasis will keep the cut material you use as fresh as it can be. Scout out your yard. Are there shrubs with berries that you can use? If you buy a real Christmas tree, save any branches that are trimmed off the bottom – they are wonderful as the starting point of a pretty decoration. I like to use magnolia, boxwood, juniper, chamaecyparis , pine, cedar, and a shrub often used in the shade, leucothoe, which is particularly long lasting when cut.Christmas - Closeup Kris' Mailbox Decoration

If  your options are limited in  your own yard, we also have bunches of greenery available through the season for you to decorate with.  From berries to greens and pinecones too, there will be enough here for you to play with! I warn you though, once you start putting your decoration together, it will be hard to stop!

Begin by soaking your oasis piece(s)  for at least an hour so the foam absorbs all the water. It will feel heavy. If you’re working on your mailbox, take a look at it.  Would you like to see your decoration attached to the post? Or perhaps you’d like to put it on top. For either of these two options, simply take florist wire through the oasis cage and around the mailbox or post. If you have a mailbox with the nameplate across the top, it’s quite easy to wire two oasis forms together, creating a “saddle” to hang on the mailbox.

Now you’re ready to begin inserting your greenery and having some fun!  Whether I’m  doing a door swag or a mailbox decoration, I like to have all my different greens, berries and pinecones laid out so I can see all my options. If there was one thing I could tell you at this point, it’s to not be afraid. If you cut a stem and it’s too long, don’t sweat it, just recut it shorter. By the same token, if you feel the stem you’ve cut is too short, set it aside; it will probably work just right in a different spot. Remember, this should be a fun project, not a test! Try to cut stems that aren’t too “fat” since those larger than an inch in diameter tend to take up a lot of room in the oasis and can tear it up, especially if you aren’t happy with your placement and pull it out to reposition it too many times. Smaller stems are better.

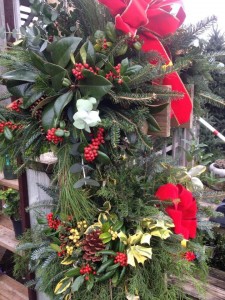
Mailbox decorations on display at Oak Street Garden Shop...

Mailbox decorations on display at Oak Street Garden Shop…

This isn’t going to be a do it by pictures post. I think that limits your creativity. So, I’m not going to tell you what exactly goes with what. If you like it, that’s what counts! You might choose to do your entire mailbox with magnolia because you have a big magnolia in your yard, or you may just want a small boxwood piece with ribbon. To emphasize, again – there is no wrong way to do this. Simply gather the greenery you like, and go from there. I think some of you who are unsure will be happily surprised at your creations. Have fun!

If do-it-yourself isn’t for you, we make mailbox decorations and more throughout the season.  Give us a call or stop in to place an order!


A Guide…Plants Used In The “Better Late Than Never Garden” A Butterfly, Bee, And Hummingbird Haven

View From the street...Hyacinth Bean Vine on the Arbor

View From the street…Hyacinth Bean Vine on the Arbor

So many folks have stopped me, asking for a plant list of flowers in the “Better Late Than Never” garden, that I decided it was high time I posted this for those of you who’d like to have something similar next year.  Obviously our garden is sited in full, daylong sun, so plants were chosen with this in mind. You’ll need to provide at least 4-6 hours of sun, with regular watering and deadheading, to maintain your flower garden next year  too.
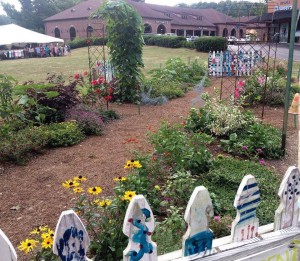
Indian Summer rudbeckia - "Better Late Than Never" garden

Rudbeckia ‘Indian Summer’ foreground. On arbor, moonvine and red mandevilla…

Any good garden begins with good soil, and, with previous vegetable garden plantings, ours had been amended with soil conditioner, compost and added topsoil. This past season we also added bags of PlantTone as well, raking it in lightly. No tilling was done since that tends to turn up weed seeds, and, once they hit the light, they all sprout, turning the garden into a weedy mess!
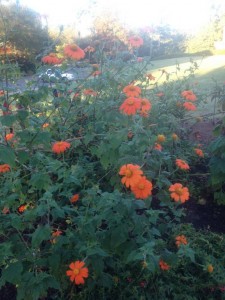
The tithonia came on strong, late summer...

The tithonia came on strong, late summer…


In a previous post I mentioned how late the garden was planted (not until the end of June!), so it was incredibly hot when the sunflowers and zinnias were planted by seed.  This is actually very good, since they need very warm soil to germinate and grow happily and consistent watering as well. I know many of you thought we were a little crazy to be planting in the incredible summer heat, though. (This is a good time to remind all of you to wear a hat if you’re out in the heat and sun and be sure to provide water for yourself too!)  Here’s a post highlighting how much the garden had grown by late summer. So many of you talk about how it seemed to explode overnight. Actually, it was steadily growing each day!

Here, then, is the plant list for a flower garden to attract bees, butterflies and hummingbirds in Birmingham, Alabama, and surrounding areas with tips on planting and maintenance:
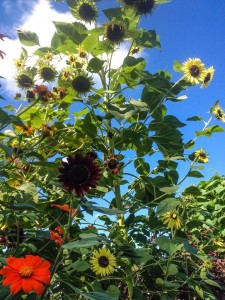
 

The sunflowers, planted from seed, towered over the garden...

The sunflowers, planted from seed, towered over the garden…

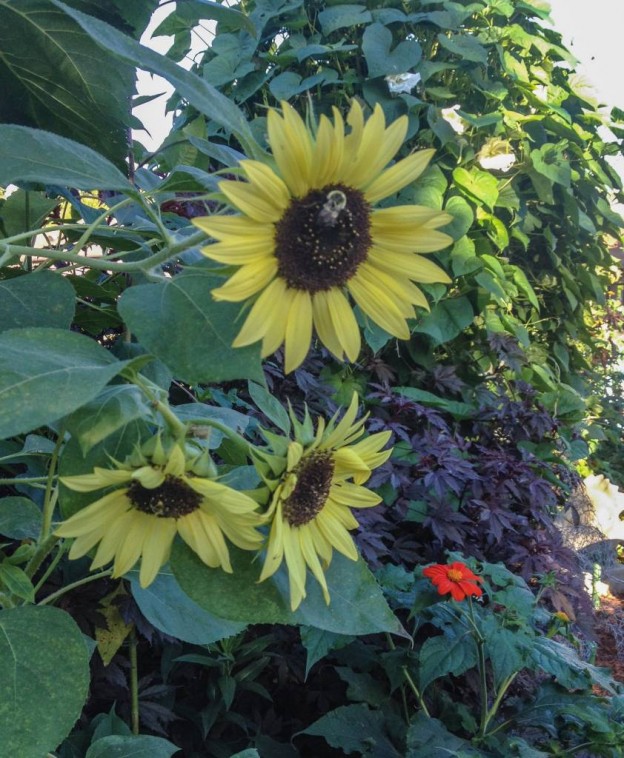
Sunflowers – We raided our Botanical Interests seed rack and planted a mix of sunflowers from Lemon Queen, mixed packs, and solid reds and yellows directly into the ground, then waited, impatiently, checking them every day – and watering each day – until they sprouted. Watching them grow and seeing folks taking pictures made all the effort worthwhile for these towering beauties.
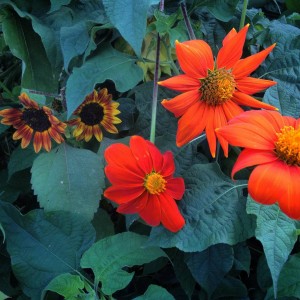
Tithonia...

Tithonia…


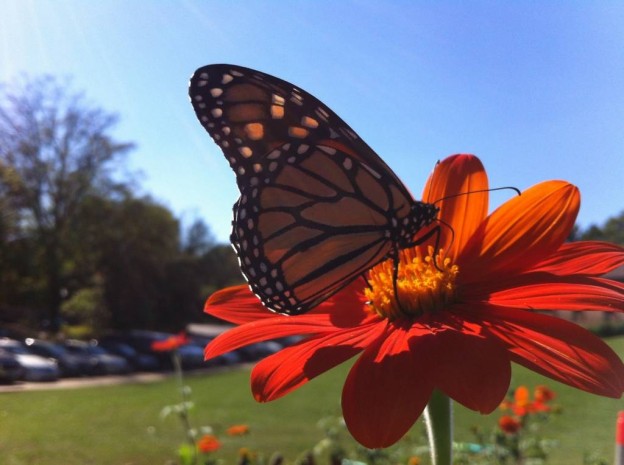
Tithonia, Mexican Sunflower ‘Torch’  – These also were planted from seed at the same time as the sunflowers. At first the sunflowers eclipsed them, but, by the very end of summer after the sunflowers had played out, the Tithonia took over, and everyone was asking about it. It boasts never-ending orange flowers that attract yellow sulphur, skipper, painted lady, and, finally, at the end of the season, monarch butterflies. A must for any sunny flower garden. I kept it deadheaded and staked but left some to lean and sprawl since the stems got quite large.

Tall cutting zinnias – The zinnias were also planted at the same time as the sunflowers and Tithonia. Again, we used Botanical Interests seed leftovers on the seed rack – all mixes of tall varieties. We also had a few green ‘Envy’ zinnia plants in cell packs left over from spring. These I cut back by half and planted in the front two beds while we waited for the zinnia seeds to come up. As seedlings came up I pinched them back to promote branching, and they  were kept deadheaded to promote more blooms so everyone could enjoy the flower display.
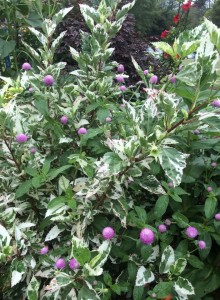
 

Variegated hibiscus with the tall pink gomphrena growing through it...

Variegated hibiscus with the tall pink gomphrena growing through it…

Hibiscus – There were two hibiscus varieties planted in the garden. Unlike fancy big-blooming hibiscus you may be more familiar with, these were planted for their foliage appeal, with blooms being secondary. The first is an ornamental red leaf hibiscus, and one of these was planted on each side of the back arbor. By the middle of October, they had each grown to enormous proportions, adding another depth of color to the garden, growing up through the tithonia and moonvine.
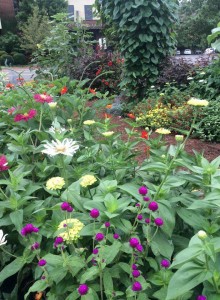
Zinnias and gomphrena...moonvine and red leaf hibiscus...

Zinnias and gomphrena…moonvine and red leaf hibiscus…

I kept them clipped periodically to keep them in check and in proportion to the rest of the surrounding plants. The second was a variegated ornamental hibiscus. One of these was planted on each side of the front arbor and had pink gomphrena and tall cutting zinnias growing through it. They were not as vigorous as the red leaf but still added another leaf variation in the garden.

Gomphrena – A plant I wouldn’t be without in the flower garden. It never looks like much in a pot, but in the garden its globe-like flowers add a completely different silhouette among all the daisy-like blooms. And it is tough! We planted transplants of tall purple, red, and pink gomphrena and also added a short variety in all four beds. Here’s another post that features gomphrena.
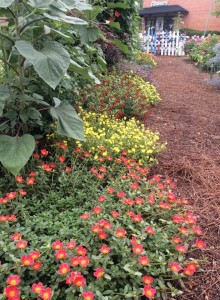
Purslane, red bat face Cuphea and purple gomphrena edge the beds...

Purslane, red bat face Cuphea and purple gomphrena edge the beds…

Purslane – This low-growing, succulent-like annual is an amazing bee magnet. We had literally hundreds of honeybees each morning on the bright yellow, orange, and red blooming plants. They are best planted along the edge of hot, sunny beds. The flowers close late in the day, but that’s hardly noticeable if you provide other flowers to look at! Be sure to take a look at the video of the honeybees on our YouTube page.
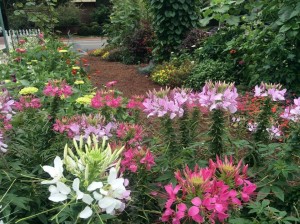
Cleome - Spider Flower...

Cleome – Spider Flower…


Cleome (Spider Flower) – We had a flat of scraggly looking cleome left over from spring that needed a home…and what a home it got! I cut them back by half so they would branch and be fuller, and were they ever! Don’t hesitate to cut back stems of these flowers through the summer. When you see numerous seed pods hanging down the length of the bloom, it’s time to cut them back. Don’t worry; they’ll continue to bloom and will probably reseed next year for you. Old fashioned flowers, they attract butterflies and bees too.
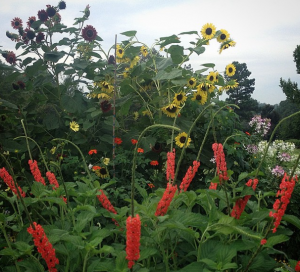
Porterweed and Sunflowers...

Porterweed and Sunflowers…

Porterweed – An interesting plant that sends out long bloom spikes with blossoms the hummingbirds and sulphur butterflies adore. I would plant it again for that reason alone! I was also impressed that it never seemed to be bothered by insect pests.

Cuphea llavea, Red bat face cuphea  – You may not have noticed this plant right away, but the hummingbirds sure did! Planted along the front of the sunflowers and under the tithonia, it added a shot of red along the ground. Extremely tough and virtually carefree, it flourished with less than optimal sun, as it eventually  was shaded out by the towering sunflowers. Even so, it was one of the last things removed at the end of October.

Cuphea ignea, cigar plant – Another planted for the hummingbirds. This one sports orangey tubular flowers on a rangy plant that I put right in the middle of the zinnias. This post tells you more about this unusual plant.
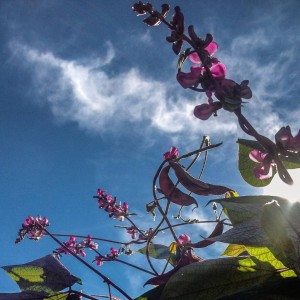
Hyacinth bean vine, sillouhetted against a blue sky...

Hyacinth bean vine, sillouhetted against a blue sky…

Hyacinth Bean Vine – We started the hyacinth bean vine from seed, planting them all along one side of the front arbor, then waited and waited for it to come up. It finally did, but the leaves were being chewed to pieces and it didn’t look happy at all. Since the garden is pesticide free, the offending leaves were removed and it was given liberal doses of Annie Haven’s Authentic Brand Manure Tea. Gradually it grew stronger, whatever was chewing it moved on, and buds began to form. By September everyone was asking what the beautiful purple flowering vine was.
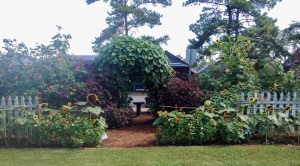
The back side - Moonvine on the arbor with the red leaf hibiscus on either side...

The back side – Moonvine on the arbor with the red leaf hibiscus on either side…


Moon Vine – The moonvine was planted on the back arbor and was the last one we had in stock from spring (They’re easily grown from seed too.). For the longest time, it seemed to be all leaves until buds began to form late in the summer.  Just about the time it threatened to engulf the arbor and everything around it, the fragrant nighttime blooms began to open each evening and were still open each morning.
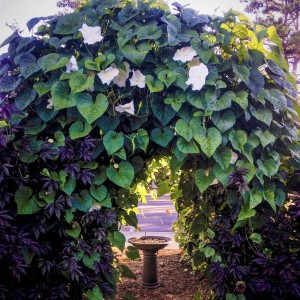
Late summer - the moonvine and red leaf hibiscus have grown together...

Late summer – the moonvine and red leaf hibiscus have grown together…

Mandevilla Vine – A red mandevilla was planted on one arbor on the other side of the moonvine, and a pink mandevilla was planted on the arbor on the other side of the hyacinth bean vine.  The pink mandevilla was still growing strong at the end of October. The red mandevilla was swallowed up by the moonvine! Both are heat-loving vines and quite beautiful and carefree.

Cuphea hyssopifolia, Mexican heather – Yes, yet another Cuphea and one for the  bees.  This one is a mounding annual that’s just right for filling in spots toward the front of a flower bed. Bees love it, and it’s virtually maintenance free.

Otomeria – A plant I’ve never grown before this summer but that was very impressive in the garden! There were only two, and you may not have noticed them. They love our heat and hopefully will be available for you to try next summer. The two in the garden were planted in August and bloomed until the end of October, when they were finally pulled out. They offered clean white blooms on sturdy mounding plants.
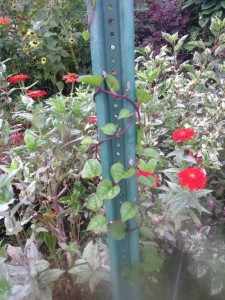
Malabar spinach vine

Malabar spinach vine

Malabar Spinach – Not spinach at all, but an edible and heat loving vine with pretty purple flowers. Like the otomeria, this was another fun plant to try that was also new to me. It did extremely well, planted late, growing up each arbor and up the very ugly 2 hour parking sign. If you’d like to learn more about this fascinating plant, click HERE.
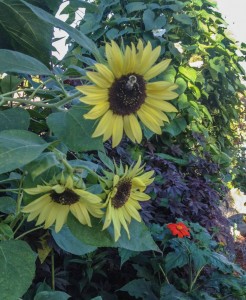
One of the many sunflowers in the garden...

One of the many sunflowers in the garden…


Rudbeckia ‘Indian Summer‘ – A sturdy annual Black-eyed Susan with large blooms, I’m going to leave these in the ground in hope that they’ll come back next year. We shall see!

Lantana – A couple of lantana were placed at the back of the sunflowers where they’d get the most sun. They were planted quite late (August) so didn’t have much time to develop. I’m going to leave them in those spots to see if they’ll return next year. They might if the winter is mild enough.
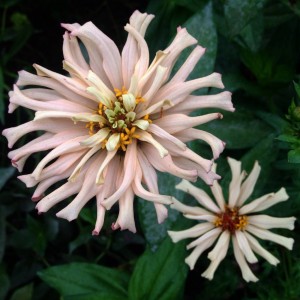
Cactus zinnia...

Cactus zinnia…

And the rest….

Assorted tip cuttings of succulents were placed at the front corner by the sign and began to really take hold by the end of the summer.  A rosemary plant was left in from the previous garden and a perennial Cardoon was placed on the end of one bed for its spiny, silvery foliage. A few dwarf purple ruellia, Mexican petunia,  were added by the back rose arbor. Finally, a couple of shade-loving torenia were planted under the sunflowers (They were just right to see from a child’s perspective!).

Dwarfed by the sunflowers...

Dwarfed by the sunflowers…

So, there’s your plant list if you’d like to have a similar summer garden next year. Please don’t feel tied to just these plants, though.  So much of the  joy of gardening involves trying new things and discovering how they work in your landscape. Meanwhile, for now, our winter garden is being planted gradually and offers an entirely different set of possibilities, again some from seed, others from transplants. I hope you enjoy the view!

By Kris Blevons
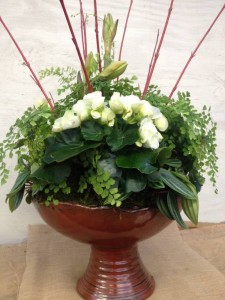


Try Some Compost Tea This Year – Haven Brand Authentic Tea Is Easy To Use!

imagePlants are like people; they need food to grow…and nutritious food for best health.  I would take that one step further and say that, not only should you feed the plant, you need to add organic amendments and nutrients to create healthy soil that your plants will  thrive in.

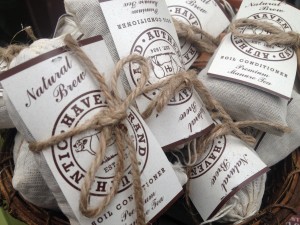
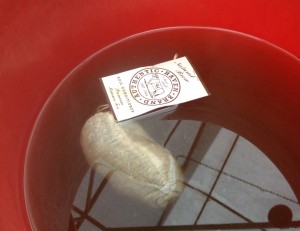
My friend Annie Haven of Authentic Haven Brand Natural Brew created her product  with this principle in mind.  On her ranch in California (It’s been in her family since the 1800’s!), the cattle are free ranging and graze in native grass pastures, free of antibiotics, hormone-added grain, and pesticides. The manure that is produced is dehydrated, then packaged, and the tea bags are shipped out and ready for you to steep. What you make can either be used as a soil drench for roses and other plants or as a foliar spray.

Little "tea" bags, ready to brew!

Little “tea” bags, ready to brew!

At Oak Street Garden Shop we’ve carried Annie Haven’s Moo Poo Tea since last spring.  The most popular has been the Soil Conditioner Premium Manure Tea, labeled for houseplants, container plants, the vegetable garden, shade plants,  shrubs and lawns. Both are in sturdy, sewn-together “tea bags”,  ready to brew. I’ve used it at the shop and in my own garden.

They couldn’t be any easier to use; just drop each bag in a 1 gallon, or up to a 5 gallon container, fill with tap water, cover and allow to steep for one to three days.  Then use it to water any plants that need a good, rich organic boost.

steeping...

steeping…

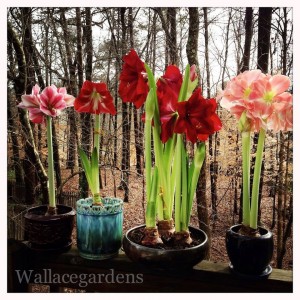
One of my friends in Atlanta, Nancy Wallace, of Wallace Gardens, uses Annie Haven’s tea each year on her amaryllis bulbs and reports that her blooms are easily one third larger than they were on the same size bulbs before she started using this tea. She  soaks them in it prior to planting, then waters them  with it until they bloom. I’ve seen pictures of her amaryllis, and they are truly impressive.

Wallace Gardens beautiful amaryllis..

Wallace Gardens beautiful amaryllis..

Another way she uses it is as a “Super Brew”, placing 4-6 bags in a jug to make a very concentrated mixture. Then, using a hose end sprayer, she foliar sprays all of her plants with it. Summer foliar feeding like this also seems to deter bugs!

For a quick tea, if there’s none at hand, put a bag in a bucket and fill it up with water. Let it sit for 5 minutes, then begin squeezing the bag over and over; you’ll see the tea releasing into the water. Continue doing this 20-30 times and you’ve got yourself a fast made tea.

When you’re finished with the tea bags, cut them open with a pair of scissors and add the contents to your container gardens…it’s all useable!

Pricing for individual tea bags is $4.95 or you can purchase 3 for $12.95.


New Fall Shipments Have Arrived – Pretty Pots For The Holidays or Any Time

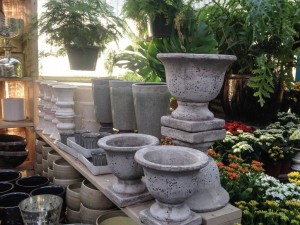
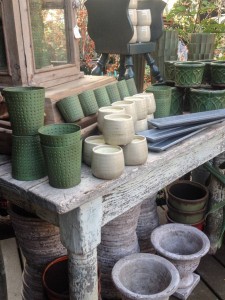
We see endless possibilities for these pretty pots...

We see endless possibilities for these pretty pots…

Small urns…

Pots - fall 2014

Pretty pots and cachepots...

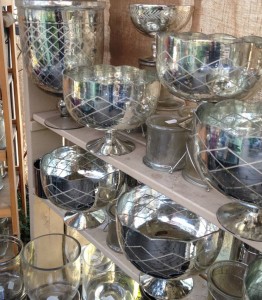
Mercury glass and cachepots…

How beautiful would these be as part of a holiday centerpiece?

How beautiful would these be as part of a holiday centerpiece?

Perfect for the holidays...

Perfect for the holidays…

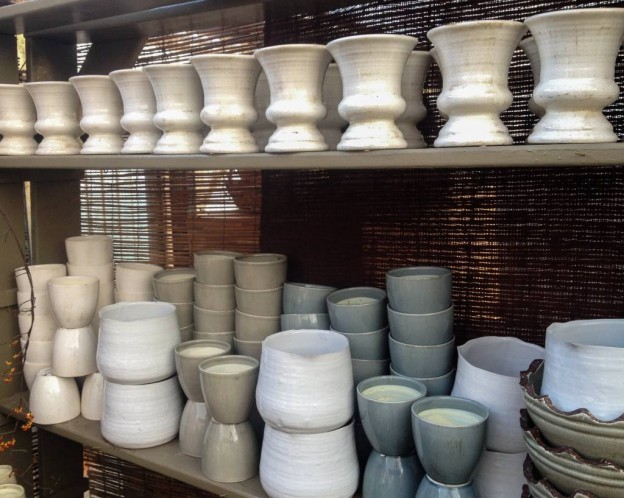
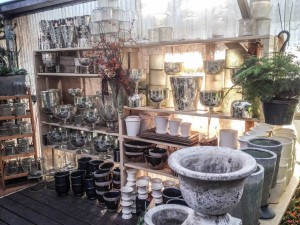
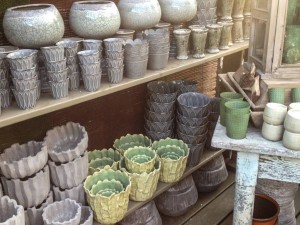
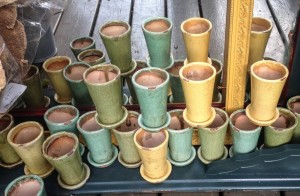
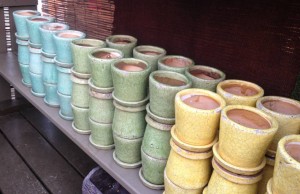
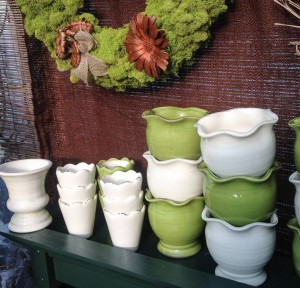
October is a favorite month of ours for many reasons. The garden is changing over from summer flowers to the pretty pansies and more that will shine next spring, and all of the beautiful gourds and pumpkins make their appearance.  In the greenhouse, we know it’s October because we begin to get boxes upon boxes of fall and holiday inventory that Jamie found at market. She, Molly, Pinkie and Angie have been busy unpacking, pricing, moving, and displaying all the pretty new items – perfect to put holiday flowers in for arrangements and holiday center pieces. Let’s take a look…

The shelves are full!

The shelves are full!


Just the right size…

Pots - Fall 2014

Green and white always appeals...

Green and white always appeals…

Miniature Conifers – Just Right For Miniature Gardening and More

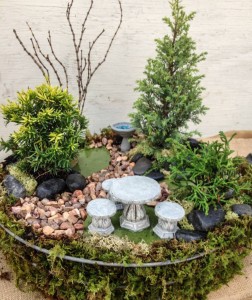
It has been quite some time since we’ve had dwarf shrubs and tiny pots of conifers available, and, with the rise in popularity of miniature and container gardening, I decided it was time to see what might be worth getting in for fall miniature gardening projects. Truthfully, these aren’t just for that purpose but can also be used in containers, and all of them are suitable for the garden too.Miniature Garden with Dwarf Evergreens

With this in mind I placed the order with a very reputable grower in the Northwest. And, even though they’re from quite a distance both in miles and climate, I’m hoping these selections will work here as well. I worked with the salesperson to find the best possible plants for the Southeast, and these cultivars are interesting and not too expensive if you’d like to give some a try.

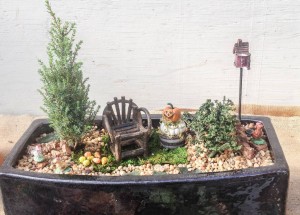
The day finally came when they arrived, and each one was unpacked and watered, then placed in flats and set into the nursery. I found time the other day to put together a couple of miniature gardens as examples of what can be done with these diminutive offerings. The small evergreens really add a sense of reality to a miniature landscape.

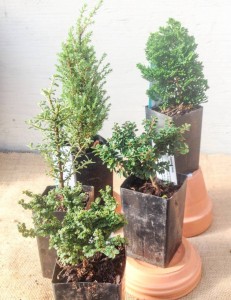
Miniature conifers. Front-Back L-R: Ulmus parviflora 'Hokkaido';Cotoneaster microphyllus 'Thymifolius'; Ilex cremate 'JerseyJewel'; Juniperus communis 'Miniature'; Chamaecyparis obtusa 'Thowell'Here also are pictures of a couple of groupings I pulled together to give you an idea of what is available as of October, 2014. In the first picture, left-right and front-back, they’re as follows:

Ulmus parviflora ‘Hokkaido’: This tiny dwarf Chinese or lacebark elm should only grow 1″-2″ a year. It’s much sought after for bonsai, trough, and miniature gardens, and its bark exfoliates with age. It may grow to just 1′ tall over a period of 5 years.

Cotoneaster microphyllus ‘Thymifolius’: Thyme leaf cotoneaster. This tiny version has red berries just like its larger relative, and it’s branches can be trained upright to form “trees” in a miniature garden.

Ilex crenata  ‘Jersey Jewel’:  A holly with unique structural form, this one is also good for rock gardens.

Juniperus communis ‘Miniature’: A slow-growing ( 2″-4″ a year) bluish-green juniper with a narrow growth habit. Also good for rock gardens in part shade. Mature height is 3′  and 1′ wide.

Chamaecyparis obtusa ‘Thoweii’: A narrow upright specimen, it will grow roughly 3″-6″ a year. It matures into a fairly narrow tree. Errant branches can be pruned to maintain the spire-like shape.

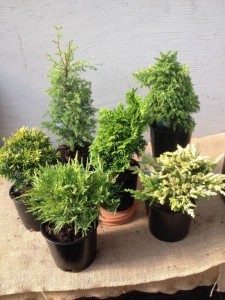
Miniature conifers. Front-Back L-R; Juniperus pfitzeriana 'Golden Joy'; Juniperus horizontalis'GoldStrike'; Taxus cuspidata' 'NanaAurescens'; Chmaecyparis obtusa 'Nana Lutea'; Juniperus communist 'Gold Cone'; Cryptomeria japonica 'Twinkle Toes'Interesting choices, right? Here’s another grouping, again L-R and front-back:

Juniperus x pfitzeriana ‘Golden Joy’: This juniper has a spreading habit and will get larger, increasing in size by 3″-6″ a year. Still, an interesting choice for a container until it outgrows it; then find a place for it in the landscape.

Juniperus horizontalis ‘Gold Strike’: Vivid yellow foliage on this spreading juniper makes quite a statement in a container. This one will need protection from our hot summer sun; give it some shade, especially in the afternoon. It’s a slow-growing, spreading dwarf juniper with a mature height of roughly 6″ and ultimate width 6″ in 10 years.

Taxus cuspidata ‘Nana Aurescens’: The new growth of this dwarf spreading (3′-4′) selection of Japanese yew is golden, hence the name ‘Aurescens’. Growth rate is estimated at 3″-6″ a year and ultimate height is 2′. Best grown in part shade, where foliage color will be a bit more chartreuse. Please be sure you have really good drainage if you try to grow this yew since it won’t tolerate wet, poorly drained soil.

Left: Juniperis communis 'Miniature' Right: Ulmus parviflora 'Hokkaido'

Left: Juniperis communis ‘Miniature’ Right: Ulmus parviflora ‘Hokkaido’

Chamaecyparis obtusa ‘Nana Lutea’: New growth on this golden dwarf Hinoki  cypress  is a vibrant yellow, and the growth rate is 3″-5″ a year. It’s a beautiful specimen for containers or the small garden, rarely growing larger than 3′, with an upright, irregular, pyramidal habit.

Juniperus communis ‘Gold Cone’: Eventually this juniper will reach a height of 3′-5′ but has a narrow growth habit of only 1′-2′.

Cryptomeria japonica ‘Twinkle Toes’: A selection with very tight, congested foliage, it has a conical shape and irregular habit. An interesting specimen at its mature height of 2′-3′.

I don’t know about you but more than a few of these are now on my “want to grow” list, whether it’s in a miniature garden,  a pretty pot, or placed in a special spot in the landscape. Best of all, the pots are really small, so there’s no major hole digging to do!

We will have these in stock until they sell out; so, if you’re interested, come in and take a look soon. If you miss out on this selection, next spring will be your next chance!

Watching the Butterfly Migration… And Transitioning the Summer Garden to Fall

Tithonia - Mexican sunflowerThe other day I slipped across the street to check the ‘Better Late Than Never’ garden – ostensibly to check new transplants for water. Really, though, I wanted to see if the butterflies were still there. Now, not just any butterflies (Though I admit I’m partial to them all.) but the imperiled monarch butterflies, who, I was told, are coming through now on their migratory paths. And they were still there, sailing through and landing on the Tithonia rotundifolia ‘Torch’,  (Mexican sunflower) feeding on the bright orange blooms. I’m doubly glad now that I left it standing while it was still in full color. I’ve been planting the winter garden under cover of its thickened stems, fully weighted down with its nectar filled flowers.

Monarch butterfly on tithoniaWhether these monarchs spotted the tithonia as they were coming through, or were a result of the butterfly weed  Asclepias tuberosa, is anyone’s guess. Butterfly weed and milkweed are the plants that monarch butterflies lay their eggs on – the caterpillars then eat the foliage, form their chrysalis and hatch to become the beautiful butterflies I was watching soar through the garden.Monarch butterflies on tithonia

I called out to a mother and her young son about to get into their car.  “Do you see the butterflies? They’re monarchs!” Oh my goodness!”, she answered. “Look at all of them!” Her little boy stood, transfixed, watching them maneuver gracefully through the garden. I told him how special these butterflies are, and that since they’re on a long journey to Mexico, it’s very important that they find the flower nectar to give them strength and energy so they’ll be able to fly such a great distance.

Butterflies like these cosmos, zinnias and marigolds

Butterflies like these cosmos, zinnias and marigolds

Over the next few days more people stopped to marvel at the butterflies, oohing and ahhing at the sight. It’s been such a pleasure to share this experience as fall moves toward winter. Soon the tithonia will have to be pulled up. Until all the butterflies are gone though, I think I’ll leave well enough alone…

If you want a butterfly friendly garden too, provide sources of food, (They love zinnias, cosmos, marigolds, and  tithonia, to name a few.) and  plants they can lay their eggs on. (And that you will allow to get chewed up by the caterpillars!) These include  the asclepias mentioned above for monarchs. Parsley, dill and fennel are commonly planted for swallowtails.

Provide pesticide free plantings, and cultivate a tolerance for the less than perfect garden. Learn to live with leaves that have been munched – more often than not, the culprits causing the problems are simply moving through your garden on their way somewhere else! Simple things like grooming plants by removing yellowed and chewed leaves, and practicing good garden sanitation by keeping fallen leaves and other plant debris out of the garden, will go a long way toward creating a healthy environment for your garden, you, and the creatures that inhabit its space. 

By Kris Blevons


Fall Container Planting…(There’s More Than Just Pansies Out There!)

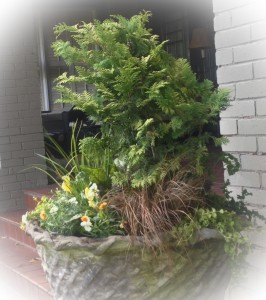
Fall Planter With Chamaecyparis 'Crippsii'The temperatures are hopefully trending downward, and you’re thinking about redoing your summer plantings. There seem to be so many choices; it’s normal to feel overwhelmed at the garden shop, even though you probably thought you had it all figured out before you left home!

I’ve seen the slightly dazed look  on folks’ faces as they peruse the tables upon tables of pansies, violas, snapdragons, various herbs and ornamental greens. Invariably they turn to us with a bewildered look and say, “I have (insert number of pots here) and need to fill them. Can you help me?!”

Assuming you have at least a half days worth of sun for flowers, the usual pansies and violas will work just fine all on their own if you really don’t want to do a whole lot of thinking; but there’s so much more out there to play with! From the simplest addition of beautiful green curly parsley (It adds such great color and texture to a planting.) to a more complex mix of greens, grasses and herbs, there’s no limit to fun combinations.

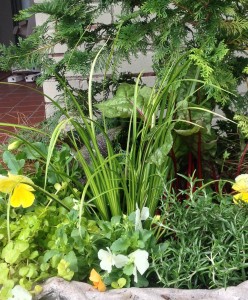
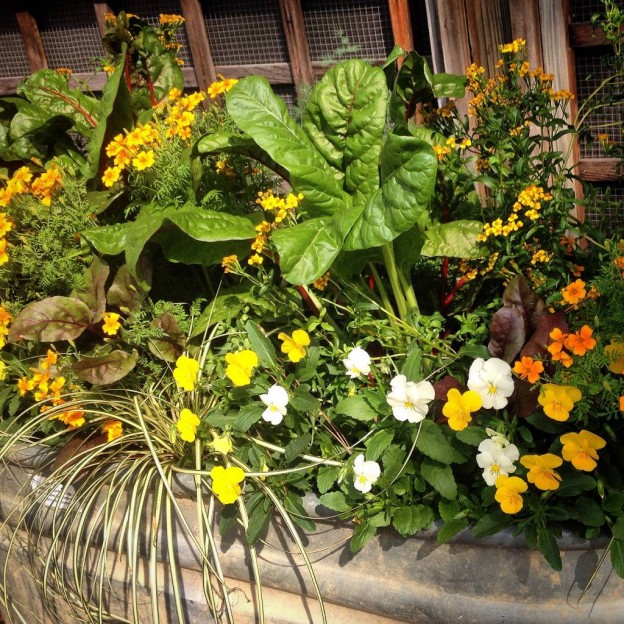
Close up - fall planterThe large planter here is one of a pair, used at the top of stairs leading onto a wide open porch. I took my color cues from the red brick and cream color of the house in choosing my plants, using predominantly yellow with the evergreen Chamaecyparis ‘Crippsii’, yellow variegated  Acorus ‘Ogon’, golden creeping Jenny to trail, and Matrix ‘Lemon’ pansies. To this I added ornamental red mustard, and a chard with red stems called ‘Charlotte’. These will add big, bold leaves, beautiful foliage color, and added height.

Next, more flowers  with a trailing white pansy called Cool Wave White,  a few orange violas and a trailing rosemary  –  the brown grass trailing off to one side and tucked in the back as well is Carex ‘Toffee’. When the sun shines on this grass it glows!

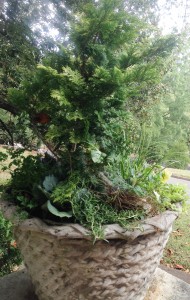
Fall Planter - Cham 'Crippsii''These planters are quite large and can support this variety of plants. In smaller planters, a smaller shrub, some curly parsley, pansies and a trailing plant might be sufficient. Remember, more is always better in planters and windowboxes to give them a lush overflowing feel.These planters will make a definite statement as they grow out.

  • Tips For Maintaining Your Fall/Winter Planters:
  • – As always, keep faded blooms deadheaded.

– Don’t overwater.  As the weather cools in the fall and winter, it’s best to let planters go a bit drier.

– If plants like ornamental cabbage and parsley do get dry between watering, you’ll have some yellow leaves. Groom these and other plants regularly, removing any yellowing leaves that you see. Remember, they’re not going to turn green again!

– Watch the weather and be prepared to cover your planters if freezing temperatures are forecast. Prior to covering, water them thoroughly. Uncover them as soon as the temperatures are above freezing.

Some Interesting Choices To Use With Pansies And Violas In  Winter Planters:

  • Chamaecyparis obtusa – various selections;  they make excellent evergreen accents.
  • Cupressus ‘Carolina Sapphire’ – beautiful blue evergreen, good in the landscape also.
  • Rosemary – large evergreen herb, upright or trailing varieties.
  • Juniper – ‘Blue Point’
  • Thuja – ‘Golden Globe’ arborvitae, nice, rounded form.
  • Heuchera & Heucherella selections – evergreen perennials, interesting as a foliage element – airy blooms in spring.
  • Acorus – adds another texture to plantings; grasslike variegated leaves add color as well.
  • Ornamental Kale – ‘Redbor’ and ‘Winterbor’ are two very upright growing forms of kale,  but there are many others. ‘Red Russian’ and ‘Lacinato’ are also edible. In a normal to mild winter they’ll last til spring. As heat returns, they’ll “bolt”, or bloom, adding yellow flowers.
  • Ornamental Mustard – These add a bold leaf and a darker color to compositions.
  • Chard – another beautiful and edible addition to containers or garden beds.
  • Curly Parsley – Adds texture in winter plantings; also a beautiful shade of deep, clean green.
  • Golden Creeping Jenny – A useful trailing element, it may get knocked back in a freeze but adds color until then and will come back as temperatures moderate.
  • Muehlenbeckia, Angel Vine – tough as nails trailer. Will lose it’s leaves in a freeze but normally reappears in the spring. Protect it and it will be green through the winter in Birmingham.
  • Sweet Alyssum – not available for long in fall, but a nice addition to planters until it succumbs to freezing temperatures.
  • Poppies – available through the fall; worth trying if you haven’t. They hunker down through the winter but will fill out in the spring, adding their bright, papery blooms to liven any planting. Take care to not overwater under cool winter conditions.


Fall Favorites For Spring Flowers…A Primer On Pansies & Violas

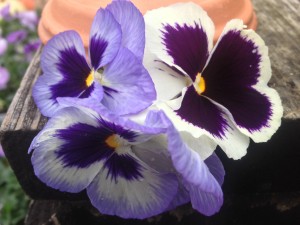
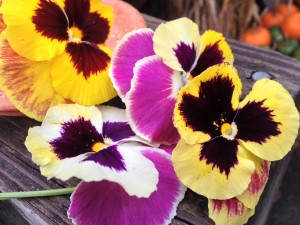
Pansy Matrix Ocean Breeze MIx

Pansy Matrix Ocean Breeze MIx

Pansy Matrix Sunrise

Pansy Matrix Sunrise

Fall is planting time here in Birmingham, and pansies and violas are the stars of the show. Even if folks plant nothing else, it’s so easy to put a few of these spring beauties in a little spot in the garden, a pot, or a window box for the winter.

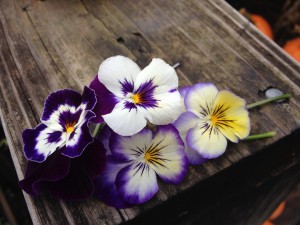
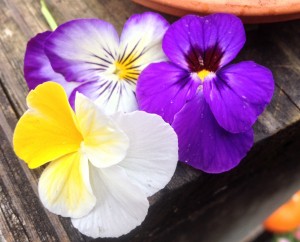
Panola Purple Face & Viola Sorbet Blueberry Cream

Panola Purple Face & Viola Sorbet Blueberry Cream

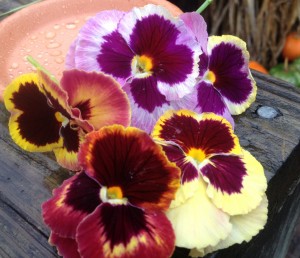
Pansy Dynamite Scarlet/Viola Sorbet Antique Shades/Viola Penny White

Pansy Dynamite Scarlet/Viola Sorbet Antique Shades/Viola Penny White

Pansy Majestic Giants Patricia

Pansy Majestic Giants Patricia

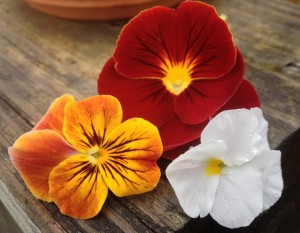
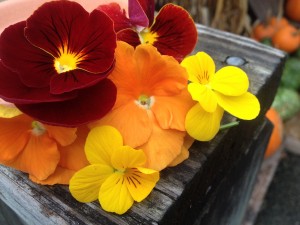
Pansy Dynamite Scarlet/Pansy Matrix Orange/Viola Sorbet Yellow

Pansy Dynamite Scarlet/Pansy Matrix Orange/Viola Sorbet Yellow

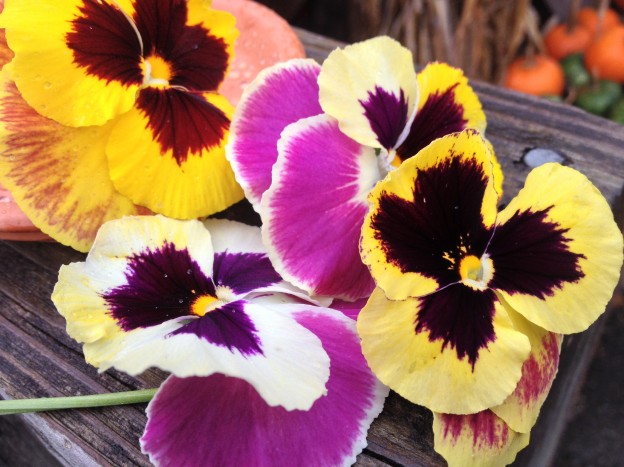
Oh but what a dizzying selection greets you at the garden shop! Tables upon tables of blooms…some diminutive, others large, some with solid colors, others with charming “faces”, all waiting for you to decide which of them to choose to add beauty to your landscape next spring – and even some color through the winter.

One rainy Saturday morning I put together a few sample combinations of pansies, violas, and mixtures of the two to show you a few options available for your planting pleasure…but keep in mind this is just the tip of the iceburg when it comes to playing with color in your garden!

Remember to think about what else will be blooming in your garden come spring.  You may not want a pink pansy in front of your orange azaleas (Though I’ve been known to favor pink and orange in certain instances!), so think it through before you decide.

Another consideration to keep in mind is the color of your house.  My first summer in our home I decided I wanted an “English Garden” look out front, using pinks/purples and silvers.

I was so caught up in my vision that I forgot this color palette would look like blech in front of the brick – I was unhappy with it all summer and couldn’t wait to tear it all out come fall.

Now I use brighter colors and include poppies –  it looks so much better!  I save the more muted colors for the back of my house where I play with my “English Garden” and plant everything  I want to – including foxglove and snapdragons for spring interspersed with pansies and violas.

Viola Sorbet Purple Duet/Blue Blotch/Banana Cream

Viola Sorbet Purple Duet/Blue Blotch/Banana Cream


The difference between a pansy and a viola is primarily size and shade tolerance. The pansy bloom and plant is larger. Pansies need at least half a day of sun to bloom well; full sun all day is best, but remember, in the spring as the temperatures rise, they’ll play out faster in so much sun.

Violas are smaller in size and the blooms are smaller as well. However, violas put out massive amounts of small blooms and the plants attain a nice rounded size which makes up for those diminutive  flowers. Violas can tolerate less sun, though, as with the pansies, at least half a day sun is best.

As for most plants, fertilizing is important.  Plant Tone is a good natural (and stinky!) amendment to add to beds in the fall.  Incorporate  it with a first feeding of Osmocote, which will release its nutrients until the soil gets cold.

Mid-winter apply  calcium nitrate to add extra nitrogen. After planting, always water your plants in and apply a good layer of mulch to keep roots warm through cold spells.While plants are blooming be sure to deadhead, (pinch off faded blooms) to keep more buds coming. If you leave old blooms on to die then set seed, this creates a messy looking plant that’s putting all its energy into that seed, not into future blooms.


This is especially important to remember come spring. Don’t be overly concerned if plants aren’t blooming in the middle of winter. This is normal – especially if we have cool, frosty  nights. Remember, the real reward comes in the spring!

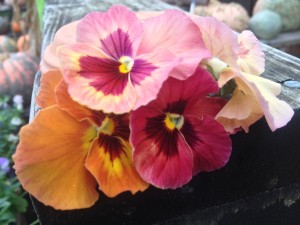
Pansy Mariposa Peach Shades

Pansy Mariposa Peach Shades

Be mindful of winter temperatures – this is the time to watch the weather reports each morning or evening. Pansies are tough plants, but help them out by making sure soil in beds or planters is moist if there are freezing temperatures forecast.

Hopefully  these suggestions and tips will be helpful for any of you that get overwhelmed by the choices available…happy planting!


Poppies! Plant Some This Fall!

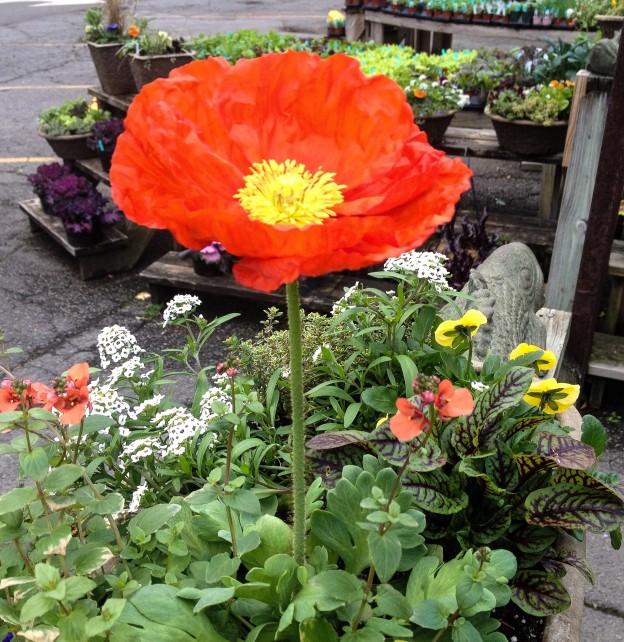
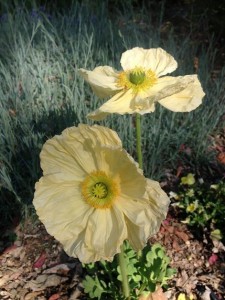
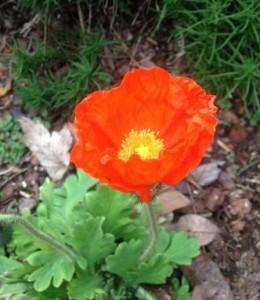
I love poppies. Specifically, papaver nudicaule, or Iceland poppies, bright harbingers of spring in the Birmingham area.

IMG_2767Best planted in the garden in a sunny spot that won’t stay too wet, they’ll grow through the winter getting bigger and bigger. The first fat bud uncurling signals spring isn’t far off, and once they begin to bloom they continue, until, finally, they fade in the true heat of late spring.

Most people are skeptical when I go on about poppies – until they try them. (I admit I’ve had to work hard to talk some of you into planting them, they look so scrawny and pitiful in their little cell packs or 4″ pots.)

Poppy Care:

Plant them in a sunny, well drained spot.

When you remove them from their pots, disturb the root ball as little as possible. I know, this is contrary to what you’ve always heard about planting. But, trust me on this, poppies don’t like their roots messed with.

Don’t plant too deeply. Water them in after planting, then allow them to dry out between watering. Do not overwater!

When they begin to bloom, deadhead, or cut off faded blooms. This will ensure the energy of the plant will go toward producing more bright flowers, not a poppy seed pod.

IMG_1658Cut some to bring inside! Here are some tips for cutting your poppy blooms:

Wear gloves. Poppies secrete a liquid that can irritate the skin.

Cut stems early in the morning when the most moisture is in the stem. The best stage to cut your poppy is when the bud is just beginning to stand up straight and is slightly colored.

– Cut the stem with a sharp pair of scissors so the stem doesn’t flatten or get squished.

Sear the cut end of the stem with a match or dip it in boiling water to seal it. This will keep the moisture in the stem and help the flowers last as long as possible.

– Place your stems in cold water before moving them to their place of honor in your home or as a bright gift for a friend!

Poppies…one more in a long line of beautiful flowers for the spring garden. Don’t miss out this year – find a sunny spot and plant a few!

By Kris Blevons
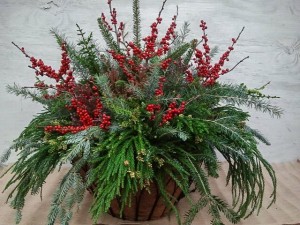
Snapdragons – Plant This Fall for Cut Flowers Next Spring!

snapdragons, poppies and a pass-a-long white dianthus...

snapdragons, poppies and a pass-a-long white dianthus…

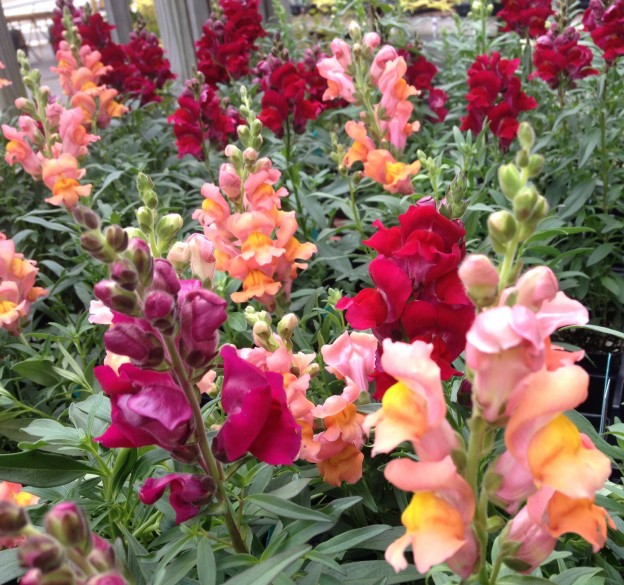
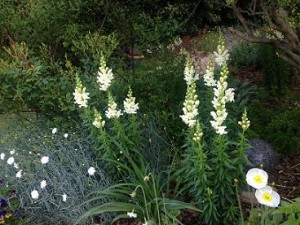
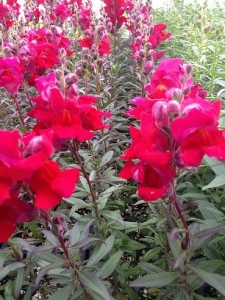
Snapdragons! These childhood favorites certainly deserve a space in our spring gardens. Planted in the fall, these annuals will survive a normal Birmingham winter and give us glorious springtime color.

I’ve discovered that since their bloom time always seems to come after the pansies and violas have begun to fade in the late spring heat,  that placing them in garden beds intermingled with perennials, roses and poppies is the best way to enjoy them. There’s simply nothing like a spring garden with snapdragons in it – and they are beautiful cut flowers too!

IMG_0434Snapdragons can be purchased in the fall in cell pack flats and in larger pots as well.  Many times they’ll be  in bloom. When theses initial bloom spikes are finished, cut them back below the faded flowers.  This will ensure they’ll branch and be fuller and more robust.  Through the winter the plant’s energy will go into growing roots and strong leaves – the beautiful blooms next spring are your reward!

Be careful not to overwater your snapdragons, especially very young, newly transplanted ones. Let them dry out a bit between watering since their root systems can easily be overwatered at this stage and will not recover from it.  If they have been overwatered,  the plant will wilt, looking for all the world like it needs water. If, after being given some,  your snapdragons continue to look droopy,  it’s best to pull them out and try again with fresh plants.

By Kris Blevons

Succulents Planted in Cedar and Hypertufa…

Made out of cedar...

Made out of cedar…

Even an ordinary day can bring pleasant surprises. Every now and then people stop by, peddling items they’ve created, hoping we’ll carry them. We try some,  hoping they’ll be a good fit for our location and things our customers will like.  Some work for us; some don’t.

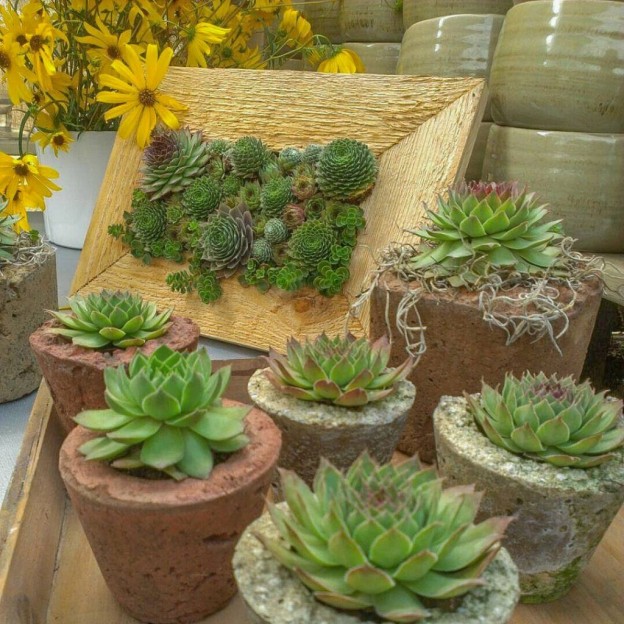
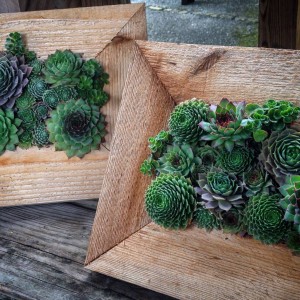
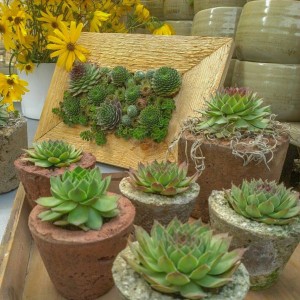
The other day  a gentleman stopped in with his truck loaded with beautiful hypertufa pots of all sizes and cedar frames planted with hen and chick succulents, sempervivums. Right away  I knew these were right up our alley! If you’re on Pinterest (Oak Street Garden Shop is!), you no doubt have seen succulents of all sorts in many combinations. Whoever the very first person was who came up with this great idea deserves a prize!Cedar Frames with Hen and Chicks

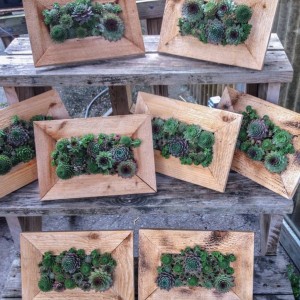
These frames are made of long-lasting cedar,  are lightweight, and are actually designed to stand on a table like a picture. Even set completely flat they could be a beautiful centerpiece. The planting box also has drainage holes so plants won’t get waterlogged.

image

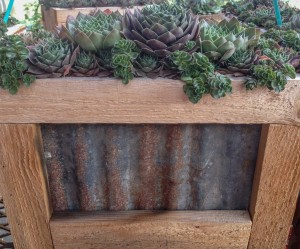
Little cedar boxes wrapped with burlap and planted with sempervivums also caught our eye. Really such a simple idea…and so pretty. We’d like to also get more of the cedar planters with metal fronting; they are fantastic looking!

Cedar and Metal Planter with Hen and Chicks

Rounding out the offerings were different sizes of planted hypertufa pots. The tiny pots with one sempervivum are just the right size for party favors or a “Thinking of you” gift. There were also a selection of larger pots, some wrapped with burlap with the addition of a medallion for added interest.

Fortunately, this gentleman used to work for one of our excellent wholesale plant suppliers in Alabama years ago and has a lot of experience growing quality plants. Taking this knowledge a step further and offering planted  containers was certainly a natural progression. After a move to Georgia and time spent working in garden center retailing, he and his brother are back in Alabama with this new, local business. We wish them the best of luck!

if you’re in the Birmingham area, stop in and  take a look at these pretty plantings from our newest local supplier!

Planting The “Better Late Than Never” Garden For Fall

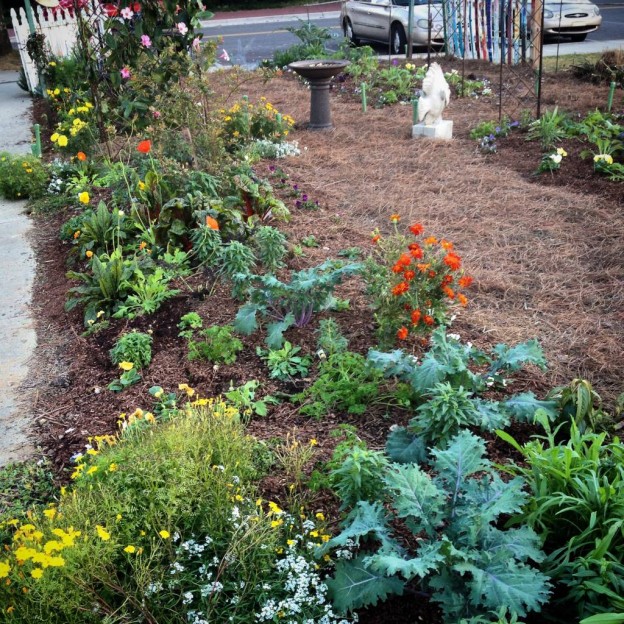
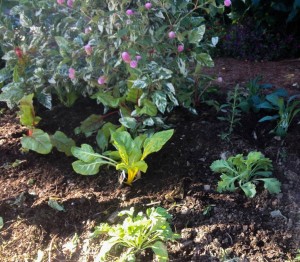
Chard and poppies mingling with pink gomphrena and the variegated hibiscus...

Chard and poppies mingling with pink gomphrena and the variegated hibiscus…

The owner of Oak Street Garden Shop, Billy Angell, and I have different approaches to gardening, mostly the result of our personalities, I think. Billy is very methodical and precise (not a bad thing), and I’m admittedly more undisciplined and haphazard in my gardening efforts.

I can almost feel him cringing as I yank just some of the  zinnias and other spent plants from the “better late than never” garden the other morning, rather than pulling everything out and starting  fresh with a completely new planting.  I’d gone in earlier than usual to take a look and assess what needed to be pulled out in anticipation of the fall/winter garden. I’ve been worrying that

Bachelor buttons and snapdragons...

Bachelor buttons and snapdragons…

as we get busier and busier with the fall planting season, not to mention the craziness of the holidays just around the corner, the garden could fall by the wayside; so the pressure is on!

Now, it wasn’t strictly just a pull some of the plants out mission. I had also brought a smattering of plants with me to plant here and there as holes conveniently opened up. A few iceland poppies, some snapdragons, bachelor buttons, foxglove, red mustard, chard, and  kale were all on my to-do list to plant.  Now, how all this mish-mash is going to turn out is anyone’s guess, since I’m not starting with a completely blank slate…but that’s half the fun!

Foxglove...under the sunflowers...

Foxglove…under the sunflowers…

This is how I’ve gardened at home for years. In the fall, I pull out spent flowering annuals a little at a time; and, as I do,  I add to the garden as holes open up. This works out well because not everything I want is available all at once, and the garden turns over to a new season gradually as summer annuals mingle with fresh plantings.

This year bachelor buttons, foxglove, and iceland poppies appeared in late September; so they’ve gone  into the first available spaces in the garden. More of them will be planted as room opens up. Summer annuals that are still hanging in are left to continue attracting late season butterflies and bees until the last will finally be pulled out to make way for the final winter plantings of pansies, violas, and, by seed, larkspur and delphinium. This planting method works well in beds that are a mix of perennials, annuals, and shrubs, too.

Poppies...

Poppies….

So, in the “better late than never garden”, the zinnias, cleome, and the few sunflowers I pull out (There are a lot more sunflowers to go!) make room for a few of each of the aforementioned snapdragons, iceland poppies, foxglove, bachelor buttons, kale, and mustard.  We’ll top dress the beds with PlantTone too and will see how the compost is looking in the bins, adding some of it if it’s ready.

In the coming days and weeks the garden will undergo even more changes until, finally, the last plants are in. Then it’s a waiting game until spring, when the real show will begin. Just don’t be surprised if you see us still planting in the dead of winter…I think the “better late than never” garden will always be just that!


Orchids…Early Fall Arrangements

A lady slipper is framed by angelvine...

A lady slipper is framed by angelvine…

Orchids, succulents, dried pods and foliage are the common theme in these four arrangements. With the heat of summer receding (Thankfully!) and fresh material arriving to work with, it’s a happy time in the greenhouse. So, between new shipments of pots, plants, ribbon and more, these were a few of the pieces we created. Let’s take a look.

Orchid, succulents and dried pods Someone who worked for us many years ago called from North Carolina to order an orchid for her mother’s birthday. She likes succulents too; so a double stemmed phalaenopsis and a lady slipper orchid were paired in a container and succulents nestled at the base. The addition of  angelvine and a touch of brown ribbon complete the design.
The next two small containers both started with an orchid, then succulents, ribbon, and, in the second, Jamie selected just the right white miniature pumpkin and burlap bow…the perfect gift for someone!Fall Orchid Arrangement

No two designs are ever alike for us, though sometimes a customer will see something they particularly like and will request another version of it.  Our least favorite thing is when someone brings in a picture with the request that we copy it, though we’ll always accommodate as best we can.Fall Orchid Arrangement - Customer's Dough Bowl

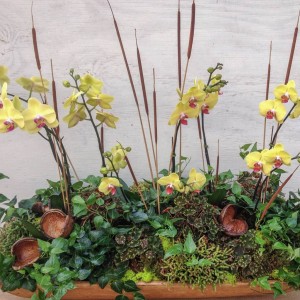
Happily, this large dough bowl of a longtime customer is one we see fairly regularly and one that we have complete creative license with. This go-round I filled it with orchids and under planted it for fall with Rex begonias, a pretty ivy, and added dark, shiny pods for their color and shape. A touch of chartreuse mood moss picks up the light green veining in the begonia leaf. Some tiny cattails are placed as accents, and my design is done.

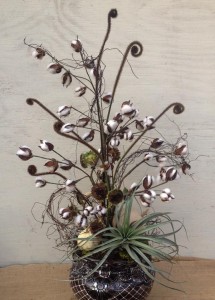
Cotton stems, dried sunflower seed heads from the garden, and fern fiddleheads were the starting point for the last piece in a pretty brown and white bowl. . I added an air plant at the base and wound angel vine up through the cotton for even more interest. Some days are so much fun in the greenhouse!

Cotton, sunflower seed heads, fern fiddle heads and an airplantThis is just a sampling of the early fall things we’ve been creating! Since we’re always searching for new ideas and ways to make our arrangements more interesting and  unique, who knows what we’ll come up with next…


Bittersweet…For Fall!

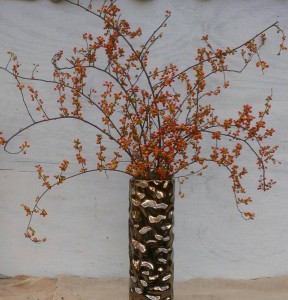
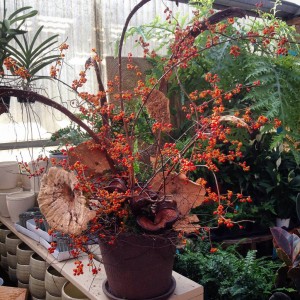
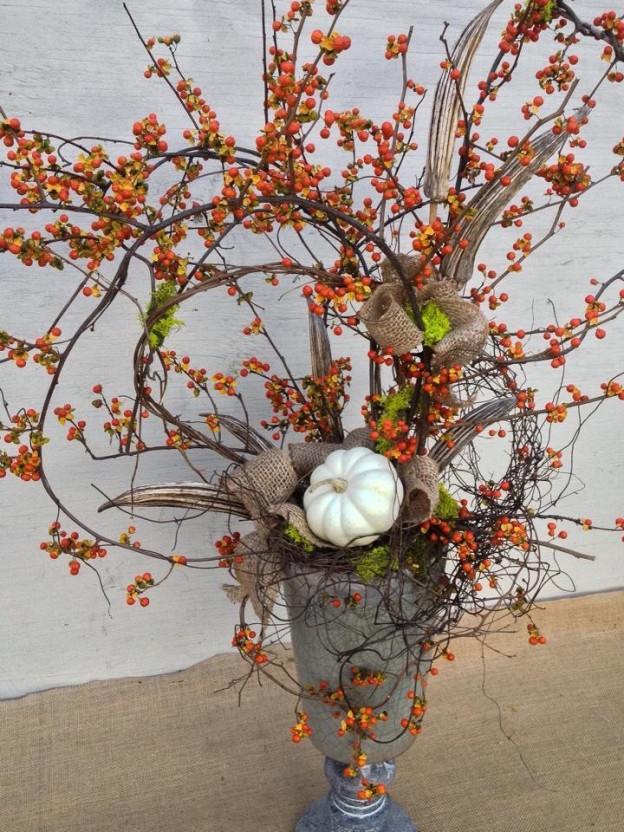
Our shipments of bittersweet have begun to arrive, and on its own or combined with pumpkins, gourds, and dried pods of all sorts,  fall decorating can begin!Arrangement Close-Up - Bittersweet, Mini White Pumpkin, Burlap, Pods

A Simple Arrangement of Bittersweet Each year we’re fortunate to have friends in North Carolina supply us with long stems of beautiful, freshly cut bittersweet that we enjoy using in many of our fall designs and that you can purchase to create your own too.
The vines are expertly hand cut in the mountains, packed carefully between paper, and shipped to us. It’s so fresh the berries are usually still closed until they begin to open in the heat of the greenhouse. To keep the berries from shedding, give them a good coating of a heavy-duty hairspray. We discovered this tip a couple of years ago, and it works well.

Stems of bittersweet...

Stems of bittersweet…

Bittersweet is lovely on its own in a simple vase,  but it can also be the star in more elaborate arrangements. The sky’s the limit with so many interesting supporting players of dried materials, gourds, and plants. Here are some designs from fall 2013. With this year’s season just beginning, I’m sure there will be many more to show you in the coming weeks!Bittersweet arrangement


Note:  This fall decorating staple is also an invasive vine in many parts of the country. Because of this, we recommend its use for indoor decorating only. This simple step will prevent birds from eating any of the seeds on outdoor decorations and depositing them in areas here where it could get a foothold.  We also ask that you dispose of indoor decorations at the end of fall by bagging them up in a plastic garbage bag and sealing it securely.

Fall flowers…Pansies and More!

So many to choose from!

So many to choose from!

We’re so lucky in Birmingham to be able to plan and plant our winter and early spring gardens in the fall, using fresh annuals, like the colorful pansies and violas, as well as  various vegetables – ornamental and edible kale, cabbage, and pac choi are just a few. With summer’s heat behind us, time spent in the garden is a pleasure, not a chore.

IMG_1851


Soon all the tables in the nursery will be laden with plants of all kinds – this is such a great opportunity for you to create the most beautiful early spring garden!

IMG_1572Start with pansies and violas for beds and planters, then add supporting players. Some of the prettiest additions to your winter/early spring garden are foxglove with their tall spires of white, pink and purple, snapdragons – they are worth waiting for – poppies, with their bright orange, yellow, red and white papery blooms, and the bluest blue bachelor buttons.
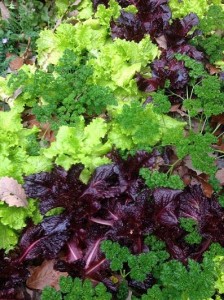


Curley parsley and lettuce...

Curley parsley and lettuce…


There are so many leafy greens to interplant in containers and beds too – colorful chard, kale and mustard are so beautiful and edible as well. Curly parsley is another staple of the winter garden, adding its rich green leaves and texture to any composition.

Finally, don’t overlook the unassuming fall bulbs. Planting a bulb is a leap of faith for some, while other folks plant a few every year to add to their spring display. It’s truly amazing that such  beauty lies in something so seemingly drab.

Smart gardeners know to look for all of these in the fall, planting them in anticipation of a gorgeous spring display!


Fall Planting Tips To Create A Great Spring Garden:

  • Amend your soil. You might think since you followed our advice and added soil conditioner, PlantTone, cow manure or compost  to your beds last spring you’re done. Not so fast! High temperatures break down soil amendments quickly, and plants take up nutrients. Continue adding to your soil every season. Healthy, loose soils create healthy plants.  (Instead of putting fallen leaves to the curb, start a compost pile with them, or run over them with your lawn mower and throw them in your beds. They’ll decompose and add to your soil’s structure and health.)
  • After you get your plants home, be sure to keep them watered, especially if you can’t plant them right away. We water small transplants in 4″ pots and cell packs at least once a day, especially if it’s hot and sunny. Of course, less water is required in cloudy, cool conditions. Right before you plant them, be sure they’re moist.
  • Early in the season while the soil is still warm, you can still plant with Osmocote. However, later in the winter months, use Calcium Nitrate to feed your plants, especially if the foliage of your pansies turns a reddish color. Remember, you’re planting for spring color, though on warm days through the winter you should also have some blooms.
  • Water your bed thoroughly after planting, and keep it watered while your transplants are getting their feet settled in their new home. Take care not to overwater, though, especially as the temperatures cool down going into the winter months.
  • Mulch your beds with shredded mulch or pine straw  to keep soil temperature around the roots as warm as possible.
  • Deadhead your pansies and violas! I can’t stress enough how important this is. A pansy that you leave a dead bloom on will form a seed there, instead of putting that energy into more flowers. Make a practice to walk through your garden at least once a week, taking a good look at your plants and deadheading  faded blooms. If you’ve missed some, you’ll see the seed pod beginning to form. Pinch any and all off! This will go a long way toward keeping your pansies happy!


– Posted using BlogPress from my iPhone

Bachelor Buttons…Plant Some This Fall for a Blue, Blue Spring!

Newly planted...

Newly planted…

I planted some bachelor buttons, Centaurea cyanus ‘Blue Boy’, in my garden the other day. Usually transplants of these beautiful spring to early summer bloomers are hard to come by until very late fall almost into winter, and I’ve planted them that late with success.

So blue...

So blue…

This year, though, one of our local growers already has some available! So, if you’re in the Birmingham area, make some room in your garden so you can enjoy the bluest of blues next spring like I do every year along with my roses, foxglove, and snapdragons.

To help you understand where they will work best for you, keep in mind that they’ll grow to 3′ and become very full, especially if you cut them back a bit early in the spring. This isn’t absolutely necessary, but I’ve found it keeps mine from sprawling and they still get quite tall. One of my best combinations (Quite by accident!), and one I’ve repeated, is bachelor button and Baptisia shown here.

With Baptisia in the spring...

With Baptisia in the spring…

You may happen upon your own beautiful combinations though. Just remember to give them some sun and don’t baby them too much. Average soil is fine since they are really amazingly tough plants, and only the heat of summer will end the blue wave of carnation like flowers.

The blue of a bachelor button is simply incomparable – cornflower blue. It was once called “boutonnière flower” because the small, bright blue flowers were once commonly used by bachelors tucked into buttonholes on their suits. It’s also been called “Ragged Robin” and “Cornflower”.

Many of you have noticed the bachelor buttons in our sign planter in front of Oak Street Garden Shop each spring. By the time you notice them blooming, it’s too late to plant them. Don’t miss out this year!