Category Archives: Planting Tips

It’s Planted! The ‘Better Late than Never Garden’ Summer 2015

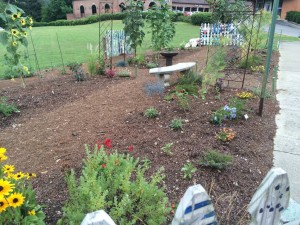
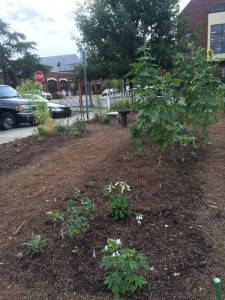
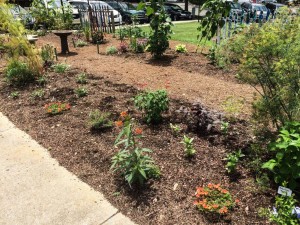
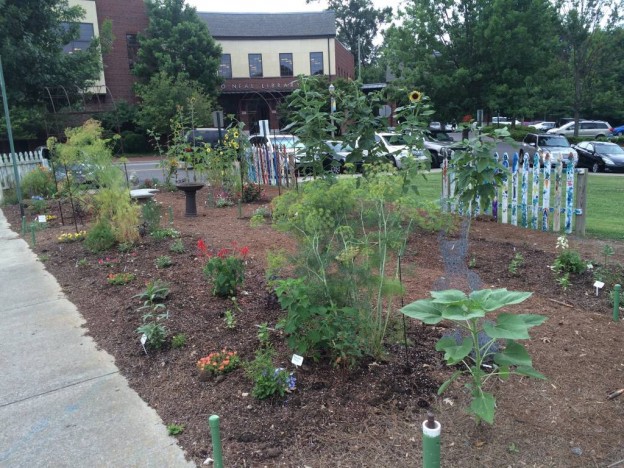
Better Late Than Never Garden - June 2015Just about this time last year we planted the community garden across the street with flowers to attract bees, butterflies and other pollinators. The two years previous it had been a vegetable garden, though the first year of veggies turned out a bit better than the second. Regardless, this little plot of land has had a lot growing in it!

By the end of summer I’d begun calling it the ‘Better Late than Never Garden’,  and it’s certainly been a lesson to many in the neighborhood that a garden can be started any time of the year with care and attention.  I think the zinnias and other heat loving plants performed as well, or better, than if they’d been put in the ground 2 months earlier. In  fact, I’d probably be pulling a few out right about now!Better Later Than Never Garden - June 2015

When the summer seeds arrived early this spring, I perused the seed rack, choosing a good assortment of sunflowers and zinnias since they’d done so well last year. I squirreled them away and took them home, knowing it would be months before they’d be planted.

Finally, the other day I brought all the packets back, walked across the street, and laid them out on the ground in the four planting beds, randomly choosing spots I thought might work well between the various groupings of plants already in the ground.  I thought I’d picked the perfect day, since there was a good chance of rain that afternoon and for the next few days as well.

I’d been sure to set aside some packs of tithonia, the beautiful orange mexican sunflower too, and picked a spot in the garden for some, though there already were plants growing in random spots that had seeded from last year.  What a happy surprise that’s been! I’ve left them to grow in the spots they’ve picked and know the monarch butterflies will appreciate them again in late summer.

Better Late Than Never GardenOne flower I thought there’d be plenty of, because it’s a notorious reseeder, is the beautiful cleome or spider flower. I’ve been disappointed to find only one plant coming in the spot it was last year though. After giving it some thought,  I’m sure the reason no seeds that might have fallen to the ground germinated was  the heavy layer of pinestraw mulch I used in the winter garden. It was great for the pansies, snapdragons and foxglove but must have smothered any seeds that tried to come up through it.

Working my way through the beds one at a time, I used my pick to loosen the soil and make  shallow trenches. Most rows were planted 1/4″ or so deep, lightly sprinkled out, and then the soil gently pushed back. After all the seeds packets were opened and planted, the beds were lightly watered.

Remember I said rain was forecast that afternoon? Well, it turned out to be an absolute gullywasher.  I watched the rainstorm through the doors to the greenhouse, wondering if any of the seeds I’d just planted would still be in the same spot. Only time would tell, I thought.

The zinnia and sunflower seeds are coming up....

The zinnia and sunflower seeds are coming up….

There are at least 6 different varieties of zinnia and as many sunflowers planted in the four beds, and, if last year is any indication, the garden will be an explosion of color in another month or so and the bees and butterflies will be enjoying the patch of blooms in the middle of the village.

The hyacinth bean vine has been replanted too, on the first arbor closest to the sidewalk. The seeds were soaked overnight to soften them and planted all along the length of the arbor on both sides.

Luckily the torrential downpour didn’t wash all the seeds away and the zinnias, sunflowers, and hyacinth bean vine seeds are already coming up. Now the smallest plants will need to be taken out so they’re not too crowded. Crowding of tiny plants isn’t good, and none will be very strong if they’re left too long. This is called thinning and, hard as it is to do, is a necessary step to a beautiful garden.

So, it’s planted for another season, though a garden is never finished, right? Following is a list of the seeds planted in this year’s summer garden:

Zinnias:  Envy, California Giants, Fireball Blend, Northern Lights Blend, Solar Flare Blend, Persian Carpet

Sunflowers: Lemon Queen, Peach Passion, Flash Blend, Vanilla Ice, Moulin Rouge, Evening Sun

Cosmos:  Bright Lights Blend

Tithonia – Mexican Sunflower/Torch Flower

Signet MargoldsTagetes tenufolia – Tangerine & Lemon Gem

Hyacinth Bean Vine

Posted by Kris Blevons

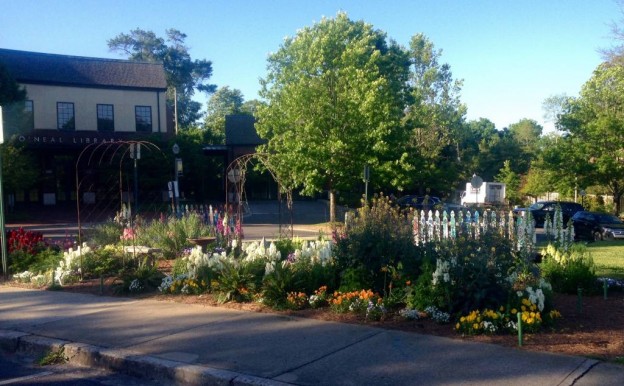
It’s Spring In The ‘Better Late Than Never Garden’…

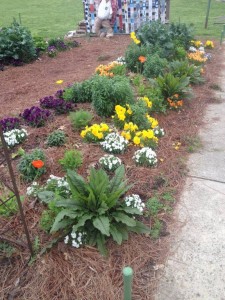
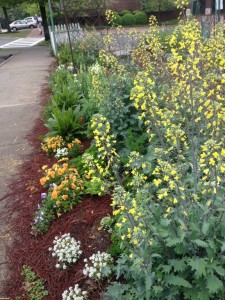
Better Late Than Never Garden -Winter 2014-2015Last fall the little plot that I’ve come to call the ‘Better Late Than Never’ garden was gradually planted with foxglove, snapdragons, poppies, delphinium, bachelor buttons, ornamental kale, pansies, and violas. Dashing across the street between customers and shop business to add plants and tending it very early in the morning, the garden slowly filled in.

There were a few poppies...

There were a few poppies…


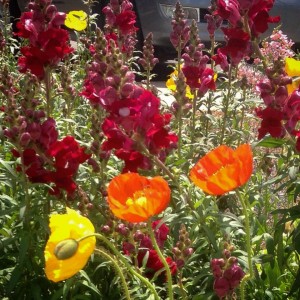
As with any garden, there were successes and failures. I’ve come to accept that nature always has the upper hand and not to take it personally when something doesn’t go exactly as planned. Take the poppies, for example. This year, for some reason (I think it was all the rain late winter into early spring.), they just didn’t fill out like they usually do. Disappointing for sure, but the snapdragons more than made up for the poppies lackluster performance.

Yellow snapdragons and white foxglove...

Yellow snapdragons and white foxglove…

I usually have lots of larkspur that reseed in my garden at home. This year I don’t see much coming up at all. Again, it could be the rains or

even the frigid spell late winter this year. It didn’t come up in the shop garden either. Oh, well! The foxglove is beautiful and is putting on quite a show with the delphiniums!

Red Russian ornamental kale adding it's yellow blooms as it bolts...

Red Russian ornamental kale adding it’s yellow blooms as it bolts…

My strategy is to have a variety of plants, knowing that there will be some failures but many more successes. Also, between business at the garden shop (and a personal life), I’ve tried to keep the garden weeded and tended as much as possible.

Early morning light on the snapdragons and pansies...

Early morning light on the snapdragons and pansies…


In a perfect world, there would be endless help, every foxglove would be staked, the bachelor buttons would have been cut back at least once to keep them from flopping, the snapdragons would have supports around them, and the pansies and violas would have more constant deadheading…but whoever said life was perfect, and wouldn’t that actually be a little boring?

The nursery is full of plants for your summer garden.  Spring is all about renewal and hope for a new season, so plant your garden with things you love and try something new too. I’m not sure what this summer will hold for the ‘Better Late Than Never’ garden. I do know we’ll enjoy the beauty of all that’s growing now through our busy spring season and get it planted, finally…(Better late than never!).

Happy spring planting to all of you, remember to maintain the garden as best you can, and always enjoy observing life in your garden too…

Posted by Kris Blevons


Here’s A Look At Our Plantings in the Southern Living Magazine’s Container Gardening Collector’s Edition!

One of our favorite things to do at the shop when there’s a little extra time is to create imaginative and creative plantings to give people ideas for their own planters. The trick is using the right plants for our southern climate,   and maintaining them well.  So there just happened to be quite a few growing out last summer when the producers of the Southern Living Container Gardening Special Collector’s Edition stopped in to see if there were any they could use. The special publication would be available on newstands beginning February, 2015. All of the plantings in this issue make sense for southern gardeners since they utilize the plants that will withstand the heat and humidity we all contend with.

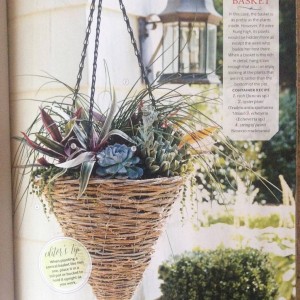
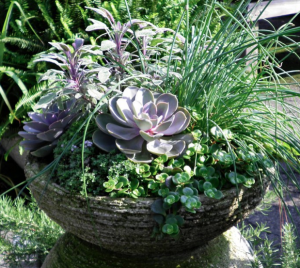
I wanted to do something a little different in this cone shaped basket, so I started with a pot of chives and added rhoes (oyster plant) Echeverias and trailing string of pearls for a textural feast... Photo Courtesy Southern Living

I wanted to do something a little different in this cone shaped basket, so I started with a pot of chives and added rhoes (oyster plant) Echeverias and trailing string of pearls for a textural feast…
Photo Courtesy Southern Living Magazine

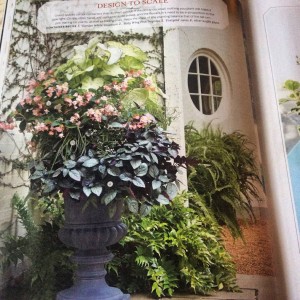
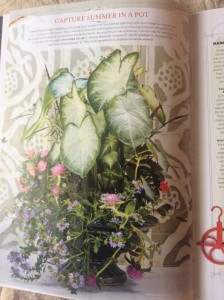
One of my favorite shade planting designs because of how wonderfully it grew out after this picture was taken. The 'Babywing' pink begonia was a showstopper, growing through the large 'Garden White' caladiums and the carex 'Evergold' mingled with the silver waffle plant, (hemigraphis) trailing over the edge beautifully... Photo Courtesy Southern Living

One of my favorite shade planting designs because of how wonderfully it grew out after this picture was taken. The ‘Babywing’ pink begonia was a showstopper, growing through the large ‘Garden White’ caladiums and the carex ‘Evergold’ mingled with the silver waffle plant, (hemigraphis) trailing over the edge beautifully…
Photo Courtesy Southern Living Magazine

Between myself, Jamie, Molly, Pinkie, and Lauren, we are well represented in this informative issue, and I am so proud! Here’s a look at our designs (You can pick up a copy of the magazine while  it’s on newsstands until May, 2015).   Look HERE to see a post on a few more  of our plantings from  last summer including a couple of these right after they were planted.   Posted by Kris Blevons

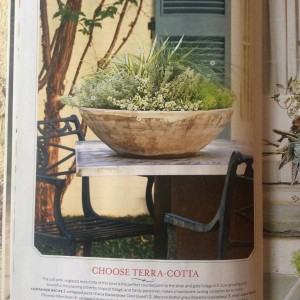
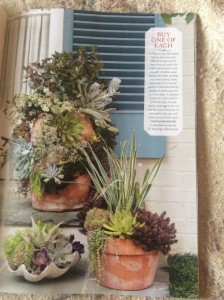
I wanted to capture a Mediterranean feel with this summer planting in a large terra cotta bowl. I started with a variegated yucca and added drought tolerant silver thyme and sedums, a trailing jade plant (portulacaria) and a wispy Mexican feather grass (Nasella tenuissima)... Photo Courtesy Southern Living Magazine

I wanted to capture a Mediterranean feel with this summer planting in a large terra cotta bowl. I started with a variegated yucca and added drought tolerant silver thyme and sedums, a trailing jade plant (portulacaria) and a wispy Mexican feather grass (Nasella tenuissima)…
Photo Courtesy Southern Living Magazine

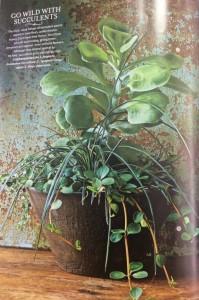
Large rounded leaves of a flap jack kalanchoe, thin, strappy leaves of an agave and trailing peperomia all combine beautifully in Molly's composition... Photo Courtesy Southern Living

Large rounded leaves of a flap jack kalanchoe, thin, strappy leaves of an agave and trailing peperomia all combine beautifully in Molly’s composition…
Photo Courtesy Southern Living Magazine

Three succulent plantings by Molly certainly showcase all the variety available... Photo Courtesy Southern Living

Three succulent plantings by Molly certainly showcase all the variety available…
Photo Courtesy Southern Living Magazine

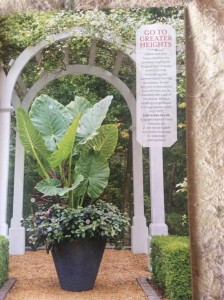
An Alocasia is the star of this "large and in charge" planting by Jamie. She added Alternanthera 'Ruby Star' to fill out the base... Photo Courtesy Southern Living Magazine

An Alocasia is the star of this “large and in charge” planting by Jamie. She added Alternanthera ‘Ruby Star’ to fill out the base…
Photo Courtesy Southern Living Magazine

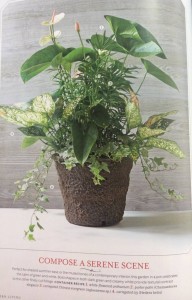
We love using houseplants in shade containers through the summer. Molly used various shapes and textures here, beginning with an anthurium and adding the parlor palm, agloenema and ivy... Photo Courtesy Southern Living Magazine

We love using houseplants in shade containers through the summer. Molly used various shapes and textures here, beginning with an anthurium and adding the parlor palm, agloenema and ivy…
Photo Courtesy Southern Living Magazine

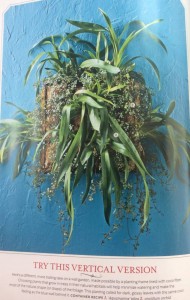
Jamie used Oncidium orchids and Pilea 'Aquamarine' in this vertical planter... Photo Courtesy Southern Living Magazine

Jamie used Oncidium orchids and Pilea ‘Aquamarine’ in this vertical planter…
Photo Courtesy Southern Living Magazine

A glazed, blue footed urn was the inspiration for Pinkie's pink, blue, and white combination...the caladiums are a sun tolerant variety called 'Aaron' Photo Courtesy Southern Living

A glazed, blue footed urn was the inspiration for Pinkie’s pink, blue, and white combination…the caladiums are a sun tolerant variety called ‘Aaron’.
Photo Courtesy Southern Living Magazine

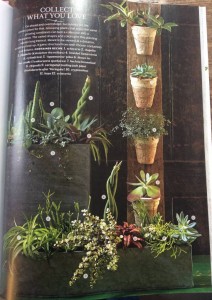
Succulents! Look at all the different leaf shapes and sizes here...Lauren's vertical planter is wood from a pallet with pots wired on. Photo Courtesy Southern Living

Succulents! Look at all the different leaf shapes and sizes here…Lauren’s vertical planter is wood from a pallet with pots wired on.
Photo Courtesy Southern Living Magazine

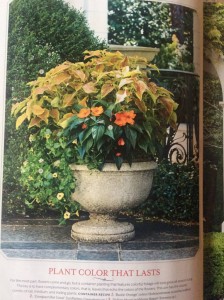
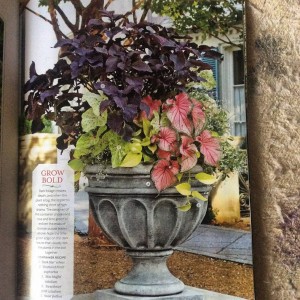
Begin your planting combinations with one plant you love, and add to it. I wanted to use this coleus, then added the trailing torenia and SunPatiens to compliment it... Photo Southern Living Magazine

Begin your planting combinations with one plant you love, and add to it. I wanted to use this coleus, then added the trailing torenia and SunPatiens to compliment it…
Photo Courtesy Southern Living Magazine

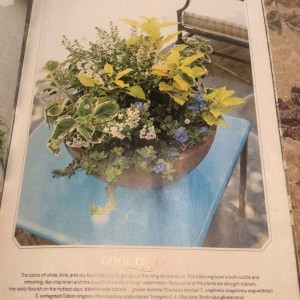
This brown bowl I designed was actually featured in another post on our website titled 'A Brown Bowl, 2 Ways'. This is the chartreuse, blue and white version for sun... Photo Courtesy Southern Living Magazine

This brown bowl I designed was actually featured in another post on our website titled ‘A Brown Bowl, 2 Ways‘. This is the chartreuse, blue and white version for sun…
Photo Courtesy Southern Living Magazine

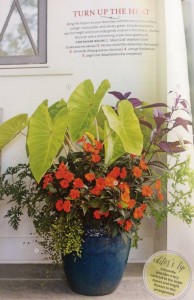
A pretty blue glazed pot was the starting point for my planting using a dramatic elephant ear called Maui Gold. Look at that color! This was featured on the cover too... Photo Courtesy Southern Living

A pretty blue glazed pot was the starting point for my planting using a dramatic elephant ear called Maui Gold. Look at that color! This was featured on the cover too…
Photo Courtesy Southern Living Magazine

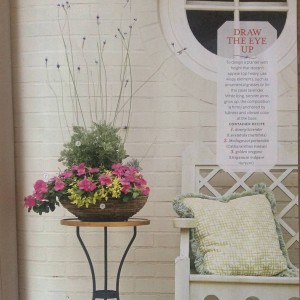
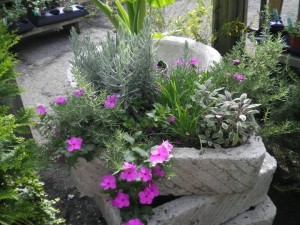
Hypertufa containers work well for herbs and flowers. In this bowl I used a lavender, ornamental golden oregano and added a splash of color with pink vinca... Photo Courtesy Southern Living

Hypertufa containers work well for herbs and flowers. In this bowl I used a lavender, ornamental golden oregano and added a splash of color with pink vinca…
Photo Courtesy Southern Living Magazine

In this large shade planter I decided to use a trailing 'Neon' Pothos instead of the ubiquitous chartreuse potato vine. Don't be afraid to use houseplants in outdoor shade planters! Here coleus, caladiums and an airy white euphorbia complete the design... Photo Courtesy Southern Living Design

In this large shade planter I decided to use a trailing ‘Neon’ Pothos instead of the ubiquitous chartreuse potato vine. Don’t be afraid to use houseplants in outdoor shade planters! Here coleus, caladiums and an airy white euphorbia complete the design…
Photo Courtesy Southern Living Magazine

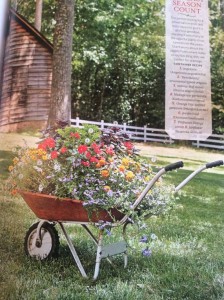
I filled this old wheelbarrow up with lots of zinnias, fan flower and vinca, then added some purple basil, ornamental Kent's Beauty oregano, and scented geranium for additional foliage and texture. It bloomed all summer! Photo Courtesy Southern Living Magazine

I filled this old wheelbarrow up with lots of zinnias, fan flower and vinca, then added some purple basil, ornamental Kent’s Beauty oregano, and scented geranium for additional foliage and texture. It bloomed all summer!
Photo Courtesy Southern Living Magazine

The ‘Better Late Than Never Garden’ – A Winter Update

Tucking in winter plants around fall annuals, late fall...

Tucking in winter plants around fall annuals, late fall…

The ‘better late than never garden’ is certainly living up to its name, since it was planted at the beginning of November 2014, and most of it finished just prior to the hectic holiday season, a full month later than I would have liked. This ‘better late than never’ schedule is working out okay so far, though, as the plants are growing steadily. Of course, more updates will follow, documenting successes and the inevitable failures that every garden and gardener has.

Most of these pictures were taken quickly  very early on a mid-December morning in the middle of the holiday rush. Since there were other things that needed to be done, I couldn’t linger; but now, with the new year and more time, here’s an overview of the planting process and selection in this ‘better late than never’ winter garden.

Mid-December. Mulched and growing...

Mid-December. Mulched and growing…

Let me admit right off that I’m not a “garden designer”. I can’t tell you that I drew a beautiful rendering of what I envisioned this garden to be come spring. No, the reality is that I grabbed a few packs of this and a few pots of that (usually in the middle of a busy day), raced across the street trowel and plants in hand, and plugged them in wherever I felt they worked best. So, in that way, little by little and over and over, the garden was planted. Time, attention, and the weather will determine how it turns out this spring.

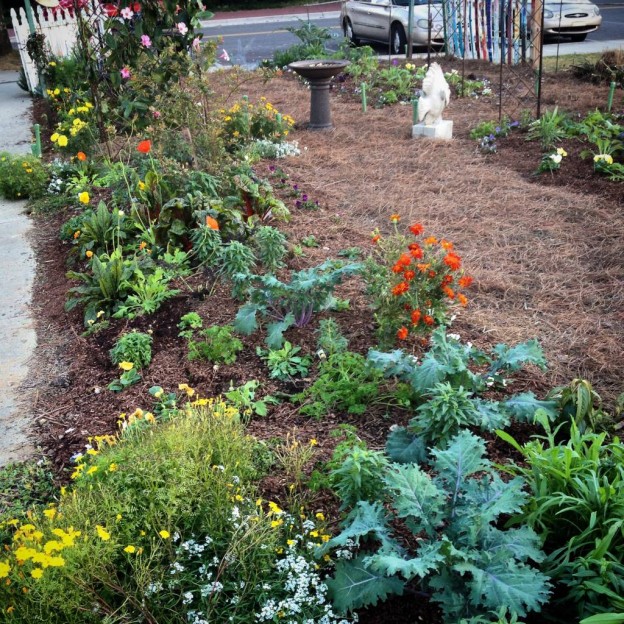
Violas, delphinium, poppies, kale, curly parsley, bachelor buttons and more growing... Mid-December

Violas, delphinium, poppies, kale, curly parsley, bachelor buttons and more growing… Mid-December

I began by planting a few foxglove, delphinium, and bachelor buttons under the still blooming summer tithonia. Then, when it was finally pulled out (Better late than never too!), pansies, violas, and sweet alyssum were added to large spaces that opened up.

Red Veined Sorrel, Rumex sanguinea in the winter garden...January

Red Veined Sorrel, Rumex sanguinea, in the winter garden…January

Since the summer annuals were pulled out of them first, the two front beds were planted the earliest with snapdragons, poppies, bachelor buttons, chard, curly parsley, dill (The dill will eventually freeze at some point.),  red veined sorrel, ‘Bull’s Blood‘ beetskale, and mustard “Red Giant“.  There’s quite a mix of annuals, herbs, flowers, and even bulbs (dwarf narcissus and ipheionin each bed.

The 'better late than never garden' in mid-December...

The ‘better late than never garden’ in mid-December…

A good layer of mulch is really important for your winter garden. Some folks start with a completely empty bed, add the mulch, then plant through it, a great method and easy to do. Of course,  I did just the opposite. I had the time to plant before I had the help for the mulch! So, inevitably, there I was, mulching in the dark before the first cold snap of the season.

I also made sure everything was watered well before spreading the shredded pine bark around the little plants. There will be many more cold snaps before the winter is through, and I’m counting on this mulch to keep the soil warm since this isn’t a garden that gets babied.

A poppy, in bud, with 'Red Giant' ornamental mustard in the 'better late than never garden' in January...

A poppy, in bud, with ‘Red Giant’ ornamental mustard in the ‘better late than never garden’ in January…

For people that don’t have big blocks of time (That’s most of us, I think.), planting a little bit at a time does work…obviously I’m a poster child for it. Now I’m concentrating on keeping winter weeds controlled in the beds, since the two worst offenders, chickweed and henbit, insist on coming up. Don’t let these winter weeds get hold in your garden. Pulling a few every week is far more preferable than tackling them come spring, after they’ve been allowed to smother your pansies and  violas.

Have you planted some flowers for spring? If you haven’t, try a few poppies, pansies, or violas since, as you know now, it’s never too late to plant a garden. I’ll keep you posted on our ‘better late than never’ garden’s progress too!


A Guide…Plants Used In The “Better Late Than Never Garden” A Butterfly, Bee, And Hummingbird Haven

View From the street...Hyacinth Bean Vine on the Arbor

View From the street…Hyacinth Bean Vine on the Arbor

So many folks have stopped me, asking for a plant list of flowers in the “Better Late Than Never” garden, that I decided it was high time I posted this for those of you who’d like to have something similar next year.  Obviously our garden is sited in full, daylong sun, so plants were chosen with this in mind. You’ll need to provide at least 4-6 hours of sun, with regular watering and deadheading, to maintain your flower garden next year  too.
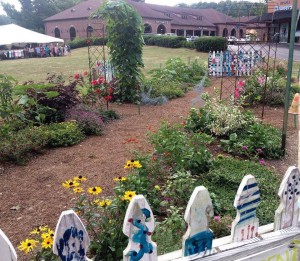
Indian Summer rudbeckia - "Better Late Than Never" garden

Rudbeckia ‘Indian Summer’ foreground. On arbor, moonvine and red mandevilla…

Any good garden begins with good soil, and, with previous vegetable garden plantings, ours had been amended with soil conditioner, compost and added topsoil. This past season we also added bags of PlantTone as well, raking it in lightly. No tilling was done since that tends to turn up weed seeds, and, once they hit the light, they all sprout, turning the garden into a weedy mess!
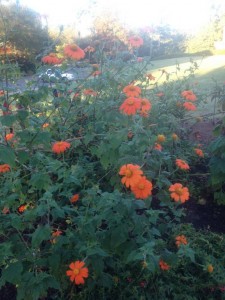
The tithonia came on strong, late summer...

The tithonia came on strong, late summer…


In a previous post I mentioned how late the garden was planted (not until the end of June!), so it was incredibly hot when the sunflowers and zinnias were planted by seed.  This is actually very good, since they need very warm soil to germinate and grow happily and consistent watering as well. I know many of you thought we were a little crazy to be planting in the incredible summer heat, though. (This is a good time to remind all of you to wear a hat if you’re out in the heat and sun and be sure to provide water for yourself too!)  Here’s a post highlighting how much the garden had grown by late summer. So many of you talk about how it seemed to explode overnight. Actually, it was steadily growing each day!

Here, then, is the plant list for a flower garden to attract bees, butterflies and hummingbirds in Birmingham, Alabama, and surrounding areas with tips on planting and maintenance:
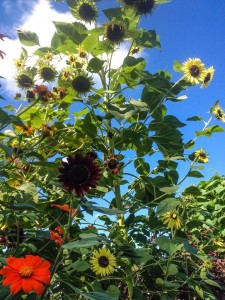
 

The sunflowers, planted from seed, towered over the garden...

The sunflowers, planted from seed, towered over the garden…

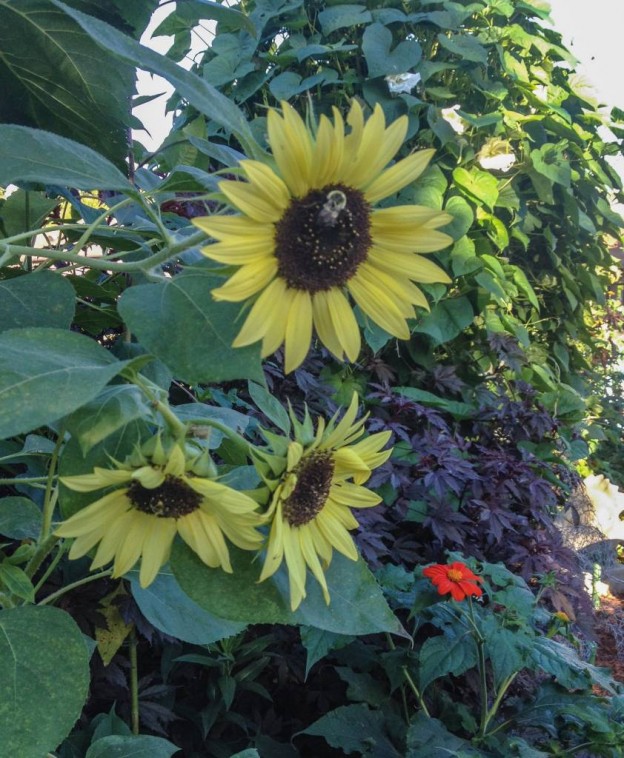
Sunflowers – We raided our Botanical Interests seed rack and planted a mix of sunflowers from Lemon Queen, mixed packs, and solid reds and yellows directly into the ground, then waited, impatiently, checking them every day – and watering each day – until they sprouted. Watching them grow and seeing folks taking pictures made all the effort worthwhile for these towering beauties.
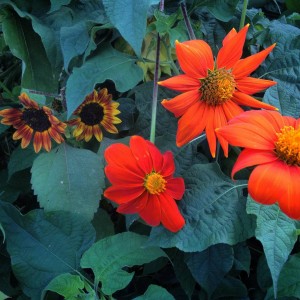
Tithonia...

Tithonia…


Tithonia, Mexican Sunflower ‘Torch’  – These also were planted from seed at the same time as the sunflowers. At first the sunflowers eclipsed them, but, by the very end of summer after the sunflowers had played out, the Tithonia took over, and everyone was asking about it. It boasts never-ending orange flowers that attract yellow sulphur, skipper, painted lady, and, finally, at the end of the season, monarch butterflies. A must for any sunny flower garden. I kept it deadheaded and staked but left some to lean and sprawl since the stems got quite large.

Tall cutting zinnias – The zinnias were also planted at the same time as the sunflowers and Tithonia. Again, we used Botanical Interests seed leftovers on the seed rack – all mixes of tall varieties. We also had a few green ‘Envy’ zinnia plants in cell packs left over from spring. These I cut back by half and planted in the front two beds while we waited for the zinnia seeds to come up. As seedlings came up I pinched them back to promote branching, and they  were kept deadheaded to promote more blooms so everyone could enjoy the flower display.
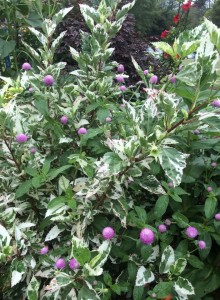
 

Variegated hibiscus with the tall pink gomphrena growing through it...

Variegated hibiscus with the tall pink gomphrena growing through it…

Hibiscus – There were two hibiscus varieties planted in the garden. Unlike fancy big-blooming hibiscus you may be more familiar with, these were planted for their foliage appeal, with blooms being secondary. The first is an ornamental red leaf hibiscus, and one of these was planted on each side of the back arbor. By the middle of October, they had each grown to enormous proportions, adding another depth of color to the garden, growing up through the tithonia and moonvine.
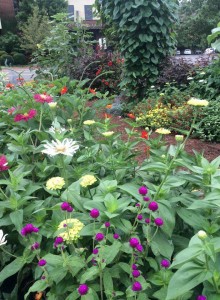
Zinnias and gomphrena...moonvine and red leaf hibiscus...

Zinnias and gomphrena…moonvine and red leaf hibiscus…

I kept them clipped periodically to keep them in check and in proportion to the rest of the surrounding plants. The second was a variegated ornamental hibiscus. One of these was planted on each side of the front arbor and had pink gomphrena and tall cutting zinnias growing through it. They were not as vigorous as the red leaf but still added another leaf variation in the garden.

Gomphrena – A plant I wouldn’t be without in the flower garden. It never looks like much in a pot, but in the garden its globe-like flowers add a completely different silhouette among all the daisy-like blooms. And it is tough! We planted transplants of tall purple, red, and pink gomphrena and also added a short variety in all four beds. Here’s another post that features gomphrena.
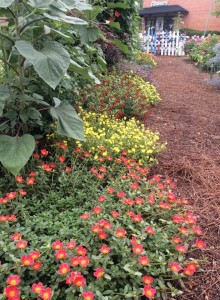
Purslane, red bat face Cuphea and purple gomphrena edge the beds...

Purslane, red bat face Cuphea and purple gomphrena edge the beds…

Purslane – This low-growing, succulent-like annual is an amazing bee magnet. We had literally hundreds of honeybees each morning on the bright yellow, orange, and red blooming plants. They are best planted along the edge of hot, sunny beds. The flowers close late in the day, but that’s hardly noticeable if you provide other flowers to look at! Be sure to take a look at the video of the honeybees on our YouTube page.
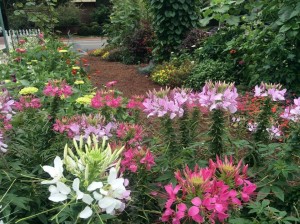
Cleome - Spider Flower...

Cleome – Spider Flower…


Cleome (Spider Flower) – We had a flat of scraggly looking cleome left over from spring that needed a home…and what a home it got! I cut them back by half so they would branch and be fuller, and were they ever! Don’t hesitate to cut back stems of these flowers through the summer. When you see numerous seed pods hanging down the length of the bloom, it’s time to cut them back. Don’t worry; they’ll continue to bloom and will probably reseed next year for you. Old fashioned flowers, they attract butterflies and bees too.
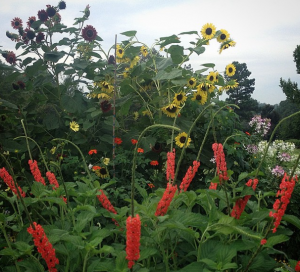
Porterweed and Sunflowers...

Porterweed and Sunflowers…

Porterweed – An interesting plant that sends out long bloom spikes with blossoms the hummingbirds and sulphur butterflies adore. I would plant it again for that reason alone! I was also impressed that it never seemed to be bothered by insect pests.

Cuphea llavea, Red bat face cuphea  – You may not have noticed this plant right away, but the hummingbirds sure did! Planted along the front of the sunflowers and under the tithonia, it added a shot of red along the ground. Extremely tough and virtually carefree, it flourished with less than optimal sun, as it eventually  was shaded out by the towering sunflowers. Even so, it was one of the last things removed at the end of October.

Cuphea ignea, cigar plant – Another planted for the hummingbirds. This one sports orangey tubular flowers on a rangy plant that I put right in the middle of the zinnias. This post tells you more about this unusual plant.
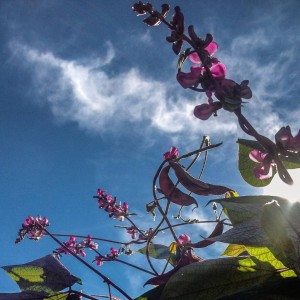
Hyacinth bean vine, sillouhetted against a blue sky...

Hyacinth bean vine, sillouhetted against a blue sky…

Hyacinth Bean Vine – We started the hyacinth bean vine from seed, planting them all along one side of the front arbor, then waited and waited for it to come up. It finally did, but the leaves were being chewed to pieces and it didn’t look happy at all. Since the garden is pesticide free, the offending leaves were removed and it was given liberal doses of Annie Haven’s Authentic Brand Manure Tea. Gradually it grew stronger, whatever was chewing it moved on, and buds began to form. By September everyone was asking what the beautiful purple flowering vine was.
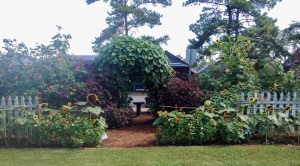
The back side - Moonvine on the arbor with the red leaf hibiscus on either side...

The back side – Moonvine on the arbor with the red leaf hibiscus on either side…


Moon Vine – The moonvine was planted on the back arbor and was the last one we had in stock from spring (They’re easily grown from seed too.). For the longest time, it seemed to be all leaves until buds began to form late in the summer.  Just about the time it threatened to engulf the arbor and everything around it, the fragrant nighttime blooms began to open each evening and were still open each morning.
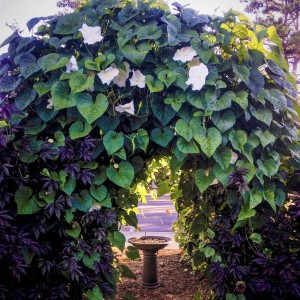
Late summer - the moonvine and red leaf hibiscus have grown together...

Late summer – the moonvine and red leaf hibiscus have grown together…

Mandevilla Vine – A red mandevilla was planted on one arbor on the other side of the moonvine, and a pink mandevilla was planted on the arbor on the other side of the hyacinth bean vine.  The pink mandevilla was still growing strong at the end of October. The red mandevilla was swallowed up by the moonvine! Both are heat-loving vines and quite beautiful and carefree.

Cuphea hyssopifolia, Mexican heather – Yes, yet another Cuphea and one for the  bees.  This one is a mounding annual that’s just right for filling in spots toward the front of a flower bed. Bees love it, and it’s virtually maintenance free.

Otomeria – A plant I’ve never grown before this summer but that was very impressive in the garden! There were only two, and you may not have noticed them. They love our heat and hopefully will be available for you to try next summer. The two in the garden were planted in August and bloomed until the end of October, when they were finally pulled out. They offered clean white blooms on sturdy mounding plants.
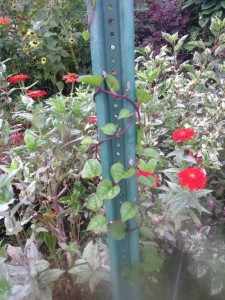
Malabar spinach vine

Malabar spinach vine

Malabar Spinach – Not spinach at all, but an edible and heat loving vine with pretty purple flowers. Like the otomeria, this was another fun plant to try that was also new to me. It did extremely well, planted late, growing up each arbor and up the very ugly 2 hour parking sign. If you’d like to learn more about this fascinating plant, click HERE.
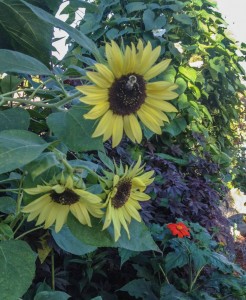
One of the many sunflowers in the garden...

One of the many sunflowers in the garden…


Rudbeckia ‘Indian Summer‘ – A sturdy annual Black-eyed Susan with large blooms, I’m going to leave these in the ground in hope that they’ll come back next year. We shall see!

Lantana – A couple of lantana were placed at the back of the sunflowers where they’d get the most sun. They were planted quite late (August) so didn’t have much time to develop. I’m going to leave them in those spots to see if they’ll return next year. They might if the winter is mild enough.
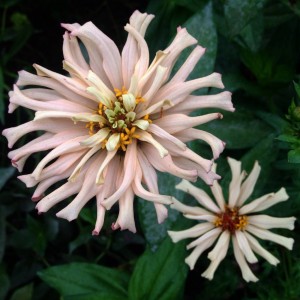
Cactus zinnia...

Cactus zinnia…

And the rest….

Assorted tip cuttings of succulents were placed at the front corner by the sign and began to really take hold by the end of the summer.  A rosemary plant was left in from the previous garden and a perennial Cardoon was placed on the end of one bed for its spiny, silvery foliage. A few dwarf purple ruellia, Mexican petunia,  were added by the back rose arbor. Finally, a couple of shade-loving torenia were planted under the sunflowers (They were just right to see from a child’s perspective!).

Dwarfed by the sunflowers...

Dwarfed by the sunflowers…

So, there’s your plant list if you’d like to have a similar summer garden next year. Please don’t feel tied to just these plants, though.  So much of the  joy of gardening involves trying new things and discovering how they work in your landscape. Meanwhile, for now, our winter garden is being planted gradually and offers an entirely different set of possibilities, again some from seed, others from transplants. I hope you enjoy the view!

By Kris Blevons
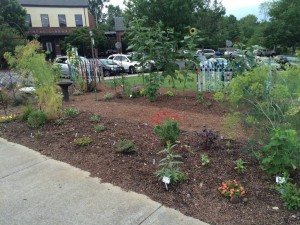


Miniature Conifers – Just Right For Miniature Gardening and More

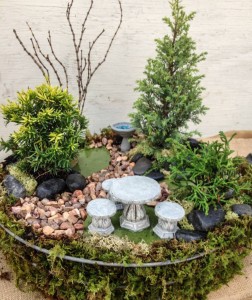
It has been quite some time since we’ve had dwarf shrubs and tiny pots of conifers available, and, with the rise in popularity of miniature and container gardening, I decided it was time to see what might be worth getting in for fall miniature gardening projects. Truthfully, these aren’t just for that purpose but can also be used in containers, and all of them are suitable for the garden too.Miniature Garden with Dwarf Evergreens

With this in mind I placed the order with a very reputable grower in the Northwest. And, even though they’re from quite a distance both in miles and climate, I’m hoping these selections will work here as well. I worked with the salesperson to find the best possible plants for the Southeast, and these cultivars are interesting and not too expensive if you’d like to give some a try.

The day finally came when they arrived, and each one was unpacked and watered, then placed in flats and set into the nursery. I found time the other day to put together a couple of miniature gardens as examples of what can be done with these diminutive offerings. The small evergreens really add a sense of reality to a miniature landscape.

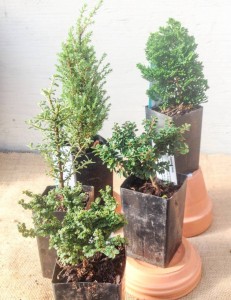
Miniature conifers. Front-Back L-R: Ulmus parviflora 'Hokkaido';Cotoneaster microphyllus 'Thymifolius'; Ilex cremate 'JerseyJewel'; Juniperus communis 'Miniature'; Chamaecyparis obtusa 'Thowell'Here also are pictures of a couple of groupings I pulled together to give you an idea of what is available as of October, 2014. In the first picture, left-right and front-back, they’re as follows:
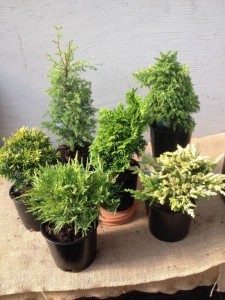
Ulmus parviflora ‘Hokkaido’: This tiny dwarf Chinese or lacebark elm should only grow 1″-2″ a year. It’s much sought after for bonsai, trough, and miniature gardens, and its bark exfoliates with age. It may grow to just 1′ tall over a period of 5 years.

Cotoneaster microphyllus ‘Thymifolius’: Thyme leaf cotoneaster. This tiny version has red berries just like its larger relative, and it’s branches can be trained upright to form “trees” in a miniature garden.

Ilex crenata  ‘Jersey Jewel’:  A holly with unique structural form, this one is also good for rock gardens.

Juniperus communis ‘Miniature’: A slow-growing ( 2″-4″ a year) bluish-green juniper with a narrow growth habit. Also good for rock gardens in part shade. Mature height is 3′  and 1′ wide.

Chamaecyparis obtusa ‘Thoweii’: A narrow upright specimen, it will grow roughly 3″-6″ a year. It matures into a fairly narrow tree. Errant branches can be pruned to maintain the spire-like shape.

Miniature conifers. Front-Back L-R; Juniperus pfitzeriana 'Golden Joy'; Juniperus horizontalis'GoldStrike'; Taxus cuspidata' 'NanaAurescens'; Chmaecyparis obtusa 'Nana Lutea'; Juniperus communist 'Gold Cone'; Cryptomeria japonica 'Twinkle Toes'Interesting choices, right? Here’s another grouping, again L-R and front-back:
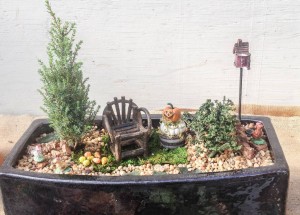
Juniperus x pfitzeriana ‘Golden Joy’: This juniper has a spreading habit and will get larger, increasing in size by 3″-6″ a year. Still, an interesting choice for a container until it outgrows it; then find a place for it in the landscape.

Juniperus horizontalis ‘Gold Strike’: Vivid yellow foliage on this spreading juniper makes quite a statement in a container. This one will need protection from our hot summer sun; give it some shade, especially in the afternoon. It’s a slow-growing, spreading dwarf juniper with a mature height of roughly 6″ and ultimate width 6″ in 10 years.

Taxus cuspidata ‘Nana Aurescens’: The new growth of this dwarf spreading (3′-4′) selection of Japanese yew is golden, hence the name ‘Aurescens’. Growth rate is estimated at 3″-6″ a year and ultimate height is 2′. Best grown in part shade, where foliage color will be a bit more chartreuse. Please be sure you have really good drainage if you try to grow this yew since it won’t tolerate wet, poorly drained soil.

Left: Juniperis communis 'Miniature' Right: Ulmus parviflora 'Hokkaido'

Left: Juniperis communis ‘Miniature’ Right: Ulmus parviflora ‘Hokkaido’

Chamaecyparis obtusa ‘Nana Lutea’: New growth on this golden dwarf Hinoki  cypress  is a vibrant yellow, and the growth rate is 3″-5″ a year. It’s a beautiful specimen for containers or the small garden, rarely growing larger than 3′, with an upright, irregular, pyramidal habit.

Juniperus communis ‘Gold Cone’: Eventually this juniper will reach a height of 3′-5′ but has a narrow growth habit of only 1′-2′.

Cryptomeria japonica ‘Twinkle Toes’: A selection with very tight, congested foliage, it has a conical shape and irregular habit. An interesting specimen at its mature height of 2′-3′.

I don’t know about you but more than a few of these are now on my “want to grow” list, whether it’s in a miniature garden,  a pretty pot, or placed in a special spot in the landscape. Best of all, the pots are really small, so there’s no major hole digging to do!

We will have these in stock until they sell out; so, if you’re interested, come in and take a look soon. If you miss out on this selection, next spring will be your next chance!

Watching the Butterfly Migration… And Transitioning the Summer Garden to Fall

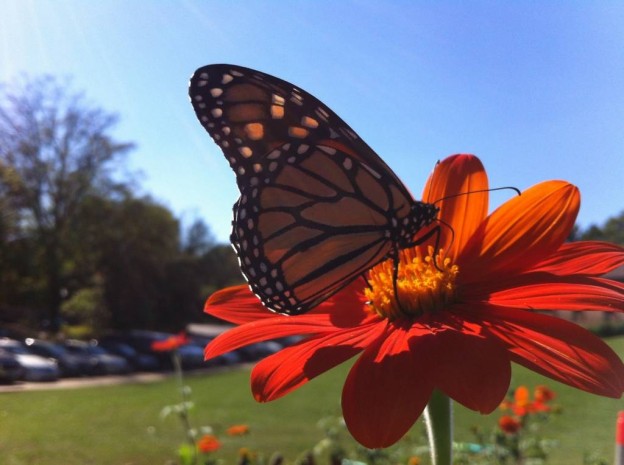
Tithonia - Mexican sunflowerThe other day I slipped across the street to check the ‘Better Late Than Never’ garden – ostensibly to check new transplants for water. Really, though, I wanted to see if the butterflies were still there. Now, not just any butterflies (Though I admit I’m partial to them all.) but the imperiled monarch butterflies, who, I was told, are coming through now on their migratory paths. And they were still there, sailing through and landing on the Tithonia rotundifolia ‘Torch’,  (Mexican sunflower) feeding on the bright orange blooms. I’m doubly glad now that I left it standing while it was still in full color. I’ve been planting the winter garden under cover of its thickened stems, fully weighted down with its nectar filled flowers.

Monarch butterfly on tithoniaWhether these monarchs spotted the tithonia as they were coming through, or were a result of the butterfly weed  Asclepias tuberosa, is anyone’s guess. Butterfly weed and milkweed are the plants that monarch butterflies lay their eggs on – the caterpillars then eat the foliage, form their chrysalis and hatch to become the beautiful butterflies I was watching soar through the garden.Monarch butterflies on tithonia
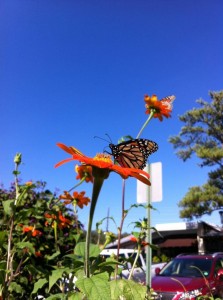
I called out to a mother and her young son about to get into their car.  “Do you see the butterflies? They’re monarchs!” Oh my goodness!”, she answered. “Look at all of them!” Her little boy stood, transfixed, watching them maneuver gracefully through the garden. I told him how special these butterflies are, and that since they’re on a long journey to Mexico, it’s very important that they find the flower nectar to give them strength and energy so they’ll be able to fly such a great distance.

Butterflies like these cosmos, zinnias and marigolds

Butterflies like these cosmos, zinnias and marigolds

Over the next few days more people stopped to marvel at the butterflies, oohing and ahhing at the sight. It’s been such a pleasure to share this experience as fall moves toward winter. Soon the tithonia will have to be pulled up. Until all the butterflies are gone though, I think I’ll leave well enough alone…

If you want a butterfly friendly garden too, provide sources of food, (They love zinnias, cosmos, marigolds, and  tithonia, to name a few.) and  plants they can lay their eggs on. (And that you will allow to get chewed up by the caterpillars!) These include  the asclepias mentioned above for monarchs. Parsley, dill and fennel are commonly planted for swallowtails.

Provide pesticide free plantings, and cultivate a tolerance for the less than perfect garden. Learn to live with leaves that have been munched – more often than not, the culprits causing the problems are simply moving through your garden on their way somewhere else! Simple things like grooming plants by removing yellowed and chewed leaves, and practicing good garden sanitation by keeping fallen leaves and other plant debris out of the garden, will go a long way toward creating a healthy environment for your garden, you, and the creatures that inhabit its space. 

By Kris Blevons


Fall Container Planting…(There’s More Than Just Pansies Out There!)

Fall Planter With Chamaecyparis 'Crippsii'The temperatures are hopefully trending downward, and you’re thinking about redoing your summer plantings. There seem to be so many choices; it’s normal to feel overwhelmed at the garden shop, even though you probably thought you had it all figured out before you left home!
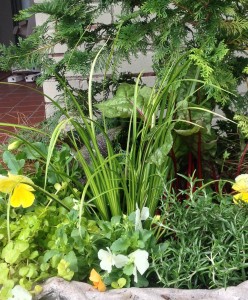
I’ve seen the slightly dazed look  on folks’ faces as they peruse the tables upon tables of pansies, violas, snapdragons, various herbs and ornamental greens. Invariably they turn to us with a bewildered look and say, “I have (insert number of pots here) and need to fill them. Can you help me?!”

Assuming you have at least a half days worth of sun for flowers, the usual pansies and violas will work just fine all on their own if you really don’t want to do a whole lot of thinking; but there’s so much more out there to play with! From the simplest addition of beautiful green curly parsley (It adds such great color and texture to a planting.) to a more complex mix of greens, grasses and herbs, there’s no limit to fun combinations.

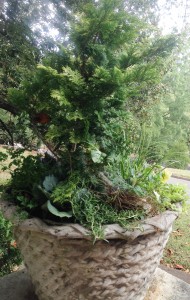
Close up - fall planterThe large planter here is one of a pair, used at the top of stairs leading onto a wide open porch. I took my color cues from the red brick and cream color of the house in choosing my plants, using predominantly yellow with the evergreen Chamaecyparis ‘Crippsii’, yellow variegated  Acorus ‘Ogon’, golden creeping Jenny to trail, and Matrix ‘Lemon’ pansies. To this I added ornamental red mustard, and a chard with red stems called ‘Charlotte’. These will add big, bold leaves, beautiful foliage color, and added height.
Next, more flowers  with a trailing white pansy called Cool Wave White,  a few orange violas and a trailing rosemary  –  the brown grass trailing off to one side and tucked in the back as well is Carex ‘Toffee’. When the sun shines on this grass it glows!

Fall Planter - Cham 'Crippsii''These planters are quite large and can support this variety of plants. In smaller planters, a smaller shrub, some curly parsley, pansies and a trailing plant might be sufficient. Remember, more is always better in planters and windowboxes to give them a lush overflowing feel.These planters will make a definite statement as they grow out.
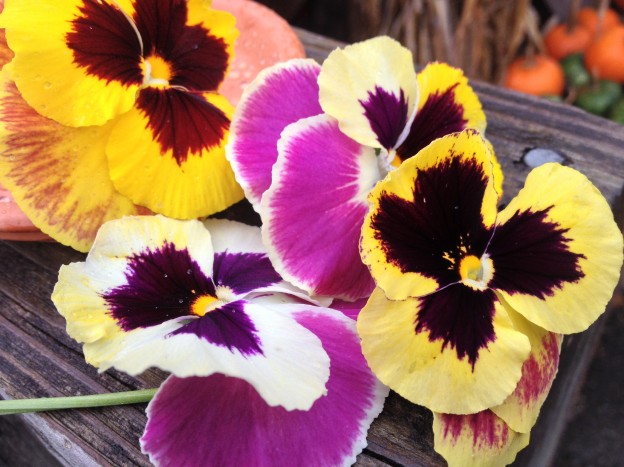
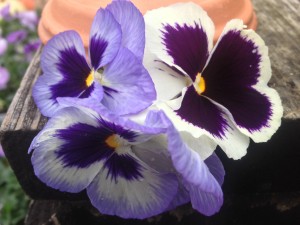
  • Tips For Maintaining Your Fall/Winter Planters:
  • – As always, keep faded blooms deadheaded.

– Don’t overwater.  As the weather cools in the fall and winter, it’s best to let planters go a bit drier.

– If plants like ornamental cabbage and parsley do get dry between watering, you’ll have some yellow leaves. Groom these and other plants regularly, removing any yellowing leaves that you see. Remember, they’re not going to turn green again!

– Watch the weather and be prepared to cover your planters if freezing temperatures are forecast. Prior to covering, water them thoroughly. Uncover them as soon as the temperatures are above freezing.

Some Interesting Choices To Use With Pansies And Violas In  Winter Planters:

  • Chamaecyparis obtusa – various selections;  they make excellent evergreen accents.
  • Cupressus ‘Carolina Sapphire’ – beautiful blue evergreen, good in the landscape also.
  • Rosemary – large evergreen herb, upright or trailing varieties.
  • Juniper – ‘Blue Point’
  • Thuja – ‘Golden Globe’ arborvitae, nice, rounded form.
  • Heuchera & Heucherella selections – evergreen perennials, interesting as a foliage element – airy blooms in spring.
  • Acorus – adds another texture to plantings; grasslike variegated leaves add color as well.
  • Ornamental Kale – ‘Redbor’ and ‘Winterbor’ are two very upright growing forms of kale,  but there are many others. ‘Red Russian’ and ‘Lacinato’ are also edible. In a normal to mild winter they’ll last til spring. As heat returns, they’ll “bolt”, or bloom, adding yellow flowers.
  • Ornamental Mustard – These add a bold leaf and a darker color to compositions.
  • Chard – another beautiful and edible addition to containers or garden beds.
  • Curly Parsley – Adds texture in winter plantings; also a beautiful shade of deep, clean green.
  • Golden Creeping Jenny – A useful trailing element, it may get knocked back in a freeze but adds color until then and will come back as temperatures moderate.
  • Muehlenbeckia, Angel Vine – tough as nails trailer. Will lose it’s leaves in a freeze but normally reappears in the spring. Protect it and it will be green through the winter in Birmingham.
  • Sweet Alyssum – not available for long in fall, but a nice addition to planters until it succumbs to freezing temperatures.
  • Poppies – available through the fall; worth trying if you haven’t. They hunker down through the winter but will fill out in the spring, adding their bright, papery blooms to liven any planting. Take care to not overwater under cool winter conditions.


Fall Favorites For Spring Flowers…A Primer On Pansies & Violas

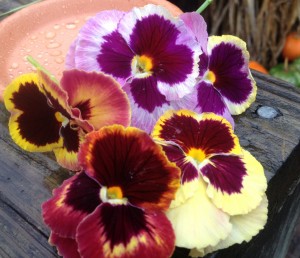
Pansy Matrix Ocean Breeze MIx

Pansy Matrix Ocean Breeze MIx

Pansy Matrix Sunrise

Pansy Matrix Sunrise

Fall is planting time here in Birmingham, and pansies and violas are the stars of the show. Even if folks plant nothing else, it’s so easy to put a few of these spring beauties in a little spot in the garden, a pot, or a window box for the winter.

Panola Purple Face & Viola Sorbet Blueberry Cream

Panola Purple Face & Viola Sorbet Blueberry Cream

Pansy Dynamite Scarlet/Viola Sorbet Antique Shades/Viola Penny White

Pansy Dynamite Scarlet/Viola Sorbet Antique Shades/Viola Penny White

Pansy Majestic Giants Patricia

Pansy Majestic Giants Patricia

Pansy Dynamite Scarlet/Pansy Matrix Orange/Viola Sorbet Yellow

Pansy Dynamite Scarlet/Pansy Matrix Orange/Viola Sorbet Yellow

Oh but what a dizzying selection greets you at the garden shop! Tables upon tables of blooms…some diminutive, others large, some with solid colors, others with charming “faces”, all waiting for you to decide which of them to choose to add beauty to your landscape next spring – and even some color through the winter.

One rainy Saturday morning I put together a few sample combinations of pansies, violas, and mixtures of the two to show you a few options available for your planting pleasure…but keep in mind this is just the tip of the iceburg when it comes to playing with color in your garden!

Remember to think about what else will be blooming in your garden come spring.  You may not want a pink pansy in front of your orange azaleas (Though I’ve been known to favor pink and orange in certain instances!), so think it through before you decide.

Another consideration to keep in mind is the color of your house.  My first summer in our home I decided I wanted an “English Garden” look out front, using pinks/purples and silvers.

I was so caught up in my vision that I forgot this color palette would look like blech in front of the brick – I was unhappy with it all summer and couldn’t wait to tear it all out come fall.

Now I use brighter colors and include poppies –  it looks so much better!  I save the more muted colors for the back of my house where I play with my “English Garden” and plant everything  I want to – including foxglove and snapdragons for spring interspersed with pansies and violas.

Viola Sorbet Purple Duet/Blue Blotch/Banana Cream

Viola Sorbet Purple Duet/Blue Blotch/Banana Cream


The difference between a pansy and a viola is primarily size and shade tolerance. The pansy bloom and plant is larger. Pansies need at least half a day of sun to bloom well; full sun all day is best, but remember, in the spring as the temperatures rise, they’ll play out faster in so much sun.

Violas are smaller in size and the blooms are smaller as well. However, violas put out massive amounts of small blooms and the plants attain a nice rounded size which makes up for those diminutive  flowers. Violas can tolerate less sun, though, as with the pansies, at least half a day sun is best.

As for most plants, fertilizing is important.  Plant Tone is a good natural (and stinky!) amendment to add to beds in the fall.  Incorporate  it with a first feeding of Osmocote, which will release its nutrients until the soil gets cold.

Mid-winter apply  calcium nitrate to add extra nitrogen. After planting, always water your plants in and apply a good layer of mulch to keep roots warm through cold spells.While plants are blooming be sure to deadhead, (pinch off faded blooms) to keep more buds coming. If you leave old blooms on to die then set seed, this creates a messy looking plant that’s putting all its energy into that seed, not into future blooms.


This is especially important to remember come spring. Don’t be overly concerned if plants aren’t blooming in the middle of winter. This is normal – especially if we have cool, frosty  nights. Remember, the real reward comes in the spring!

Pansy Mariposa Peach Shades

Pansy Mariposa Peach Shades

Be mindful of winter temperatures – this is the time to watch the weather reports each morning or evening. Pansies are tough plants, but help them out by making sure soil in beds or planters is moist if there are freezing temperatures forecast.

Hopefully  these suggestions and tips will be helpful for any of you that get overwhelmed by the choices available…happy planting!


Poppies! Plant Some This Fall!

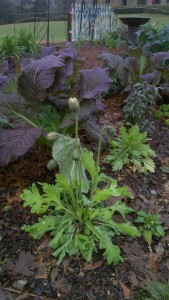
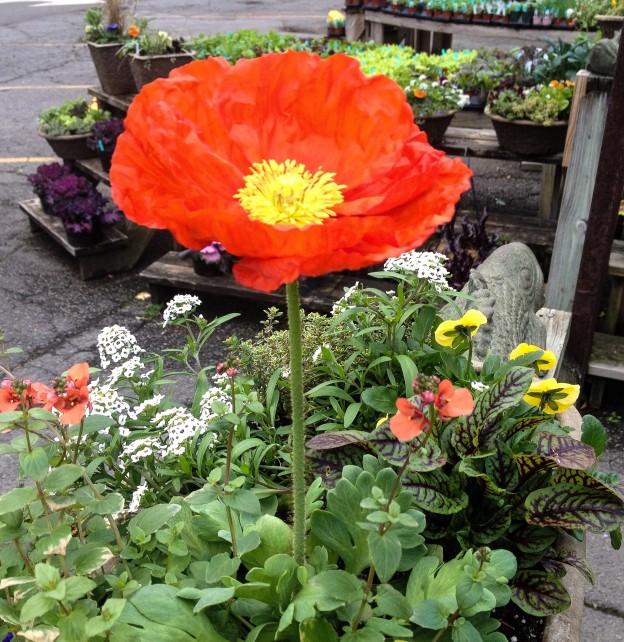
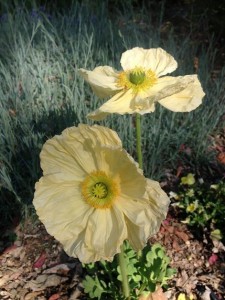
I love poppies. Specifically, papaver nudicaule, or Iceland poppies, bright harbingers of spring in the Birmingham area.

IMG_2767Best planted in the garden in a sunny spot that won’t stay too wet, they’ll grow through the winter getting bigger and bigger. The first fat bud uncurling signals spring isn’t far off, and once they begin to bloom they continue, until, finally, they fade in the true heat of late spring.
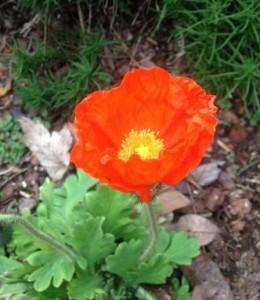
Most people are skeptical when I go on about poppies – until they try them. (I admit I’ve had to work hard to talk some of you into planting them, they look so scrawny and pitiful in their little cell packs or 4″ pots.)

Poppy Care:

Plant them in a sunny, well drained spot.

When you remove them from their pots, disturb the root ball as little as possible. I know, this is contrary to what you’ve always heard about planting. But, trust me on this, poppies don’t like their roots messed with.

Don’t plant too deeply. Water them in after planting, then allow them to dry out between watering. Do not overwater!

When they begin to bloom, deadhead, or cut off faded blooms. This will ensure the energy of the plant will go toward producing more bright flowers, not a poppy seed pod.

IMG_1658Cut some to bring inside! Here are some tips for cutting your poppy blooms:
Wear gloves. Poppies secrete a liquid that can irritate the skin.

Cut stems early in the morning when the most moisture is in the stem. The best stage to cut your poppy is when the bud is just beginning to stand up straight and is slightly colored.

– Cut the stem with a sharp pair of scissors so the stem doesn’t flatten or get squished.

Sear the cut end of the stem with a match or dip it in boiling water to seal it. This will keep the moisture in the stem and help the flowers last as long as possible.

– Place your stems in cold water before moving them to their place of honor in your home or as a bright gift for a friend!

Poppies…one more in a long line of beautiful flowers for the spring garden. Don’t miss out this year – find a sunny spot and plant a few!

By Kris Blevons

Snapdragons – Plant This Fall for Cut Flowers Next Spring!

snapdragons, poppies and a pass-a-long white dianthus...

snapdragons, poppies and a pass-a-long white dianthus…

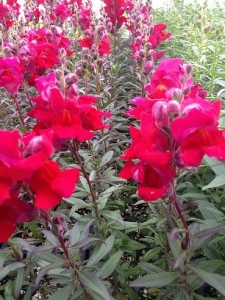
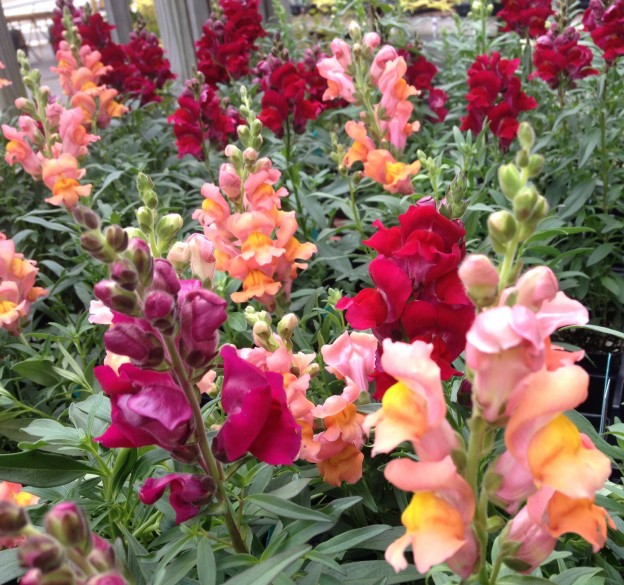
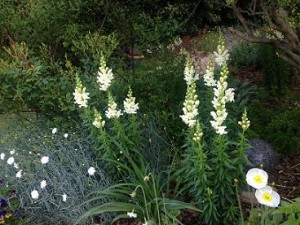
Snapdragons! These childhood favorites certainly deserve a space in our spring gardens. Planted in the fall, these annuals will survive a normal Birmingham winter and give us glorious springtime color.

I’ve discovered that since their bloom time always seems to come after the pansies and violas have begun to fade in the late spring heat,  that placing them in garden beds intermingled with perennials, roses and poppies is the best way to enjoy them. There’s simply nothing like a spring garden with snapdragons in it – and they are beautiful cut flowers too!

IMG_0434Snapdragons can be purchased in the fall in cell pack flats and in larger pots as well.  Many times they’ll be  in bloom. When theses initial bloom spikes are finished, cut them back below the faded flowers.  This will ensure they’ll branch and be fuller and more robust.  Through the winter the plant’s energy will go into growing roots and strong leaves – the beautiful blooms next spring are your reward!
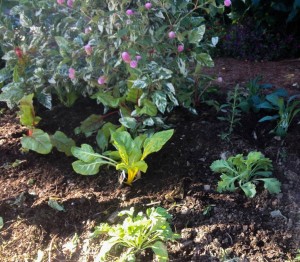
Be careful not to overwater your snapdragons, especially very young, newly transplanted ones. Let them dry out a bit between watering since their root systems can easily be overwatered at this stage and will not recover from it.  If they have been overwatered,  the plant will wilt, looking for all the world like it needs water. If, after being given some,  your snapdragons continue to look droopy,  it’s best to pull them out and try again with fresh plants.

By Kris Blevons

Planting The “Better Late Than Never” Garden For Fall

Chard and poppies mingling with pink gomphrena and the variegated hibiscus...

Chard and poppies mingling with pink gomphrena and the variegated hibiscus…

The owner of Oak Street Garden Shop, Billy Angell, and I have different approaches to gardening, mostly the result of our personalities, I think. Billy is very methodical and precise (not a bad thing), and I’m admittedly more undisciplined and haphazard in my gardening efforts.

I can almost feel him cringing as I yank just some of the  zinnias and other spent plants from the “better late than never” garden the other morning, rather than pulling everything out and starting  fresh with a completely new planting.  I’d gone in earlier than usual to take a look and assess what needed to be pulled out in anticipation of the fall/winter garden. I’ve been worrying that

Bachelor buttons and snapdragons...

Bachelor buttons and snapdragons…

as we get busier and busier with the fall planting season, not to mention the craziness of the holidays just around the corner, the garden could fall by the wayside; so the pressure is on!

Now, it wasn’t strictly just a pull some of the plants out mission. I had also brought a smattering of plants with me to plant here and there as holes conveniently opened up. A few iceland poppies, some snapdragons, bachelor buttons, foxglove, red mustard, chard, and  kale were all on my to-do list to plant.  Now, how all this mish-mash is going to turn out is anyone’s guess, since I’m not starting with a completely blank slate…but that’s half the fun!

Foxglove...under the sunflowers...

Foxglove…under the sunflowers…

This is how I’ve gardened at home for years. In the fall, I pull out spent flowering annuals a little at a time; and, as I do,  I add to the garden as holes open up. This works out well because not everything I want is available all at once, and the garden turns over to a new season gradually as summer annuals mingle with fresh plantings.

This year bachelor buttons, foxglove, and iceland poppies appeared in late September; so they’ve gone  into the first available spaces in the garden. More of them will be planted as room opens up. Summer annuals that are still hanging in are left to continue attracting late season butterflies and bees until the last will finally be pulled out to make way for the final winter plantings of pansies, violas, and, by seed, larkspur and delphinium. This planting method works well in beds that are a mix of perennials, annuals, and shrubs, too.

Poppies...

Poppies….

So, in the “better late than never garden”, the zinnias, cleome, and the few sunflowers I pull out (There are a lot more sunflowers to go!) make room for a few of each of the aforementioned snapdragons, iceland poppies, foxglove, bachelor buttons, kale, and mustard.  We’ll top dress the beds with PlantTone too and will see how the compost is looking in the bins, adding some of it if it’s ready.

In the coming days and weeks the garden will undergo even more changes until, finally, the last plants are in. Then it’s a waiting game until spring, when the real show will begin. Just don’t be surprised if you see us still planting in the dead of winter…I think the “better late than never” garden will always be just that!


Fall flowers…Pansies and More!

So many to choose from!

So many to choose from!

We’re so lucky in Birmingham to be able to plan and plant our winter and early spring gardens in the fall, using fresh annuals, like the colorful pansies and violas, as well as  various vegetables – ornamental and edible kale, cabbage, and pac choi are just a few. With summer’s heat behind us, time spent in the garden is a pleasure, not a chore.

IMG_1851


Soon all the tables in the nursery will be laden with plants of all kinds – this is such a great opportunity for you to create the most beautiful early spring garden!

IMG_1572Start with pansies and violas for beds and planters, then add supporting players. Some of the prettiest additions to your winter/early spring garden are foxglove with their tall spires of white, pink and purple, snapdragons – they are worth waiting for – poppies, with their bright orange, yellow, red and white papery blooms, and the bluest blue bachelor buttons.
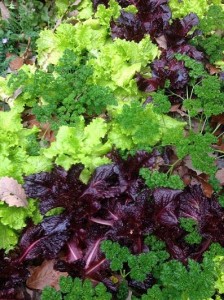


Curley parsley and lettuce...

Curley parsley and lettuce…


There are so many leafy greens to interplant in containers and beds too – colorful chard, kale and mustard are so beautiful and edible as well. Curly parsley is another staple of the winter garden, adding its rich green leaves and texture to any composition.

Finally, don’t overlook the unassuming fall bulbs. Planting a bulb is a leap of faith for some, while other folks plant a few every year to add to their spring display. It’s truly amazing that such  beauty lies in something so seemingly drab.

Smart gardeners know to look for all of these in the fall, planting them in anticipation of a gorgeous spring display!


Fall Planting Tips To Create A Great Spring Garden:

  • Amend your soil. You might think since you followed our advice and added soil conditioner, PlantTone, cow manure or compost  to your beds last spring you’re done. Not so fast! High temperatures break down soil amendments quickly, and plants take up nutrients. Continue adding to your soil every season. Healthy, loose soils create healthy plants.  (Instead of putting fallen leaves to the curb, start a compost pile with them, or run over them with your lawn mower and throw them in your beds. They’ll decompose and add to your soil’s structure and health.)
  • After you get your plants home, be sure to keep them watered, especially if you can’t plant them right away. We water small transplants in 4″ pots and cell packs at least once a day, especially if it’s hot and sunny. Of course, less water is required in cloudy, cool conditions. Right before you plant them, be sure they’re moist.
  • Early in the season while the soil is still warm, you can still plant with Osmocote. However, later in the winter months, use Calcium Nitrate to feed your plants, especially if the foliage of your pansies turns a reddish color. Remember, you’re planting for spring color, though on warm days through the winter you should also have some blooms.
  • Water your bed thoroughly after planting, and keep it watered while your transplants are getting their feet settled in their new home. Take care not to overwater, though, especially as the temperatures cool down going into the winter months.
  • Mulch your beds with shredded mulch or pine straw  to keep soil temperature around the roots as warm as possible.
  • Deadhead your pansies and violas! I can’t stress enough how important this is. A pansy that you leave a dead bloom on will form a seed there, instead of putting that energy into more flowers. Make a practice to walk through your garden at least once a week, taking a good look at your plants and deadheading  faded blooms. If you’ve missed some, you’ll see the seed pod beginning to form. Pinch any and all off! This will go a long way toward keeping your pansies happy!


– Posted using BlogPress from my iPhone

Bachelor Buttons…Plant Some This Fall for a Blue, Blue Spring!

Newly planted...

Newly planted…

I planted some bachelor buttons, Centaurea cyanus ‘Blue Boy’, in my garden the other day. Usually transplants of these beautiful spring to early summer bloomers are hard to come by until very late fall almost into winter, and I’ve planted them that late with success.

So blue...

So blue…

This year, though, one of our local growers already has some available! So, if you’re in the Birmingham area, make some room in your garden so you can enjoy the bluest of blues next spring like I do every year along with my roses, foxglove, and snapdragons.

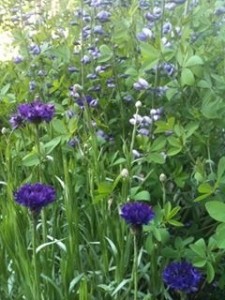
To help you understand where they will work best for you, keep in mind that they’ll grow to 3′ and become very full, especially if you cut them back a bit early in the spring. This isn’t absolutely necessary, but I’ve found it keeps mine from sprawling and they still get quite tall. One of my best combinations (Quite by accident!), and one I’ve repeated, is bachelor button and Baptisia shown here.

With Baptisia in the spring...

With Baptisia in the spring…

You may happen upon your own beautiful combinations though. Just remember to give them some sun and don’t baby them too much. Average soil is fine since they are really amazingly tough plants, and only the heat of summer will end the blue wave of carnation like flowers.

The blue of a bachelor button is simply incomparable – cornflower blue. It was once called “boutonnière flower” because the small, bright blue flowers were once commonly used by bachelors tucked into buttonholes on their suits. It’s also been called “Ragged Robin” and “Cornflower”.

Many of you have noticed the bachelor buttons in our sign planter in front of Oak Street Garden Shop each spring. By the time you notice them blooming, it’s too late to plant them. Don’t miss out this year!

Bulbs – Plan Now For Spring Beauty In Your Garden


So many to choose from...

So many to choose from…

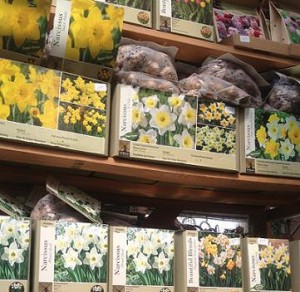
Want to be extra happy next spring? Start planning now for your spring garden to include more bulbs. They’re so easy to overlook in the fall since they don’t have flashy flowers to tempt you, but you’ll be so happy you took the time to plant them when their pretty flowers appear next March, April and May!

This fall’s bulb shipment has arrived, and the varied selection includes packages of tulips already mixed in beautiful color combinations. The important thing to remember when buying tulip bulbs is to buy them early and refrigerate them. Other bulbs you can purchase early simply to get the best selection, then keep them cool and dry until the time is right for planting all your bulbs, generally November into December here in the south.

Refrigerating the tulip bulbs at least 8 weeks is important for all of us who live in our warm climate where the winter soil temperatures don’t get cold enough for tulip bulbs to flower well. In the north, folks can buy their bulbs and plant them directly in the soil in the fall. Here, we’re tricking them into thinking they’re going through weeks of  necessary winter chilling.  Remember also that  tulip bulbs  should be treated like an annual and pulled out when they’re finished blooming.

Narcissus - Jack Snipe

Large blooming 'Ice Follies'

Large blooming ‘Ice Follies’

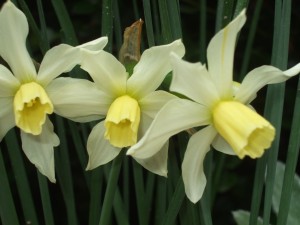
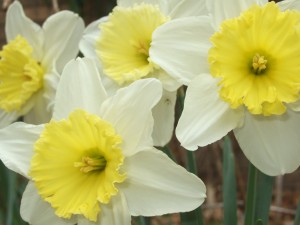
In addition to the tulip bulb mixes, there are also many packages of narcissus.  The smaller blooming varieties are perennial here and won’t need to be replanted each year.  With names like ‘Sailboat’, ‘Minnow’, ‘Sun Disc’, ‘Thalia’ and ‘Baby Moon’,  just to list a few, how can you resist? These smaller bulbs come in packages of 12,  and it’s best to plant them in groups in your garden, to make more of an impact each year.

For all of you who like the big yellow and white blooms of daffodils, we have those too. ‘Dutch Master’ and ‘Mount Hood’ are favorites with their big blossoms on tall stems, and just a few in a vase are so beautiful.

Lycoris radiata

Lycoris radiata


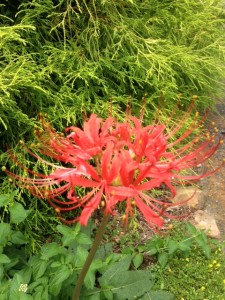
Each year we also have some of the lycoris , or red ‘Surprise Lily’ bulbs.  You’ve no doubt seen them blooming around town late in the summer, the long stems appearing, seemingly out of nowhere with their spidery red blooms. I have forgotten where I’ve planted them, and it’s always a happy surprise when they show up again each year. When they’re finished blooming, strap-like foliage will appear, persist all winter and then die down in the spring.

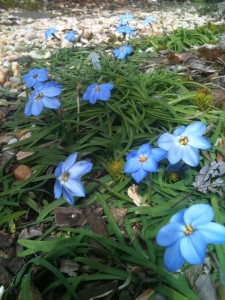
Ipheion 'Rolf Fiedler'

Ipheion ‘Rolf Fiedler’

Another of my favorite bulbs is the old fashioned ipheion. It’s a tiny naturalizing bulb, meaning it will spread gradually where it is happy, generally in a sunny, open area. They come in shades of blue, purple and white; however, the one we have is the sky blue ‘Rolf Fiedler’.  There are 18 tiny bulbs in a package, easy to plant and worth it too! You’ll see blooms late spring to early summer on these diminutive plants.

Another good one to have in the landscape or pots is muscari or grape hyacinth. These small bulbs  will spread if conditions are favorable and add even more color to the early spring garden.

Planting Tips For Bulbs:

Always plant your bulbs twice the depth of the bulb itself. For example, if a tulip bulb is 2″ long, plant it at least 4″ deep. There’s no need to plant tulip bulbs any deeper here in the south. The reason folks up north plant deeper is to protect the bulb from freezing. Our soil doesn’t stay below freezing long enough for this to be an issue.

Fertilize with a bulb booster fertilizer at planting time and fertilize established bulbs in the fall with a granular fertilizer as well. If you miss this fall feeding, you can also fertilize them in February with a liquid, even-formula fertilizer like Jack’s . A liquid feed is better in the spring since it will reach the root system faster than a slow release granular will.

By Kris Blevons


Container Gardening With Herbs – The Basics

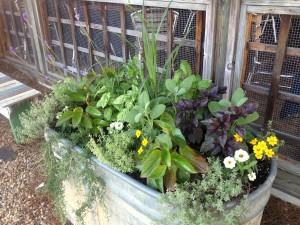
for summer - lots of herbs and some flowers too...

for summer – lots of herbs and some flowers too…

Herbs are beautiful additions to any container garden, either on their own or combined with seasonal flowers. They add colorful leaves, texture, scent, and culinary usefulness to plantings and attract bees and other beneficial insects as well.

Planting Basics:

Use as large a pot as possible.

Use good quality potting soil.

Fertilize lightly.

Maintenance of Herbs in Containers:

Herbs often suffer from overfertilizing, overwatering, and overcrowding. Water when dry so that water runs out the bottom of the container. Remember pots will dry out quickly in the heat of summer and during windy conditions. Empty water that may be standing in saucers. Clip your herbs regularly. This will keep them from becoming leggy and overcrowded, especially if they’ve been used in combination plantings.  Harvest herbs in the morning and just prior to bloom. Near the end of the season, allow your basil to bloom; the bees love it! Finally,  never prune woody herbs like rosemary to bare wood.

Using Herbs in Combination Plantings:

Trailing pink vinca works well with sun loving herbs of lavender, sage and chives in this trough planting....

Trailing pink vinca works well with sun loving herbs of lavender, sage and chives in this trough planting….

Start with the herbs you’d like to most use, either for an ornamental or culinary addition. Knowing their growth habits is helpful in deciding their placement in your container.

For example, use chives for a grasslike effect; thyme, trailing rosemary, and oregano to spill over the edges; lavender or upright rosemary for height; and parsley and sage as fillers in containers.

Another idea is to use one herb in a pot and group many such pots together. A rosemary plant, once mature, will easily fill a large 14″ or bigger planter, as will lavender. Mid-size (10″- 14″) pots can be filled with parsley, chives, sage, French tarragon, or, more easily grown in the south, Texas tarragon. The larger the pot the better!

Annual Herbs Basil, Lemon Verbena, Lemon Grass (warm season); Cilantro, Dill (cool season); parsley (biennial).

Herbs and Succulents...

Herbs and Succulents…

Perennial Herbs Rosemary, Oregano, Marjoram, Thyme, Sage, Chives, Mint, Lavender, French Tarragon, Texas Tarragon, Savory, Hyssop, Lemon Balm, Catnip, Rue, Santolina, Fennel, Germander, Summer and Winter Savory.

Cool Season Herbs Cilantro, Dill, Salad Burnet, Chervil.

Plant Sizes

Small  – under 1 foot in diameter: Parsley, Dill, Chives (garlic & onion), Cilantro, Salad Burnet, Chervil.

Medium – 1-2 feet in diameter: Thyme, Tarragon, Basils, Mint.

Large 3 feet or more in diameter or over 4 feet high: Rosemary, Oregano, Lemon Verbena, Sage.

Sun/Moisture

Dry, sunny, Mediterranean conditions: Rosemary, Oregano, Marjoram, Sage, Lavender, Thyme, Tarragon, Germander, Santolina.

Cooler, afternoon-shaded locations: Mint, Cilantro, Dill, Chives, Parsley, Lemon Balm, Salad Burnet, Lemon Grass.

Common methods of propagation of perennial herbs: Divisions: Chives, Mint, Thyme, Oregano. Cuttings: Rosemary, Lavender, Sage, Winter Savory, Lemon Verbena, Rue.

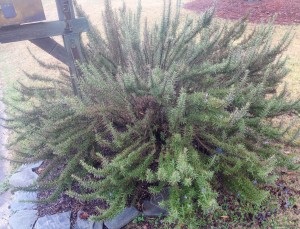
Rosemary looking a little rough after this past winter...

Rosemary looking a little rough after this past winter…

Pests & Diseases Of Herbs Careful cultivation of your herbs will help keep them healthy and less susceptible to pests and diseases. Provide adequate water when needed, plant with the proper spacing for the best air circulation, and place them in the right amount of sun. Chemicals, obviously should not be used on any herbs you plan to harvest. Insecticidal soap or a strong spray of water is generally enough to deter most pests.

Aphids – Soft-bodied insects found on new growth and easily controlled by a strong spray of water or insecticidal soap.

Whiteflies  Can be problematic, spraying the undersides of the leaves consistently with insecticidal soap is necessary to eliminate them. In large infestations they’ll fly out of the center of the plant in a white cloud when disturbed. An important point to keep in mind is that spraying with the wrong insecticide can make whitefly problems worse, since spraying with the wrong insecticide will kill important predatory insects and tiny parasitic wasps that help control whiteflies. These naturally occurring beneficial insects are the best way to control whiteflies, and whitefly outbreaks generally occur when this natural control is disrupted. The best course of action is to preserve beneficials by avoiding unnecessary insecticidal treatments.
Look HERE  for more information from Mississippi State University.

Leaf Hoppers – These insects hop from plant to plant so are known to spread diseases. Control with insecticidal soap spray.  Remove any garden debris each fall to reduce over-wintering sites. Thorough coverage of both upper and lower infested leaves is necessary for effective control.

Leaf Miner – Burrowing insects that live inside leaves and are identified by the white “trails” on the leaves. The best control is to cut the plant back and throw away (Do not compost.) those leaves. Common on parsley in particular.

Caterpillars – Always try to identify caterpillars before you get rid of them! Swallowtail butterfly caterpillars are commonly found on parsley, fennel, and dill. Bt and Sevin dust will control those you do want to eliminate, as will hand picking.

Powdery Mildew – Mildew is caused by too little air circulation. Thinning the plant and clipping back surrounding plants to improve air movement will help.

The following organic fungicide of baking soda and water can also be applied on your herbs:

1 Tbsp baking soda. ½ Tsp liquid soap   1 Tbsp light horticultural oil  in 1 gallon of water.

Always spray in the coolest portion of the day, avoid spraying when bees are active, and test this on a small portion of the plant first. The oil coats and smothers the fungi, and the soap helps the mix cling to the upper and lower portions of the leaf.

Latin names for herbs listed in this post:

Anise Hyssop: Agastache foeniculum;  Basil: Ocimum basilicum; Chives: Allium schoenoprasum; Garlic chives: Allium tuberosum; Cilantro: Coriandrum sativum; Dill: Anethum graveolens; Fennel: Foeniculum vulgare; Germander: Teucrium chamaedrys; Lavender: Lavandula sp.; Santolina: Santolina chamaecyparissus, Santolina virens; Lemon Balm:  Melissa officianalis; Lemon Grass: Cymbopogon citratus; Lemon Verbena: Aloysia triphylla ; Marjoram: Origanum majorana; Mint: Mentha sp.; Oregano (Greek) Origanum heracleoticum; Parsley: Petroselinum crispum; Rosemary: Rosmarinus officianalis; Rue: Ruta graveolens; Sage: Salvia officianalis; Salad Burnet: Sanguisorba minor; French tarragon: Artemesia dracunculus; Texas tarragon: Tagetes lucida; Thyme: Thymus sp.  Winter Savory: Satureja Montana; Summer Savory: Satureja hortensis

Crotons: Beautiful Foliage for Fall Color!

image

It’s after Labor Day, and fall is right around the corner. After going through a long, hot summer, planters and beds look, shall we say, a tad tired. Well, of course, they are.

If you planted pots at the first hint of warm weather in April, no matter how diligent you were at deadheading and cutting back, many of your annuals have had enough of the endless heat and periodic dry spells by September.

Croton 'Sloppy Paint'

So, what to do?  Well, there are certainly the ubiquitous mums, and we’ll have plenty of them in all sizes and colors for you to use. But work the pretty fall hues of yellow, orange, or red marigolds into your autumn flower planters, add a few ornamental pepper plants, and now you’ll be getting somewhere! Finally, to really take it up a notch, add some colorful foliage.

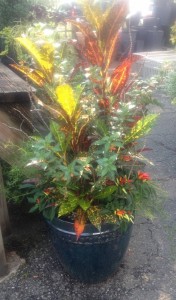
Croton 'Freckles' But “What colorful foliage?”,  you’re thinking by now. So glad you asked! What we have in mind are the brightly patterned leaves of crotons. Up to now you might have thought of them as simply a pretty houseplant for bright spots in your home.
But, luckily, these tough plants can also work beautifully outside too in combination planters or on their own.Croton 'Shoestring' Croton 'Mammy'

Some we’ve gotten in recently highlight the different sizes and patterning of the leaves. Who knew the hybridizers could come up with such variations! Even the names  – ‘Sloppy Paint‘, ‘Freckles‘, and ‘Dreadlocks‘, just to name a few –  bring a smile.

Croton 'Tamara'The best thing about crotons is that their coloration becomes more pronounced with plenty of sun, which is what the marigolds and other plants listed above prefer. Finally, surround your planting with pumpkins and gourds (or tuck a few into the base of your planting)  to create a festive tableau for fall…perfect!
Since crotons also do double duty as houseplants, bring yours inside when nighttime temperatures dip into the 40’s. Carefully remove it from your outdoor planter, and repot into a container just a bit larger than the rootball. Be sure your pot has a drainage hole. Spray the undersides and tops of the leaves with a soap spray to rid it of any insects that might try to hitch a ride indoors, and place your croton in as bright a spot as possible. Don’t overwater during the winter months, it’s best to let the soil dry completely, then water well.  During these colder periods of the year it’s growth slows, so fertilize no more than once a month with a liquid, even formula (20-20-20) fertilizer.


Malabar Spinach – A Beautiful Plant, And Tasty Too!

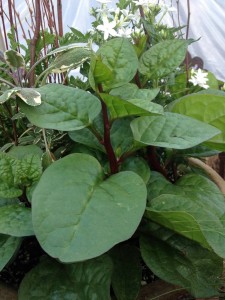
Malabar spinach...One of our growers called the other day, offering a few trays of a plant called Malabar Spinach. “It’s a heat tolerant green that we can grow in the summer,” she said.  “It also grows like a vine with really big, spinach-like leaves and pretty ornamental red stems.” Well, how could I resist that? I ordered a couple of trays, received them, and promptly planted some in a couple of combination planters.
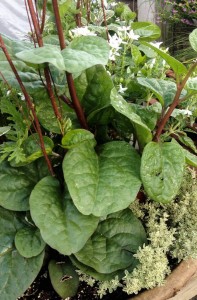
Jay put one on each of the trellises in the garden across the street, too, so we could see how they grow out in the ground. Basella alba ‘Rubra’ is native to India and Indonesia, so it’s used to some heat, and, unlike other leafy greens such as kale, lettuce, and mustards, it needs heat to thrive. It’s the perfect plant for Alabama in the summer!

Growing up birch branches...

Malabar spinach is also known as Ceylon spinach, Indian spinach, vine spinach, and Malabar nightshade and will grow 8′-10′ tall or more; so give it something to climb on. The flowers are inconspicuous. Some references say to remove them so the leaves don’t become bitter; others just mention that the seed the flowers produce is commonly used to make a purple dye where this vine is native.

Garden writer Barbara Damrosch calls this her “everything green”…the one she picks when she needs green in a dish for color, taste, or nutrition. Young leaves are best, and there are many recipes online. Both leaves and stems are edible. The hotter the weather, the faster it will grow, especially if it’s provided loose, rich soil with plenty of moisture, sun, and a sturdy support.

Since it’s still August and the temperatures are heating up, this might be a good addition to your late summer vegetable garden. Alternatively, it can be planted along along a fence or on a trellis where you can enjoy its ornamental beauty until frost. If you’re in the Crestline area of Mountain Brook, you’ll be able to watch ours as they grow in the garden across the street. It’s fun to try new things!

Succulent Plantings…When Summer Heat Sizzles!

Cork Bark and Succulents - Echevaria, Variegated Jade, Rhypsalis, Cryptanthus, Haworthia, String of PearlsWhile parts of the country are enjoying an unusually cool summer, here in the heart of the south the temperature and humidity can still soar. Unfortunately, even nighttime temperatures rarely provide respite from the unending heat, though, thankfully, we (and our plants!) have had a couple of welcome breaks this year.
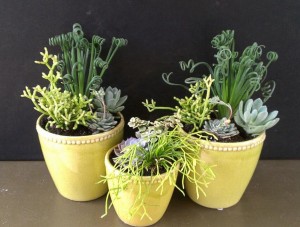
Succulents: Albuca spiralis 'Frizzle Sizzle', Rhypsalis, EchevariaWhile there are plenty of tough, heat tolerant plants that, with the proper maintenance, work very well in our landscapes, this post is going to concentrate on succulents, with examples of some recent container plantings.  Look HERE for more succulent arrangements we’ve done in the past too.

Three bright yellow pots provide a temporary home as a centerpiece trio, then these plants will move outside for the rest of the season. The curly little number here is an interesting, and new to the plant scene (at least for us), succulent-like plant (It’s actually a bulb.) called Albuca spiralis  ‘Frizzle Sizzle’. Native to South Africa, its growth actually slows during the heat of summer, and it must be kept on the dry side during this resting period.  As we move into the colder winter months, it will begin to grow again and should make a relatively easy indoor plant for a  bright room inside.

Succulents: Echevarias, Rhypsalis, Variegated Jade, Sedum and Pilea 'Aquamarine'The basket planting shows a tiny leaf blue-green succulent-like plant that is actually a Pilea called ‘Aquamarine’. It has fast become a favorite for succulent and other arrangements in containers. The tiny leaves grow quite quickly, mingling with other plants and eventually trailing, seemingly indefinitely! This mixture also has echevarias, workhorse succulents that can grow to enormous proportions.image
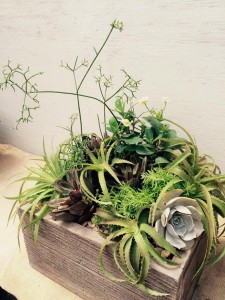
The square brown planter is home to a variety of succulents, including a number of Hechtia glomerata.  It’s  in the Bromeliad family and native from Texas down into Central America. Species of Hechtia are terrestrial and inhabit dry, rocky places and often seen growing  on vertical walls along rivers, where the soil drains exceptionally well. Hechtia is a plant that’s new to us this year. We’ve noticed it has  the spiny edges on leaves that some bromeliads are known for.

Tillandsia ( Air Plants), Succulents (Hechtia glomerata) and RhypsalisSucculent plants and air plants, Tillandsia, are  perfect partners, as you can see in this cork bark composition. Here’s the Hechtia again, with another plant called Rhypsalis. Rhypsalis is another fascinating plant. It’s actually in the cactus family and most are native to Brazil. Its name is derived from the Greek word rhips, which means wickerwork and refers to the slender, flexible, reed-like stems.
Rhipsalis are primarily epiphytic, meaning they live in trees, but some also grow in  the cracks of rocks. Quite a versatile little cactus! It doesn’t have spines like a conventional cactus; instead the stems seem almost flattened and branch frequently. Flowers are among the smallest of cactus flowers and usually white, though some may be tinged with yellow or red.

Succulent Planter with Hen and Chicks, Echevaria and CryptanthusThe wooden bowl shows an old favorite, sempervivum or hen and chicks, a well known succulent and widely available in many rosette colors. One thing we’ve learned about “semps” is they really do appreciate a bit of shade in the afternoon here in Birmingham. Maybe it’s our constant humidity. At any rate, a touch of shade seems to help.

Succulents and Cactus in a Marble DishAnother cactus called ‘Old Man’ and a little succulent called Haworthia are at home in a small marble container. There are no drainage holes in this piece, so careful watering must be done sparingly.
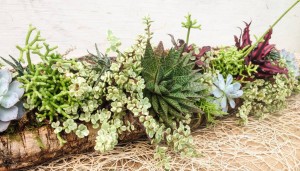
Succulents in Cork Bark - Close-Up. Rhypsalis, Variegated Jade, Echevaria, Cryptanthus, HaworthiaFinally, a long, very narrow piece of cork bark is home to a varied selection of succulents including Portulacaria afra, sometimes called miniature variegated jade plant though it’s a different species.  Its small, cream-variegated leaves on reddish stems are striking combined with the echevarias, haworthias, Cryptanthus, and  Senecio rowleyanus or string of pearls (not shown in this picture). With  bright light and a light hand with water, this planting should  flourish.
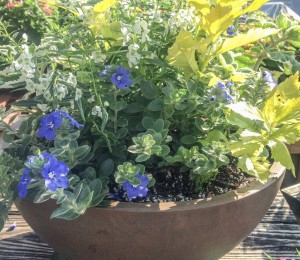
These plantings are just the tip of an amazing succulent iceberg. We’re constantly on the lookout for others to expand our design repertoire. So far we’re having a grand time!


A Brown Bowl…Planted 2 Ways For Sun

The other day I noticed we only had two midsize, light-weight brown planter bowls left in stock,  and they were just calling to be planted. Since summer is relatively slow and we have time on our hands, we’ve been planting all sorts of mixed containers with annuals, herbs, perennials, and everything in between to tempt folks coming in; and I thought one of these might be just the right size for someone.

Usually if I plant two of something for display, I make them similar, but, with these, I decided to play off the brown color of the bowls with two different plantings – both for sun, but each quite different, using annuals. Here’s what I came up with. Of course, there are endless variations of plants out there; these are  simply my two versions using annuals available mid-summer.

The first planting uses light colors that are quite harmonious – white, blue and yellow. A variegated Swedish ivy and yellow duranta are the all-important foliage accents here, and the white flowers of the angelonia will add a spiky bloom in the center (The yellow duranta will need some clipping eventually to keep it at the right proportion for this planting.). Pretty blooms of a blue daze trailing over the edge complete the picture. If the container were larger, I might have added a silver thyme as well.

image

Color is an interesting thing. You can either go big, bold, and wild and mix many together, or you might choose  two or three very opposite colors (Think purple and orange, for example.). Combinations can also be fairly calm, using colors closely related.

Flowers obviously add color to any composition, but don’t forget the importance of foliage too. Many times I’ll begin a design by pulling foliage plants to accent a particular planter, then add blooming plants to play off of those  leaves. In fact, leaves and their shapes are extremely important  to the overall look of a planter once it’s completed and growing out.

Lightweight Brown Bowl Planted - Babywing Begonia White with Bronze Leaf, Euphorbia, Yellow Joseph's Coat and Silver Dichondra

The second is quite different, though once again there’s a yellow foliage (Yellow works so well with brown!), this time a dwarf Joseph’s coat, and white blooms too, represented here by a dark leaved baby wing begonia. Its  leaves match the color of the bowl almost perfectly. The begonia is a heavy presence in this planting; so, to lighten it up, an airy blooming white euphorbia went in next. Finally, the silvery foliage of a trailing dichondra spills over the edge, adding  a nice contrast to the brown of the pot.

So, there are now two fairly simple, yet quite dissimilar plantings in the same bowl. At another  time of the year, the choices would have been even more different…yet another reason container gardening is so entertaining!

Stop in and take a look at our container planting designs if you’re in the Birmingham area. We try to have as many made up as possible to give you ideas and inspiration!