growing out nicely…
It’s summer, the heat is on, and we’re all working overtime to keep our landscapes looking as fresh as they did in the spring…thankfully we’ve been getting rainfall to help us out!
I thought you might enjoy seeing some of the planters and arrangements we’ve done through the spring and now into summer – some are succulent designs, some will enjoy the hottest part of a landscape, others are meant to stay inside or in a shady spot outside. And there are some just for a party or gift – but since they’re created with live plants they’ll last so much longer than cut flowers!
a gift for someone…
early spring…a centerpiece for a party….
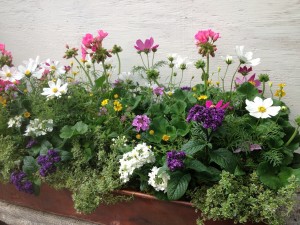
Arrangements for parties or gifts using orchids, indoor flowering plants, and any other plant that catches our eye are a lot of fun to put together, and we stay very busy creating them for folks…there really is no end to the combinations that can be used for this type of arrangement. And, once the party is over, the whole thing can be taken apart and the plants used elsewhere! The copper planter shown here was used for a party – and we’re assuming the flowers and herbs were planted in a sunny garden or container and are probably still going strong!

deadheading, judicious clipping and consistent watering kept this planter beautiful all last summer…
For long term plantings, smart plant choices need to be made, taking into consideration pot size and amount of light they’ll receive, Last, but definitely not least, the plants need to look good together! One of the most important aspects of container gardening is maintenance. Watering, deadheading, pinching, or, even more drastic, cutting back need to be done consistently to keep your container gardens looking their best.
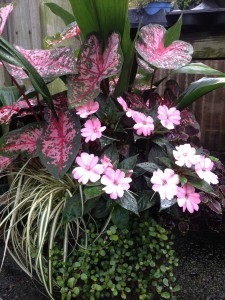
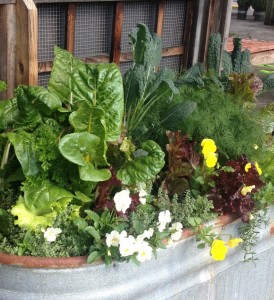
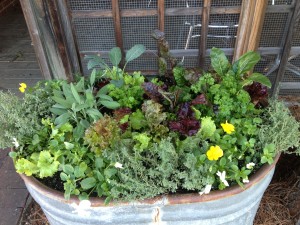
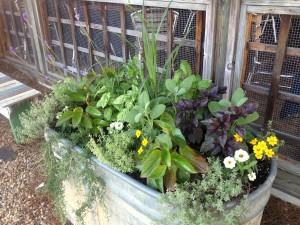
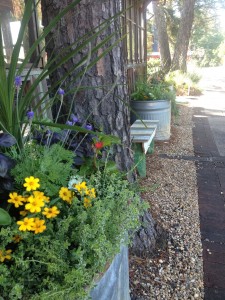
The planter at left is filled with herbs and flowers designed to handle a lot of heat and sun – just what we have in the middle of summer in Birmingham! This combination grew out quite happily last summer in the front of the shop on the hot asphalt…and inspired many other planters just like it throughout town. Herbs and flowers just go together!
aloes, succulents and a trailing rosemary…
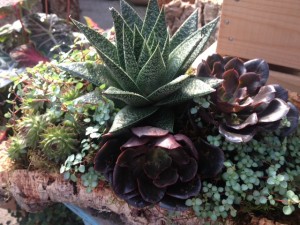
Succulents and herbs work quite well together…the trough planter shown here combines succulents, a couple of different aloe plants, and a trailing rosemary. Whoever said you can’t mix it up wasn’t talking to us!
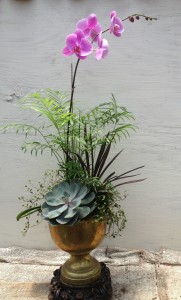
succulent and orchid arrangement…
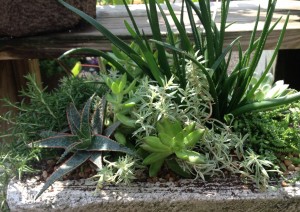
The succulents that have been available this spring and summer have really been beautiful, and we’ve been using them in all kinds of containers, on their own in long term plantings, and in gift arrangements too. Here’s one used in an orchid arrangement as an accent…they’re quite striking used in this fashion. If you’ve been keeping up with our posts on cork bark planters , you’ve seen us use the succulents in them as well.

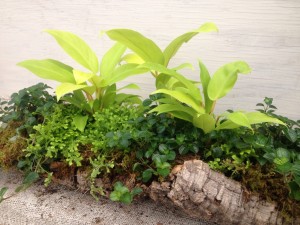
houseplants in cork bark…
more house plants in cork bark – this one ended up on a mantle…
this cork bark piece was large…
Speaking of cork bark planters, here are a few pictures of some interesting things we’ve done with them…succulents aren’t the only player in this fun sandbox! A cork bark planting done using carex, ajuga, selaginella and perennial ferns ended up at a mountain home in Highlands, North Carolina. The other planting in that post also went home with a happy customer.
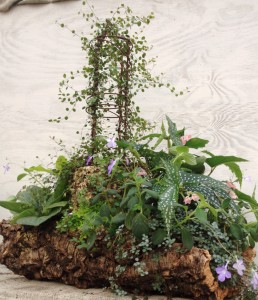
The ones shown above utilize a lot of houseplants and will be happiest either on a shady terrace or porch or inside in bright light. Some of the plants used include episcias, pilea, angelvine, creeping charlie, dracaena, selaginella and philodendron…all good houseplants. These will work nicely in a shady spot and there are other planters we’ve done that will too. Let’s take a look…

for shade…
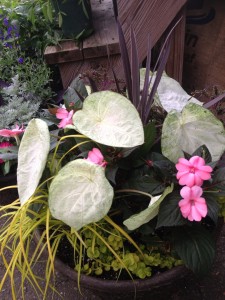
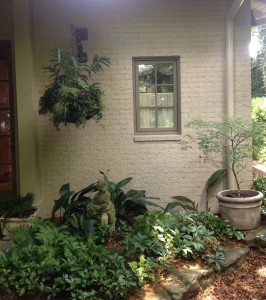
Shade containers are some of the most fun plantings to do because so much depends on foliage color and form. This might not be as flashy as an entire pot of flowers, but it is very long lasting and beautiful when done well. The hayrack shown here uses maidenhair fern, caladiums, an angelwing begonia and episcias in a very pleasing combination…the ‘Sweetheart’ caladiums seem to float above the maidenhair, and the episcia is a very subtle addition to the composition…
 The last planting is shown to serve as an example of how you can definitely have color in the shade using foliage in addition to flowers…the ‘Garden White’ caladium in contrast with the golden carex and sunpatien really catches the eye! The planter at the top of this post is also one for shade, and, once again, the foliage is the star.
It’s always nice to have customers walk through the nursery with the same plants in their hands as we’ve done in our display planters. We are happy to have our designs in your landscape, and know that imitation is the sincerest form of flattery!
– Posted using BlogPress from my iPhone

 The emphasis is on foliage, though, and I’ve included curly parsley for it’s fresh green color, a small blue fescue grass, and a shade loving heuchera for this planting. Holdovers from the summer are aspidistra, which I thin out each season, and a tiny leaf green ivy. After planting, I added birch branches to add more height and winter interest. (Branches are an easy way to get color in planters during the holiday – red twig dogwood branches would also be pretty.) While it looks a bit top heavy with the tall aspidistra at first, the parsley and heuchera will add fullness to the composition as it grows in. I’m also trying the Cool Wave white trailing pansies here this year, hoping they get enough sun to bloom well.
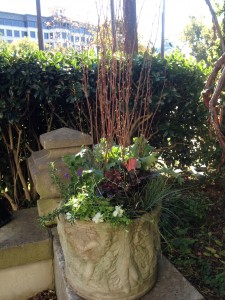
 This fall Pardis asked if I would also take a look at the planters at Bottega, their other wonderful restaurant.
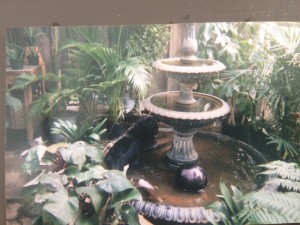
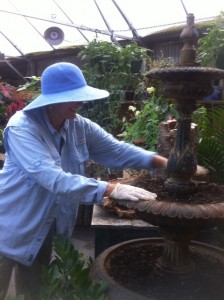

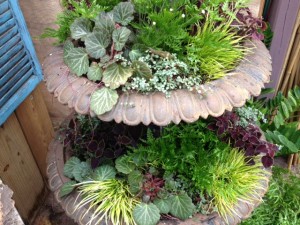
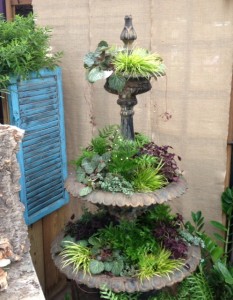 One of the filler plants I used was a tiny grass, Acorus minimus – all the acorus love moisture so it should do well. I rounded out the filler plants with a few ferns and another bog plant called Syngonanthus chrysanthus ‘Mikado’. This is a definite test since we know next to nothing about this plant; however, the fountain basin should give it the boggy conditions it is supposed to prefer!
 Ok, this might not be the moss hanging basket for your front porch…in fact, its proportions are massive, at least 30″ across and almost as deep. This basket belongs to a customer who hangs it in in a shady garden area.
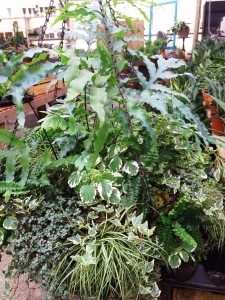 This year, she wanted an all white and green foliage basket filled top to bottom with shade loving plants. What a fun project! The basket itself is a heavy duty plastic coated metal frame with openings that plants can be inserted into. Many folks use sphagnum moss or coco liner for these type of plantings, and it works well. However I prefer to use fresh green sheet moss and layer the plantings from the bottom up.
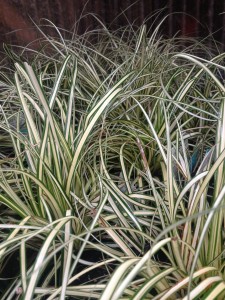
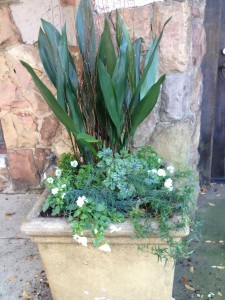
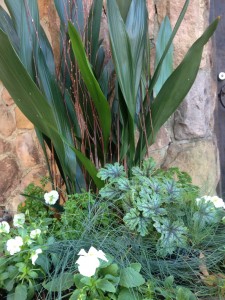
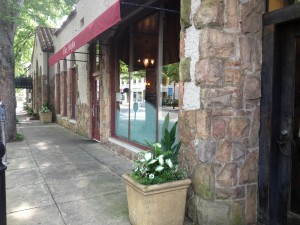 Owners Frank and Pardis Stitt prefer white and green for the front of this French cafe, located next to their acclaimed restaurant Highlands in downtown Birmingham. These are fairly large, tan colored cast stone planters with nice clean lines. A mix of contrasting green and variegated foliage with a touch of white add light to this shady spot, and the stone wall adds a pleasing backdrop to the planting.
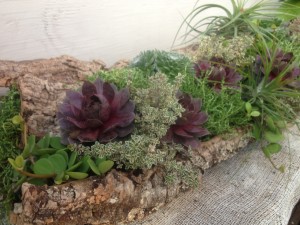
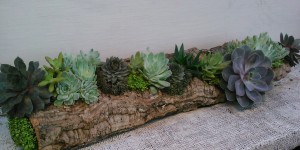
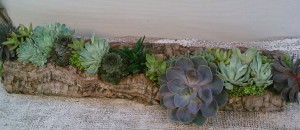 These cork bark pieces are so organic and natural…we love them and wanted to pass on just a couple of ideas for planting them. Actually, they were one of those happy accidents – one wrong stroke of the keyboard, with a different item number ordered than planned, and, voila, these cork bark pieces arrived the other day that were rounded, with just enough space for planting rather than being flat…oh, happy day!
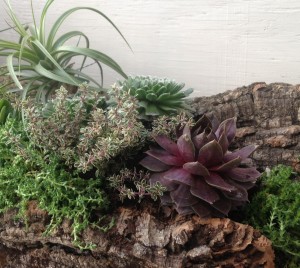 Of course, if you’ve been keeping up with previous posts, you know we’ve gotten in some pretty cool looking succulents, as well as air plants and the beginning of the new season’s herb offerings. So, with all this bounty to work with, one bark planter became a succulent, herb, airplant design and the other became a study in silvery grays and blues with a pop of chartreuse…
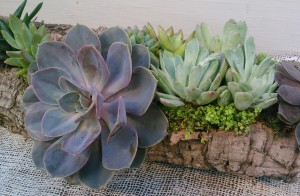
 As with any combination planting, look at color, texture and form of the plants you’re working with. The bark is rough and brown…in one planting the red coloring of the hens and chicks play off the brown of the planter while the red edging of the thyme also picks up the color of the succulents. The spiky air plants contrast with the rounded forms of the rolled bark as well.
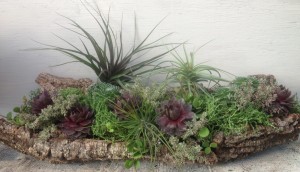
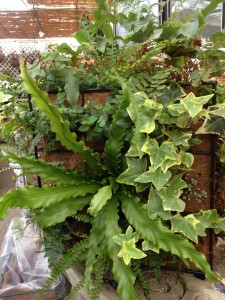
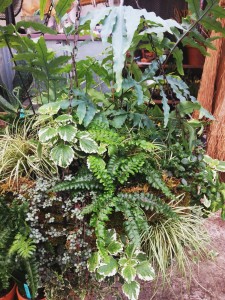
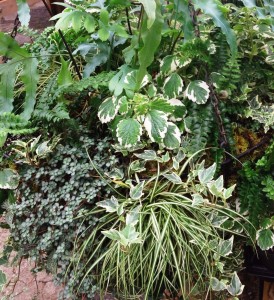
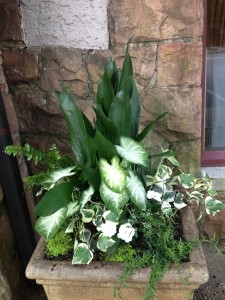
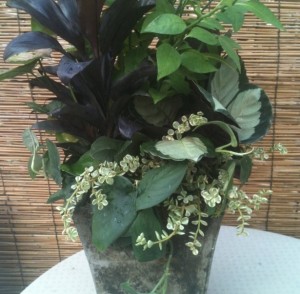 Container gardening – putting together great combinations that are long lasting and beautiful is something we love to do! The planters here show groupings of houseplants (yes, you can use combinations of houseplants too!) chosen for the variation of leaf color, shape and size…and perfect for a summer on a shady porch or patio.
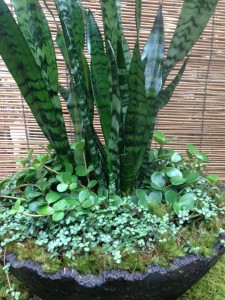 One is a loose, informal combination and the second arrangement is much more structured – see the difference?
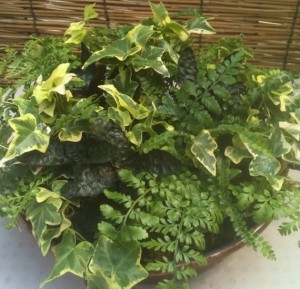 The last example is a small planter filled to the brim (don’t be skimpy with your plants!) and designed to be seen on a table or shelf. We’ll continue to showcase more container ideas to spark your imagination and creativity and help you choose the perfect combinations for your home and garden. We may be in the middle of winter now, but spring is fast approaching and we want you to enjoy creating your own container gardens – or, if you’re in the area we’re always glad to help. Happy planting!