Monthly Archives: January 2019

Bromeliad Kokedama

String Gardens – Create Your Own Kokedama


Bromeliad Kokedama
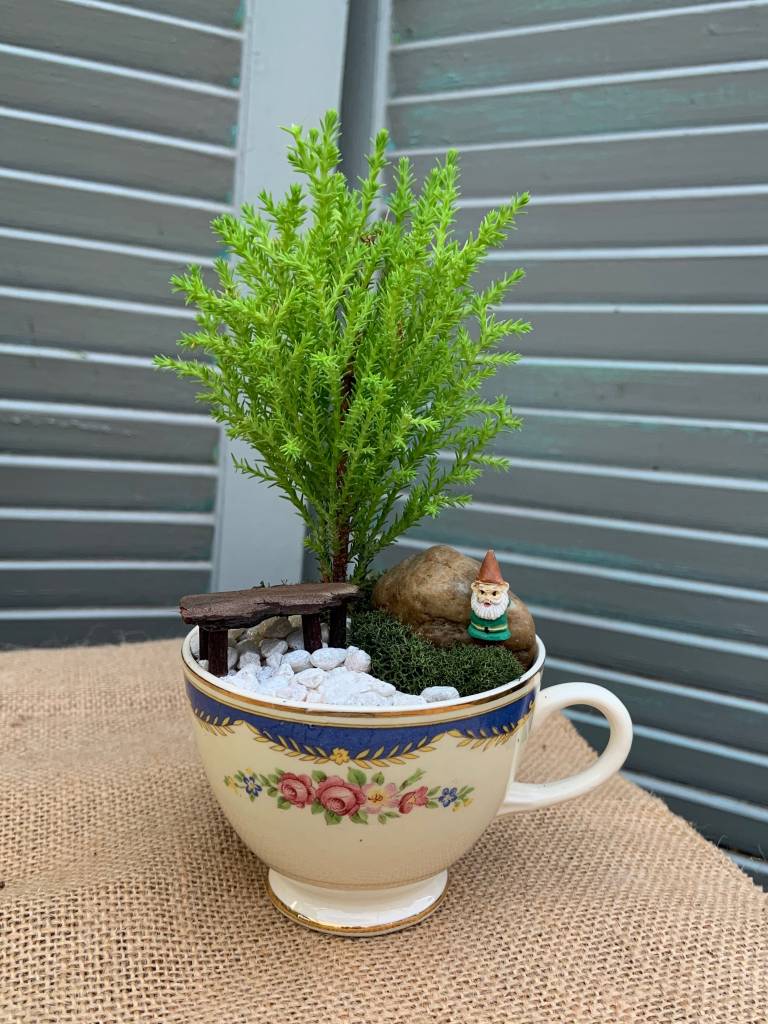
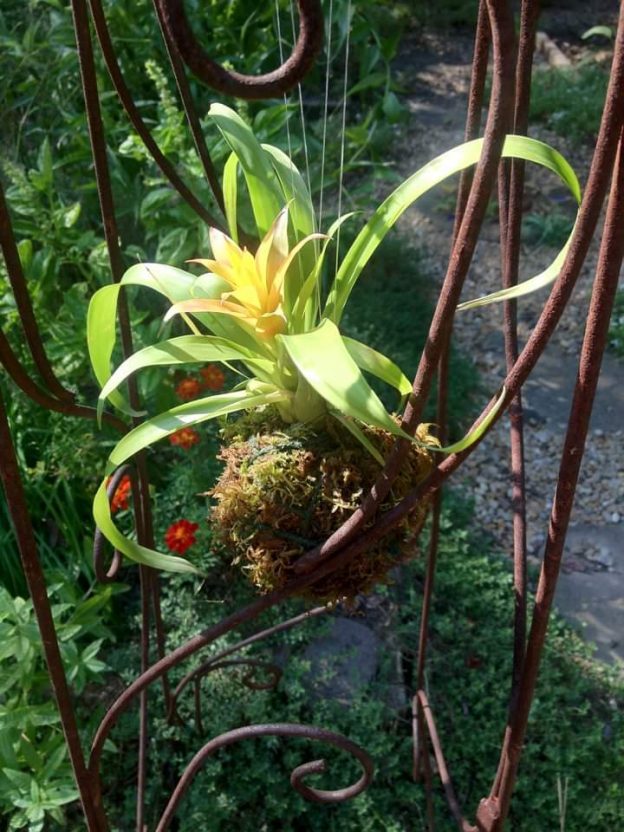
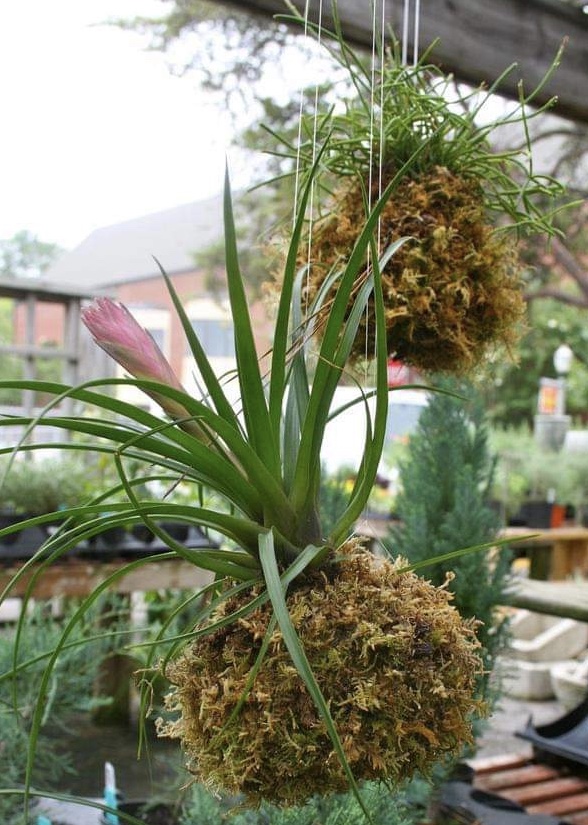
Kokedama:  Kokedama is a Japanese bonsai planting technique, dating back hundreds of years.  These unique hanging gardens are also called string gardens or moss balls and are incredibly easy and fun to create. Almost any plant can be used, so it’s a great project for experimenting  with different plants.

A kokedama garden is created by hanging different plants together in a cluster to create a “garden”. You might choose to group indoor houseplants in a string garden, arrange them outside, or simply have one hanging in a prominent spot.

Plumosa Fern Kokedama


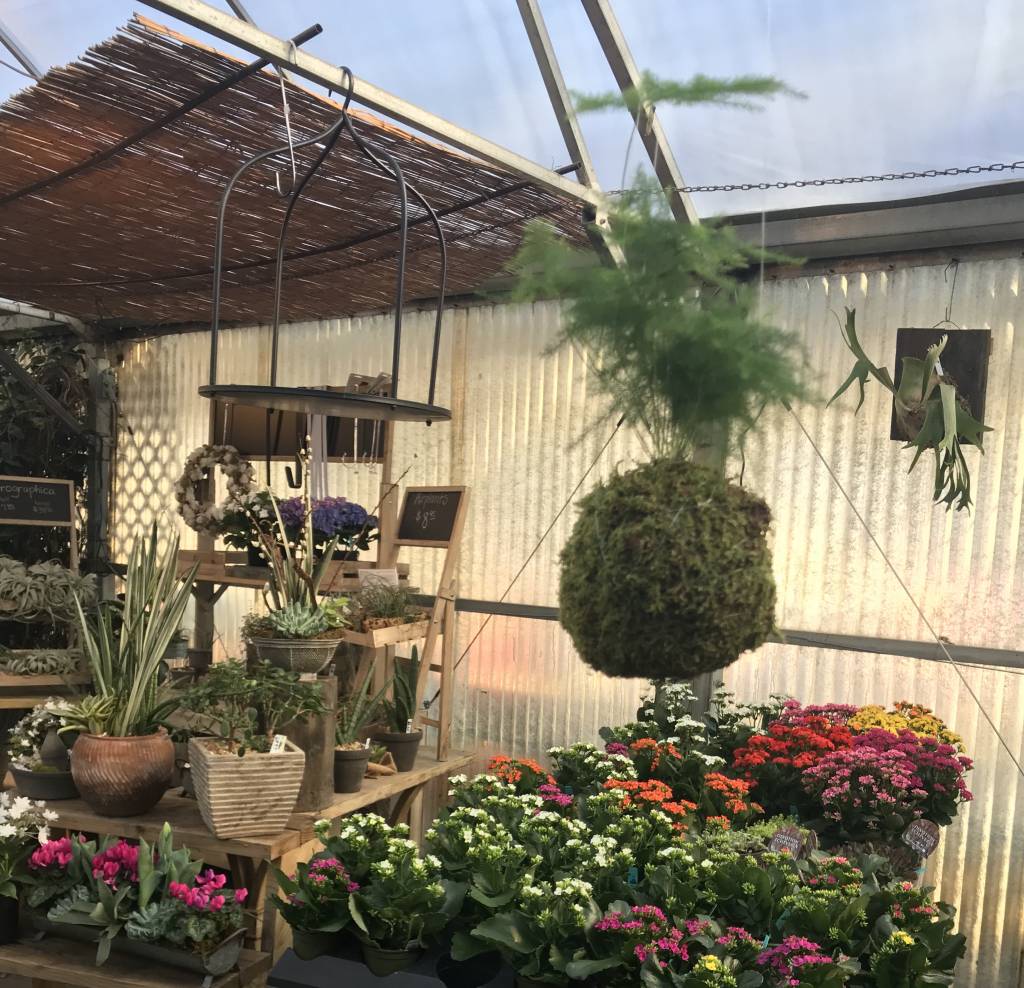
If you don’t have a lot of space, these gardens are the perfect solution. They can even be used together seated on a beautiful tray or saucer. Kokedama are a simple, beautiful, and artistic way to display plants inside or out.

Over the years this is the method we’ve come up with for creating these simple creations. It’s a messy process but a lot of fun too.


Materials needed:

Peat Moss/ Cat Litter Mixture for Kokedama

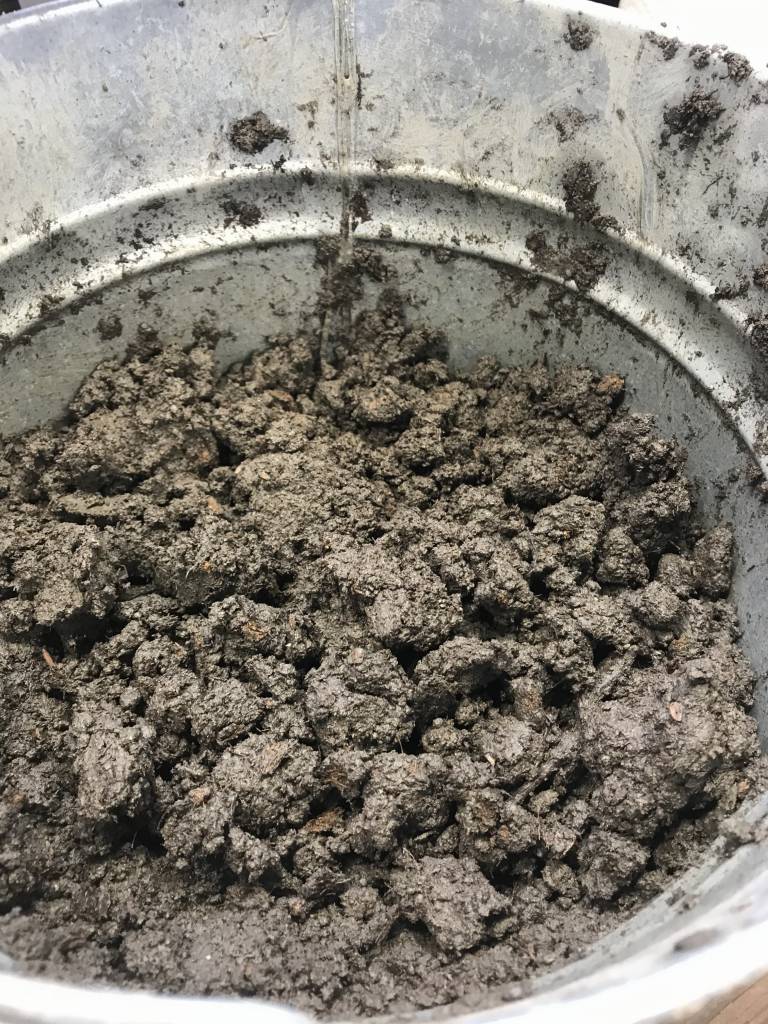
Peat moss/clay cat litter mix

Peat moss, bonsai soil or clay cat litter (the cheapest, unscented), sphagnum moss,  green sheet moss, garden twine, fishing line, latex gloves, container filled with water – optional: cotton string.


Directions for soil mix and sphagnum moss:

In a large container, measure out peat moss and bonsai soil/cat litter.  Use 7 parts peat moss  to 3 parts soil/litter. Add water, mixing well, until the consistency is of soil that can be formed into a ball that will not fall apart.  Set aside. Wearing latex gloves, take a handful of sphagnum moss and moisten it in a container of water; wring out excess.

Plant prep:

Remove as much soil from the rootball of the plant as you can and set aside.

 Assembling your string garden:

  1. Take a handful of the dampened sphagnum moss and wrap it around the roots of the plant. At this point it is optional to wrap the sphagnum with cotton string to secure it. As the plant roots grow through the sphagnum, the cotton string will decompose. I don’t use the cotton string, opting to form the dampened sphagnum around the roots alone.
  2. Now it’s time to form the soil mixture around the sphagnum wrapped plant. Firm the mixture onto it, taking small amounts and pressing firmly. Try to create a round ball. Set aside.Peat Moss/Cat Litter Soil around a Portulacaria Kokedama
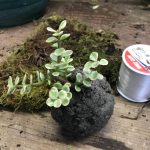
  3. Take a piece of green sheet moss large enough to wrap around your string garden. Set aside.
  4. Cut a long piece of garden twine or fishing line  – this will be what you wrap around the ball and secure the moss with.
  5. Wrap the moss around the ball, pulling off excess moss. Center the twine or fishing line under the ball, and begin to wrap it so the moss is secure, then tie off. Cut more if necessary. Wrap it tightly, forming a smooth ball.
  6. Cut 3 pieces of fishing line to hang your string garden and you’re done!


Maintaining your string garden:

Water your string garden when the ball begins to feel light, or if the plant begins to wilt. As with any other planting, you will begin to get a feel for the timing of watering. Always try to water before  your plant begins to look stressed. Soak the ball in a bowl of water until it is completely saturated. If it is hanging inside, squeeze excess water out of the moss ball before re-hanging.


A few plant choices for your string garden:

Inside:  ivy, pothos, bromeliad,  fittonia, pilea. Outside:  herbs, ajuga, carex, succulents.

Some observations I’ve made on string gardens I’ve planted and maintained:

The plants in a string garden do seem to “bonsai” themselves simply by the virtue of having the roots so constricted. The theory behind the moss ball and the plant becoming “bonsaid” is that as the roots begin to grow out of the moss ball the roots actually “air prune” themselves, thus keeping the plant small.Orchid Kokedama

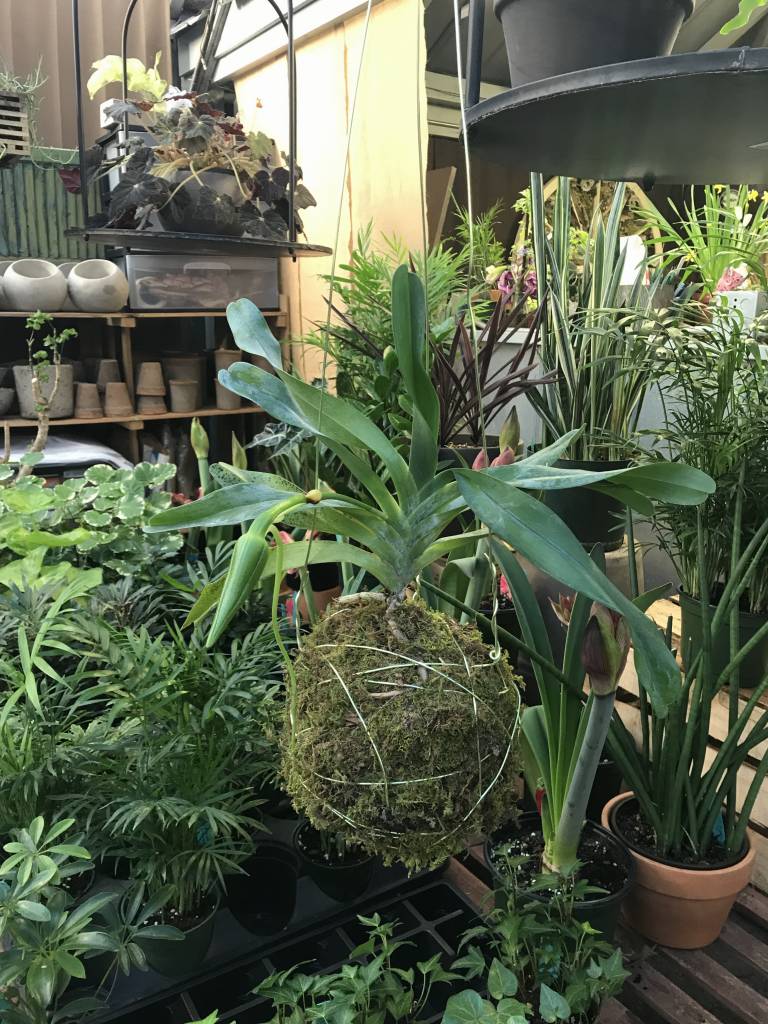
Obviously, with the peat/bonsai soil mix, the ball will dry out, so keep an eye on it. It may work best to try plants that aren’t too demanding at first  – bromeliads, succulents, and such.

Play around with the types of string/twine wrap you use – I’ve used light weight colored wire as well for a fun “artsy” look. Another idea is to find a natural netting of some sort to wrap around the moss and tie it on with clear fishing line… there are so many creative possibilities. The bottom line? Choose a plant, and have fun!

If you follow us on Instagram or Facebook you’ve probably seen a new series of shop videos – if not, follow us and check them out! They’re also on our YouTube channel under Oak Street Garden Shop – if you’d like to see more, subscribe!

By Kris Blevons


Calla Lily

The Winter Greenhouse Is Lush With Houseplants and Flowers

Bromeliads, Anthurium and Needle Palm in the GreenhouseIf you’ve never stepped into a lush greenhouse in the middle of winter on a rainy, cold day (or any day for that matter), you’re in for a real treat.

January was a turn the greenhouse upside down month, as pretty much every last thing was moved and rearranged, including one entire area that held an abundance of pots.Benches and Fountain Vignette In the Greenhouse


Anyone who ever said working in a greenhouse was a walk in the park never worked with us! Hard work aside, we’re pleased with the changes and hope you like it as well.

Tacca

Tacca, supervising…


The cats took part too, though Tacca was more than happy to settle into a box and watch the goings on, and they all found new spots to take naps!


Liam, true to his personality, likes to be center stage, right at the front door where everyone who sees him gives him a pet, and sometimes Tacca joins him there.Tacca and Liam In the Greenhouse

Of course there are beautiful houseplants of all sizes in the greenhouse, and we pay attention to them so they’re at their best when you take them home. We’re all plant junkies too and are always on the lookout for new and different offerings (One for you, one for me…).Houseplants and Pots in the Greenhouse


Miniature Garden

Haley at work on the miniature garden display…

For everyone who loves tiny, miniature garden magic, Haley has taken over the display, transforming a corner of the greenhouse.

Our fairyland table now has a new backdrop and floating clouds above it. It’s a special spot for the young and the young at heart.


Margaret’s miniature garden…

Margaret was inspired to make her own little garden in a teacup. She had a little gnome; now he lives under a “tree” with a bench nearby if he wants to sit a spell. It is so cute!


Perhaps you have an interesting container you’d like to work a little miniature magic on. They’re so much fun, and we have everything you need to make it happen.Greenhouse

If you’re on social media, we are too! We were discussing the other day that the shop is the perfect spot to take social media pictures, so look for us on FaceBook – Oak Street Garden Shop and Local Market,  Pinterest, and  Instagram too.


Houseplant Monstera deliciosaThen, while you’re visiting the shop, take a selfie and tag us (We have the perfect monstera for #monsteramonday !). The enormous pot ours is planted in was rotated, the huge leaves cleaned, and lots of pictures were taken of it. It has been our shop mascot for many years now, and we think it’s worthy of Instagram fame!

Moving the Monstera deliciosa houseplant

Jamie and Allen rotating the monstera…


Installing the New Heater

Replacing the heater…


We all appreciate being warm, and well maintained and reliable heaters are the backbone of any greenhouse. One of ours finally wore out after almost 30 years of use, and while replacing it took the better part of a rainy Saturday, we’re sure the plants (and us)  will feel the difference.Houseplants in the Greenhouse


One thing is for sure, a lush greenhouse is the perfect place to be on any winter day – among houseplants and orchids, flowers, succulents, and blooming spring bulbs. Take a moment to walk through, you won’t be sorry!

By Kris Blevons


Bird Tree in the Better Late Than Never Garen

A Repurposed Bird Tree For the ‘Better Late Than Never’ Pollinator Garden

Better Late Than Never GardenAs usual, the ‘Better Late than Never’ pollinator garden received very little attention through the holiday season, other than a much needed clean up that included cutting all the dead vines off the two arbors, pulling out spent summer annuals, and giving it a good raking.

It’s been a sleepy little garden since then, though the winter seedlings of larkspur and some bachelor buttons have appeared – along with more than a few weeds.  I’ve only seen a few poppies; I hope they’re just slow to come up this year.

January days at the shop are also filled with mundane tasks – cleaning, completing inventory, and, just like everyone, trying to get rid of the last of the Christmas tree needles that never seem to all quite go away.

In fact, we still had one very large Christmas tree to be disposed of after Christmas. It lay on its side in the nursery, a sad leftover from the holiday season. What a shame it was never decorated or showed off pretty wrapped gifts under its branches, I thought. Contemplating this, I eyed the tree. Then it occurred to me that I could use it in the little garden across the street.

Yes, I’d decorate it for the birds.  It would have a purpose, and I’d feel better about the whole situation. Enlisting Bert’s help to cut the top out of the 9’ tree I ended up with about a 6’ section that he put up on a tree stand for me. It was perfect!Bird Tree in the Better Late Than Never Garen

The next day I strung popcorn on raffia, took apart an old scarf I never wore so the yarn could be used for nesting material, and made a list of things to buy for the tree or use from the shop.

There were pinecones that I tied yarn around to hang, smeared with peanut butter, and rolled in bird seed. How many of you did that as a kid and have long forgotten about it? It’s just as messy as I remember…thank goodness for latex gloves!

Bird Tree in the Better Late Than Never GarenYarn threaded through cut up pieces of orange slices added more color to the little tree, and pieces of cotton from an old wreath added fluff for their nests. I worked on it  all morning at the nursery, then when it was finished Alyson and I loaded it onto the cart and rolled it to its place of honor in the garden.

I stood there surveying the little tree standing in front of the white fencing, hoping the birds would make their way back to our bare winter garden and discover my gift to them. How nice it would be if the community would add to the little tree too, I thought.

With this in mind I walked across the street to the library and then on to the Chamber of Commerce, asking them to spread the word about the Christmas tree with a new life in the ‘Better Late Than Never’ pollinator garden and that anyone was welcome to participate.Bird Tree in the Better Late Than Never Garen

I’m tickled with our repurposed tree for the birds in the little pollinator garden on the corner and hope you like it too. If you’re walking by, take a minute to admire the Christmas tree that became something even better, the symbol of a good and hopeful way to begin the new year. Just maybe you’ll see some happy feathered friends, too.

By Kris Blevons