
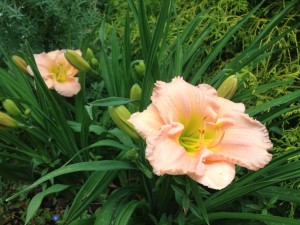
 This ‘Siloam Double Classic’ daylily’s first bloom in my garden marks the beginning of summer for me. Blooming right around Memorial Day, it is also a reliable rebloomer and the last to bloom at the end of summer – August 22nd last year, to be exact!
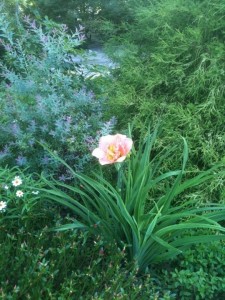
Blooms aside, daylilies also add another important element to a garden, particularly in a mixed perennial/annual bed – foliage form.
We talked about the importance of foliage in the garden in an earlier post on perennials…the fountain like leaves of large daylilies can break up the monotony of masses of other plants, and the lily bloom can be placed in contrast to other flower shapes as well.
Summer is the season for these lovely plants, and the best selection will be available in the coming days and weeks.
After you’ve chosen and placed your daylilies, don’t forget about them. They benefit from an (at least) weekly walk through the garden, to pick off faded blooms. If any leaves are yellow, pull them out as well, to keep plants looking well tended.
 Once the bloom period ends, cut the old bloomscapes completely to the ground, tidying the plant. If the leaves begin to look tattered at all, don’t hesitate to take the entire plant and cut all the foliage back by half. Your daylilies will reward you with fresh foliage the rest of the season, and, if they’re rebloomers, you’ll have another round of flowers!
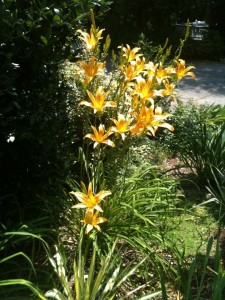
Divide your daylily when it becomes too large for its spot. This is best done on a pleasant fall day after the heat of summer has finally passed…this chore will be the subject of a future post.
– Posted using BlogPress from my iPhone

 The tall one that Jamie planted utilizes houseplants which work very well in shaded areas through the summer, and some perennials. This piece will take filtered sun and clipping of the houseplants to maintain the balance of the planting. A pot was inserted in the bottom, planted, and then soil filled to the top, filling the opening all the way up to create a cool vertical piece.
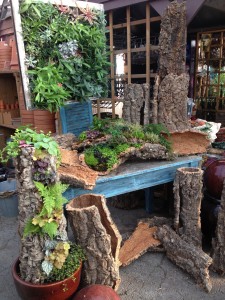
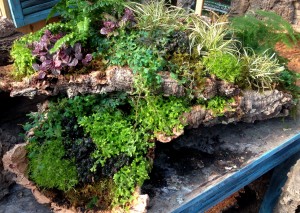 In the next planting, I took 3 of the flatter, rounded pieces and actually “stacked” them at angles, creating planting pockets and different levels and an overall shape I was pleased with. Next, perennials, including tassel ferns, ‘Metallica’ and ‘Burgundy Glow’ ajuga, golden and peacock selaginellas, Scotch moss and Carex ‘Evergold’, were added, creating sweeps of color and wispy trailers over the edges. An added bonus is that all of these plants are perennial and can be used in your landscape as they outgrow the container.
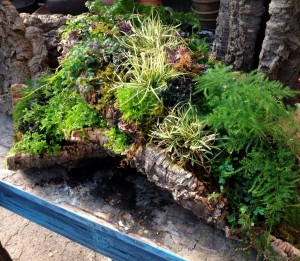 Both of these have been lined before planting but will drain over the edges in the case of the stacked pieces and down through the bottom of the planting in the tall piece. We picture them in areas of restful shade, adding their green presence to woodland surroundings…We hope you enjoy our creations as much as we enjoyed making them!