Tag Archives: living wreath

Succulents…See Some Things We’ve Created!

succulents in the greenhouse...

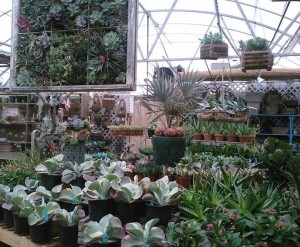
succulents in the greenhouse…
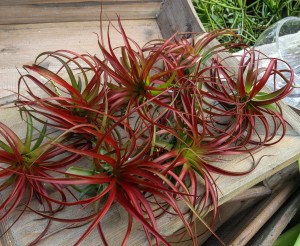
air plants...

air plants…

With the spring planting season approaching, the nursery will be a plant lovers dream, filled with the best of everything we can find. These include fragrant, ornamental, and edible herbs, including the popular oregano ‘Kent’s Beauty’, sun and shade loving perennials for your garden,  bright, flowering annuals for pots and planting beds, and shrubs expressly selected for their ornamental qualities and durability in southern gardens.

Another grouping of plants we have all year around are succulents, and they are so beautiful arranged in containers for the summer or as a combination planting in the home all year around. Some shown here also incorporate tillandsias, or air plants because their care and culture is so similar.
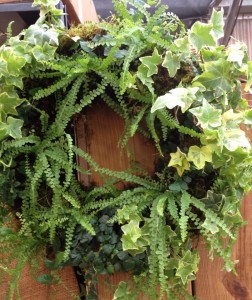
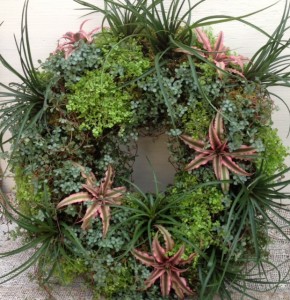
living wreath...

living wreath…

The living wreath shown here that Molly planted was a huge hit on our Facebook page, and for good reason.  Just look at all the interesting textures and colors used, including echeverias, cryptanthus, air plants and even a tiny phalaenopsis orchid! This post on creating a living wreath give you some tips on how to make your own masterpiece. To see yet another that Jamie made, take a look HERE.

image
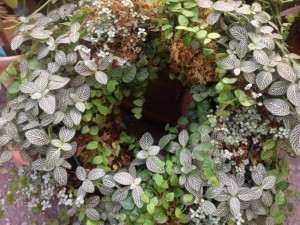
Because succulents, air plants and even bromeliads (another great companion) come in so many different shapes, colors and sizes, it’s fun to come up with endless combinations. Here are more that we’ve created in the past few months.

In this long, narrow planter Lauren used a number of different plants including succulent echevarias, sedums, haworthias, and a pretty pink aloe. Meandering through this combination are pilea ‘Aquamarine.’

this will get large!

this will get large!


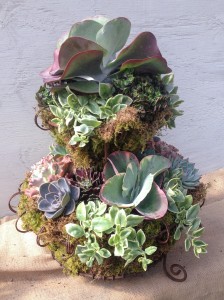
This two tier planting is going to get quite large! Flapjack kalanchoes share the space with a trailing succulent-like plant called dorotheanthus which will have charming little red flowers as the weather gets hotter. It’s also quite cold tolerant, though not completely hardy for us here. This container would be best moved in for the winter.

image


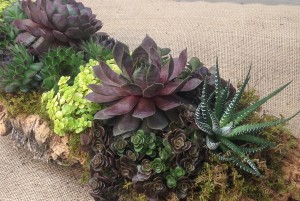
We’ve used cork bark planters to great effect in the past, and here Molly planted one with some really beautiful hen and chicks, sempervivum sp., and a couple of hardy sedums. This planting could be kept outdoors through the winter with the exception of the tiny aloes on each end, which can be repotted and moved inside during the colder months. The entire planting could also be moved into a sunny room for the winter.

one of two...

one of two…

air plants add height until the flapjack kalanchoe gets larger...

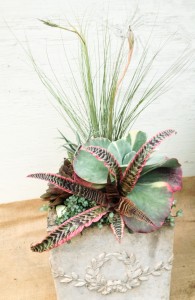
air plants add height until the flapjack kalanchoe gets larger…

The two pretty white pots shown here work together (There’s actually a third as well.) I used a tall tillandsia to add some height to this planting until the flapjack kalanchoe attained some size. The cryptanthus adds some color at the front and the pilea will contribute delicate trailing leaves to this composition.   In the second pot I added an echevaria to the planting, keeping the pinky color scheme going.

Be careful not to overwater if a container doesn't drain...

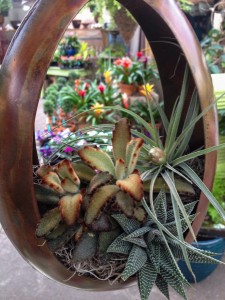
Be careful not to overwater if a container doesn’t drain…

Succulents can be planted in anything! This copper planter does not have drainage though, so the plantings need very careful attention to be sure they’re not overwatered – always be mindful of what kind of containers you’re using. Those that drain are always best. I have to confess I just really liked how this looked anyway! And, it’s been growing quite happily in the greenhouse since February.image

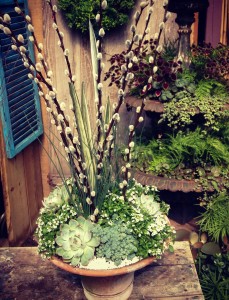
Succulents can be used as accents. too. Here a container is home to a tall sanseveria and  pussy willow stems with  sweet allysum tucked between for it’s dainty white blooms.

Finally, if you’re designing a container with succulents (Or anything!) remember the container you’re placing them in is part of the design as well.  This little log shaped planter is brown in color but  tinged with a touch of pink. I liked how the cryptanthus on the left picked up on that but contrasted with the other plants chosen to offset it in color and weight.image

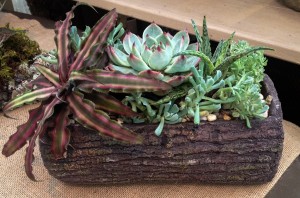
So, with warmer weather right around the corner,  grab a pot, stop in , and find some succulents and air plants of your own to plant up – you can’t go wrong – promise!


Living Wreaths – Here’s How! (The original vertical garden…)

A living wreath planted for shade using houseplant ferns, creeping fig and ivy...

A living wreath planted for shade using houseplant ferns, creeping fig and ivy…


This post is for all you do-it-yourselfers and those that just like to know how interesting plantings are created. Living wreaths are one of those things, or, as I like to think of them, the original vertical garden arrangement. Maybe you’ve seen them on Pinterest or at your favorite garden shop (Of course, if you’re in Birmingham, we hope that’s us!).


Living wreaths are not difficult to make and are really quite fun – it just takes some time and a little thought choosing plants.  The first step is deciding  where you’d like to have your living wreath. Perhaps you have a gate leading into your garden? Or maybe there’s a blank spot on that shady patio wall? They also work well placed on a flat surface such as a table.


Empty Living Wreath Frames - 16"


The sturdy wreath form you see here is a standard plastic coated 16″ size. You can see there are two pieces, and the smaller back piece hooks easily onto the larger one.


Lining the form prior to planting...

Lining the form prior to planting…


Many how-tos for living wreaths use moistened sphagnum moss to line the form. We plant them a bit differently, lining the form with moistened green sheet moss, then filling the cavity with potting soil and slow release fertilizer before planting. We’ve been planting hayracks, moss baskets and wreaths like this for over 20 years in this manner.

insert plants at intervals through the moss, firming in.

insert plants at intervals through the moss, firming in.


Jamie designed the wreath in this demonstration for a customer who wanted an interesting mix of foliage  for use in a bright location. Her plant material includes pilea, tillandsias, tiny pink cryptanthus, and baby tears. It’s important to understand the cultural needs of the plants being used so any special watering needs can be met. In this composition, the baby tears will need special attention as they require the most water.

As with any open wired container that is being lined, don’t skimp on the moss. It’s  the glue that’s holding everything together after all. When the form is thickly lined, add the potting soil, moistening it and firming it in, then add a slow release fertilizer like Osmocote.  Remember to always use a good quality soilless mix when planting any type of container. After the cavity is filled, add more sheet moss to the “back” of the wreath and attach the smaller piece. Now your wreath form is ready to plant!

Adding the cryptanthus...

Adding the cryptanthus…

Water your plants well, then insert them into the wreath by pushing a hole into the moss with your fingers so the soilless mix is exposed. Of course, the smaller the plant  the easier this step will be. Once the plant is firmed into place add more sheet moss if needed to keep the soil  around the root ball of the plant.

Some plants can be purchased in larger pots and pulled apart, like the pilea and baby tears shown here. It may look a little messy at first, but they will recover in no time. Many  plants that work well in living wreaths can be separated in this manner, including ivy, creeping fig, fittonia, asparagus fern, creeping jenny, dwarf mondo, some small ferns and many succulents.

Finished!

Finished!

What makes these wreaths so interesting and fun to make is the use of different foliage colors, textures and shapes. But, in addition to foliage, wreaths like those shown here can also be planted with bedding plants – in the spring begonias work well and, in the fall, violas and pansys make lovely wreaths too.

Watering requirements will vary on living wreaths, depending on the plants used. For instance,  a wreath planted with succulents will need less attention than those shown here.

a living wreath for shade with fittonia, creeping fig and pilea

a living wreath for shade with fittonia, creeping fig and pilea


We’ve found the easiest watering method is to lay them flat and either pour water on them or let them sit in a saucer of water until the planting is heavy. The ivy, fern and creeping fig wreath  shown at the beginning of this post lived in the greenhouse, so we were able to shower it with the hose when it needed watering, and the ivy and creeping fig was periodically pinned to the wreath with florist wire so it could root into the moss.


So, as you can see, it just takes time, the proper plants and the right technique to make a living wreath – try one for yourself!